Loading ...
Loading ...
Loading ...
14 15
D ) Check igniters.
· Operation of the electric igniters should be tested after the cooktop and
supply line have been carefully checked for leaks and the cooktop has been
connected to the electrical power.
· Push and turn a burner valve to the LITE position. All spark igniters will make
a series of sparks (ticking sounds), but only the burner turned to LITE will light.
—The burner should light when gas is available to the burner.
—Once the burner lights, it should be turned to another position.
· Test each valve separately until all burners have been checked.
E ) Burner ignition. Cooktop Spark Ignition—When you turn the cooktop knob
to LITE, the spark igniter makes a series of electric sparks (ticking sounds)
which light the burner. During a power failure, the burners will not light au-
tomatically. In an emergency, a cooktop burner may be lit with a match by
following the steps below.
·Light a match and hold the flame near the burner you want to light. Wooden
matches work best.
·Push in and turn the control knob slowly. Be sure you are turning the correct
knob for the burner you are lighting.
NOTE: If the burner does not light within five seconds, turn the knob off and
wait one minute before trying again.
F. Turn on each burner. On LP models, flames should be blue in color but may
have yellow tips.
Natural gas models should have soft, blue flames. The burner flames should
not flutter or blow away from the burner. The flame should be no less than
1/4” on the lowest setting and no greater than 1-1/2” on highest setting.
1-1/2” on highest setting.
Burners should be checked frequently.
WARNING
If you attempt to measure the flame,
please use caution. Burns could result.
OPERATION CHECKLIST
1. Make sure all controls are left in the OFF position.
2. The serial plate for your cooktop is located on the bottom of the burner
box. In addition to the model and serial numbers, it tells you the ratings
of the burners and the type of fuel and pressure the cooktop was adjust-
ed for when it left the factory.
3. When ordering parts, always include the serial number, model number
and a code letter to ensure proper replacement parts.
4. Check again to be sure all installation procedures have been completed.
ADJUST BURNER FLAMES
A. Turn all burners on highest setting and check the flames. They should be
blue in color and may have some yellow tipping at the ends of the flame
when using LP gas. Foreign particles in the gas line may cause an orange
flame at first, but this will soon disappear.
B. Turn the cooktop burner knob to “LO” while observing the flame. Adjust the
setting of the upper row of flames using the valve bypass screw as follows:
Adjustments must be made with two other burners in operation on a medium
setting. This prevents the upper row of flames from being set too low, result-
ing in the flame being extinguished when other burners are turned on.
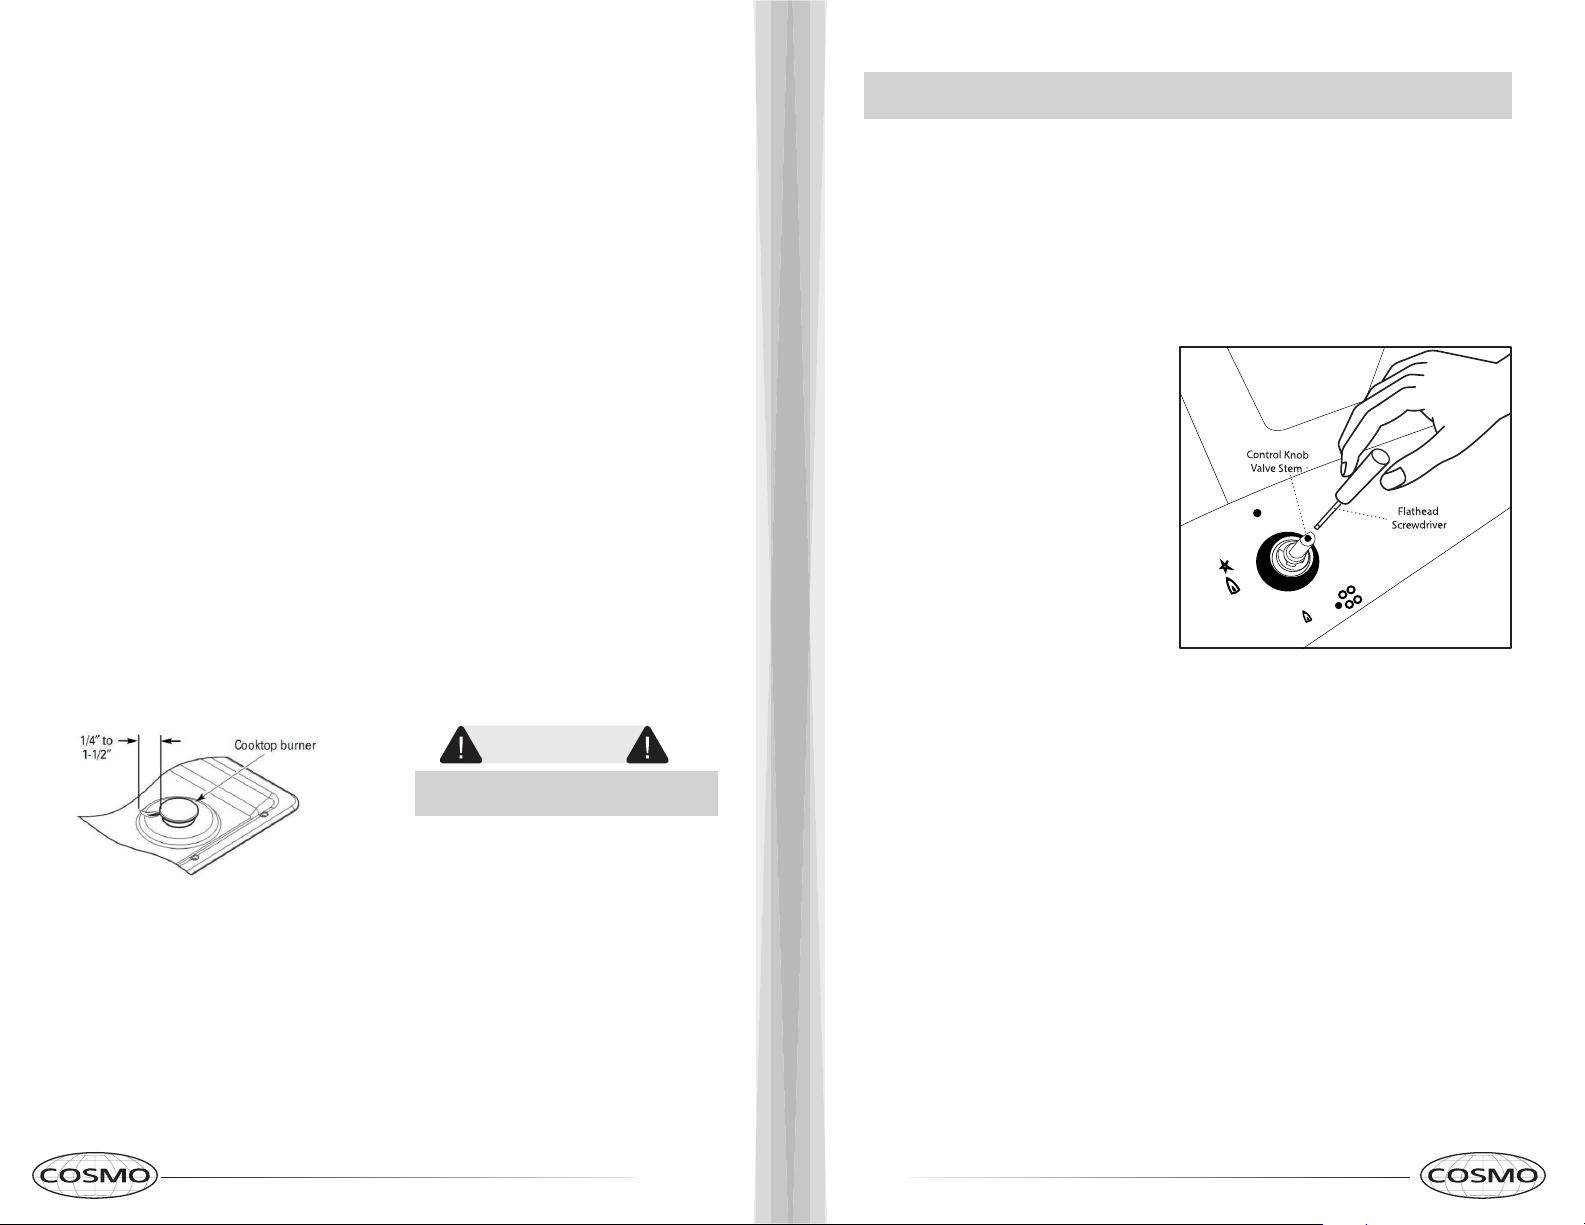
C. To adjust the flame, remove the
knobs. Insert a screwdriver through
the access hole in valve shaft as
shown.
·If the flames were too small or flut-
tered, open the valve more than the
original setting.
·If the flames blew away from the
burner, close the valve more than the
original setting.
D. Make the adjustment by slowly
turning the screw until flame ap-
pearance is correct.
E. Testing Flame Stability:
Test 1— Turn the knob from “HI” to
“LO” quickly. If the upper row of flames goes out at this setting, increase the
flame size and test again.
Test 2— With the burner on “LO”, open and close the cabinet door under the
cooktop. If the flame is extinguished by the air currents created by the door
movement, increase the flame height and test again.
F. Flame Recheck:
After the adjustment is made, turn all burners off. Ignite each burner individ-
ually. Observe the flame at the “HI” position. Rotate the knob to the lowest
setting and be sure that the flame size decreases as the knob is rotated coun-
terclockwise.
Once the conversion is complete and checked ok, fill out the conversion stick-
er and include your name, organization and date conversion was made. Ap-
ply the sticker near the cooktop gas inlet opening to alert others in the future
that this appliance has been converted. If converting back to the original
gas, please remove the sticker so others know the appliance is set to use its
original gas.
Loading ...
Loading ...
Loading ...