Loading ...
Loading ...
Loading ...
12
Care and Cleaning
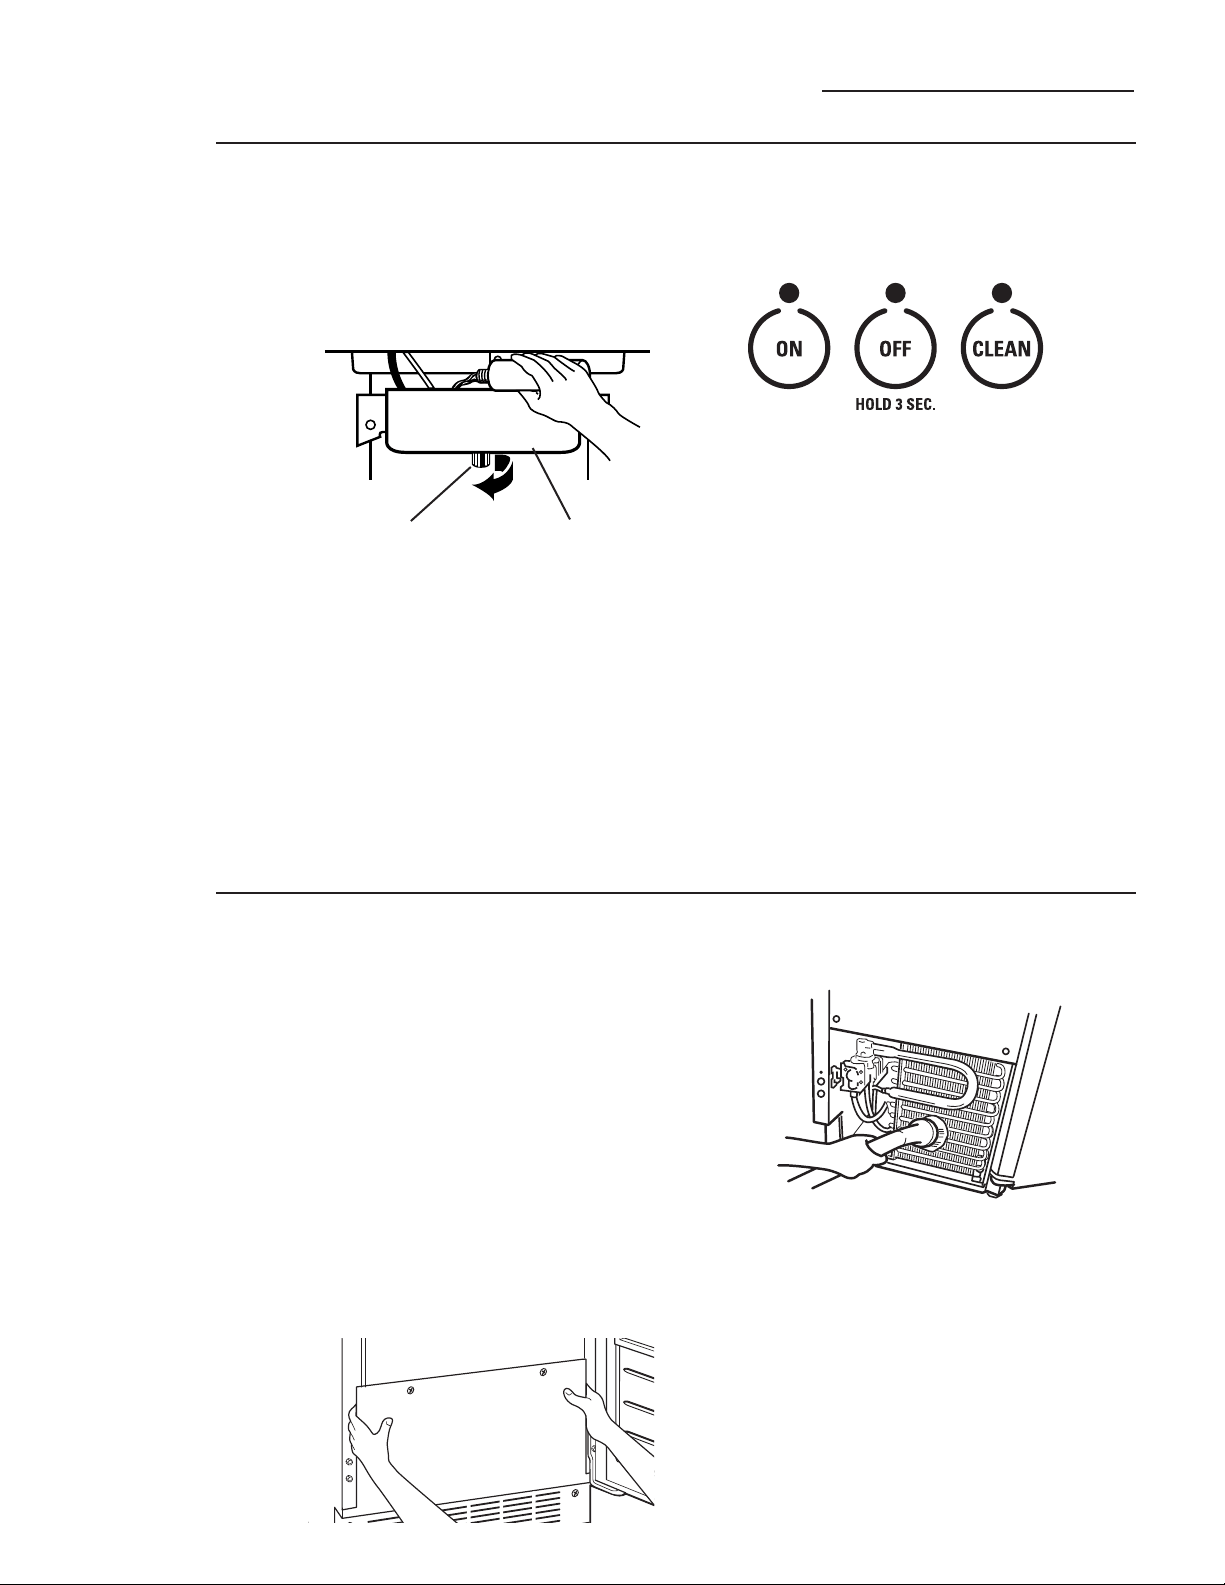
Icemaker
Condenser
For best performance, brush or vacuum lint and
dirt from the condenser at least once a year.
A dirty or clogged condenser:
• Use more energy..
• Prevents proper airflow.
• Reduces ice making capacity.
• Causes higher than recommended operating
temperatures which may lead to component
failure.
1. Unplug the icemaker or disconnect power.
2. Remove the 2 screws in the lower access
panel and the 2 screws from the base grille
area of the front panel support. Pull forward
to remove the lower access panel.
3. Pull the bottom forward and then pull down
to remove the lower access panel.
4. Remove dirt and lint from the condenser fins
and the unit compartment with a brush
attachment attached to a vacuum cleaner.
5. Replace the lower access panel using
the 4 screws.
6. Plug in the icemaker or reconnect power.
Icemaker
system
1. Press and hold the OFF button for 3 seconds.
2. Wait 5 to 10 minutes for the ice to fall into the
storage bin. Remove all ice from the storage
bin.
3. Unscrew the drain cap from the bottom of the
water reservoir located inside the storage bin as
shown. Allow the water to drain completely.
4. Replace the drain cap.
5. For best results, use the entire 16 oz. bottle
of Nickel Safe Ice Machine Cleaner. Follow
all safety precautions on the bottle. Pour one
bottle of solution into the water reservoir. Fill
the bottle twice with tap water and pour it into
the water reservoir.
Nickel Safe Ice Machine Cleaner by Nu Calgon
is available at appliance repair shops, or through
GE Parts and Accessories. Order part number
WX08X42870. In the U.S.A., call 800.626.2002 or visit
monogram.com. In Canada, call 1.800.561.3344.
6. Press and hold the CLEAN button for 3
seconds. The CLEAN light will begin to blink,
indicating that the cleaning cycle is in
process. The cleaning time is approximately
70 minutes.
7. When the indicator light becomes solid and
remains lit, the cleaning cycle is complete.
During the cleaning cycle, the system will
both clean and rinse itself.
8. After the cleaning cycle is complete, remove
the drain cap from the water reservoir to see
if any cleaning solution, green in color, is left
in the water reservoir. If cleaning solution
drains from the water reservoir, you should
run the clean cycle again adding only tap
water to the reservoir. Be sure to replace
the drain cap before running the cycle again.
If the cap is not securely tightened, water can
leak, causing thin ice or no ice.
NOTE: Severe scale buildup may require repeated
cleaning with a fresh quantity of cleaning solution.
9. Press the ON button for 3 seconds to resume
ice production.
Water reservoir
Drain cap
Loading ...
Loading ...
Loading ...