Loading ...
Loading ...
Loading ...
4
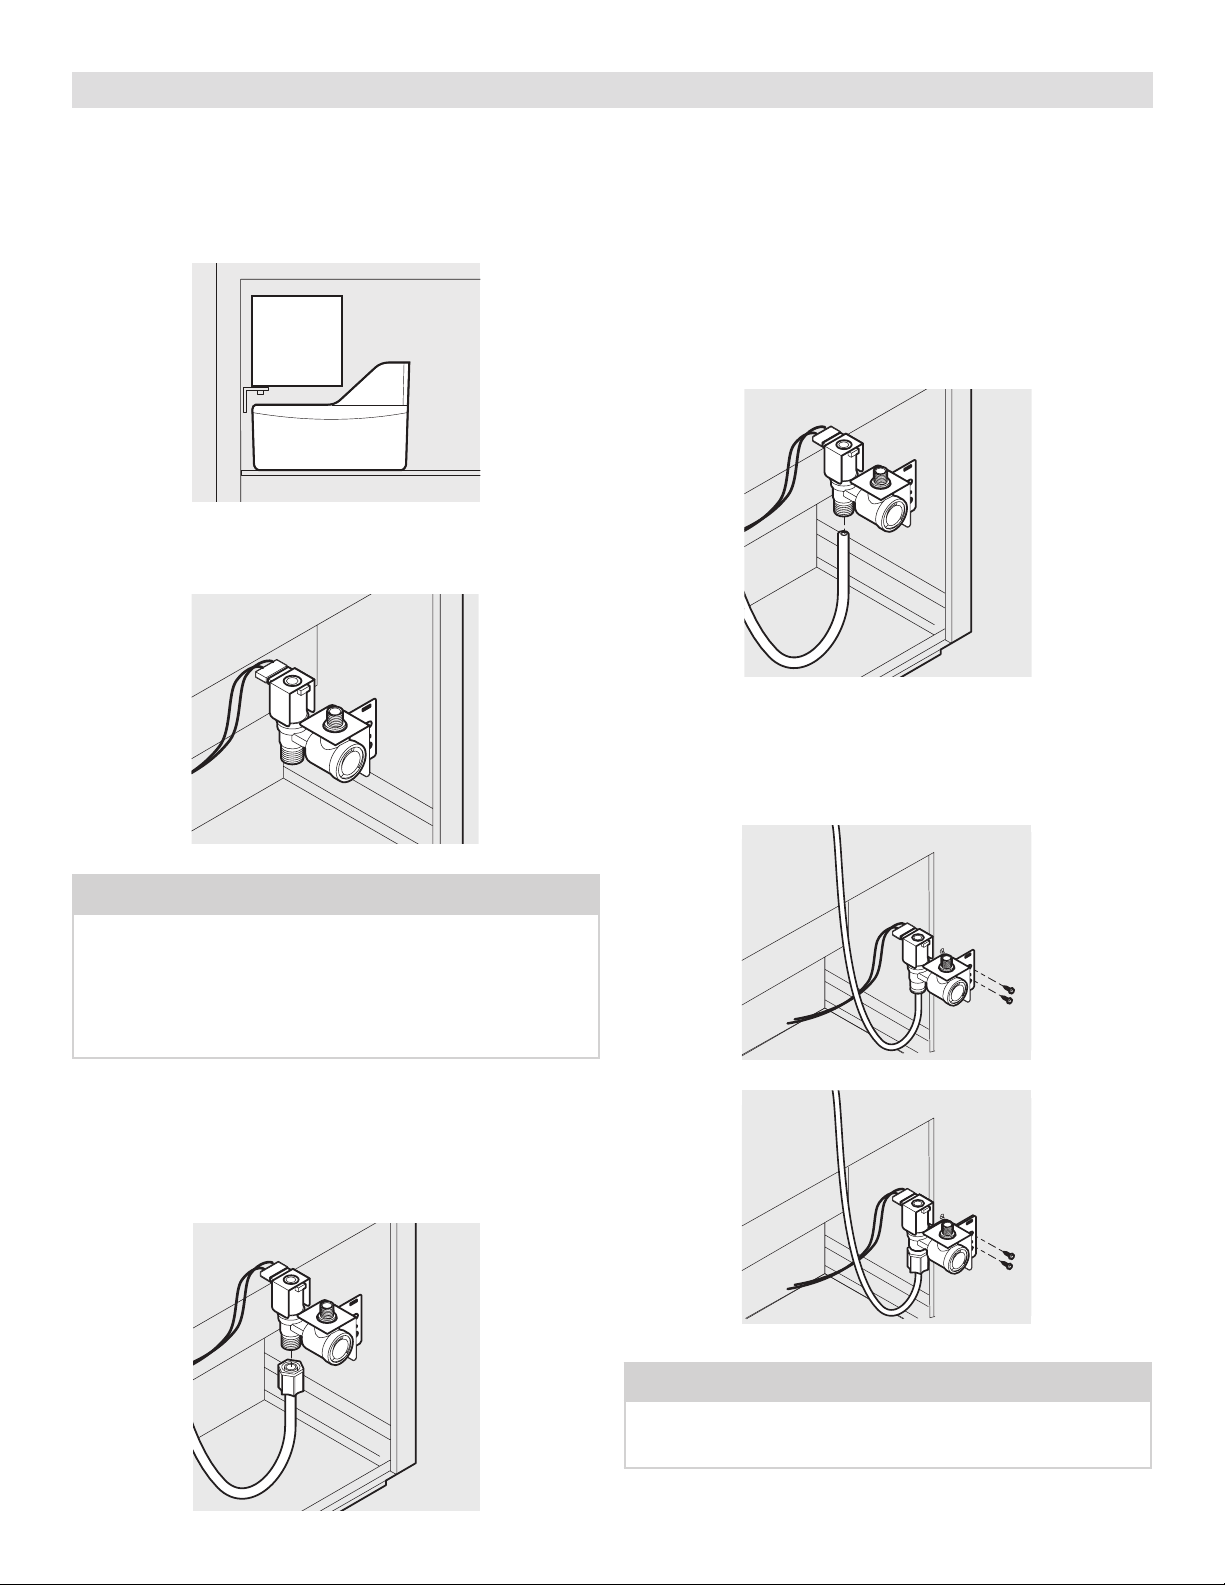
16. Connect the wiring harness to the water valve. Make sure the
connection is tight.
Figure 11
Figure 12
14. Adjust the leveling bracket on the Ice Maker. If the gap be-
tween the freezer wall and the Ice Maker is the same at top
and bottom, then Ice Maker is level. Tighten the leveling brack-
et screw when it’s level.
15. Reinstall the freezer shelf in the lower position. Set the ice
container on the shelf.
Ice Maker Installation Instructions
NOTE
If your refrigerator has an interior condenser, connect the plastic
water supply tubing and the wiring harness to the water valve
prior to mounting the valve to the rear panel because of space
constraints. Once the valve is mounted, it’s very hard to get your
hands in there to make the necessary connections. Additionally,
you may have to bend the metal tubing slightly out of the way
for the water valve to fit in the space. Do Not kink the tubing.
17. You can use 2 types of water valves with this kit. Follow the
instructions which apply to the type of valve supplied with
your kit. See Figures 13A and 13B.
For valves with a threaded outlet (Figure 13A), push the
bullet-shaped end of the green tube into the valve and tighten
the plastic nut (finger tight). Then tighten it an additional ½
turn with a wrench. DO NOT overtighten.
For valves with a push-in connection with no threads (Figure
13B), check the green hose to see if it has a small black mark
near the end without the formed tip and plastic nut. If there
is not a mark, use measuring tape and a marker to place a
mark 11/16" from the end. The valve seals against the outside
surface of the tube with an o-ring, so be sure the end of the
tube is clean and not scratched. Grasp the tube just above
the mark and push it firmly into the valve until it bottoms out.
When pushed in to the proper depth, the mark will line up
with the end of the valve fitting. If the mark is not even with
the end of the fitting, the tube is not pushed in all the way. To
remove the tube, push it inward on the collar at the end of the
fitting while pulling on the tube.
Figure 13A
Figure 13B
18. Locate the factory punched holes at the bottom right corner
of the rear panel. Align the water valve bracket with factory
drilled holes. You may have to bend the metal tubing slightly
out of the way. Use a power drill with a Phillips® head bit to
drive 2 self-tapping screws through bracket and into cabinet.
Figure 14
NOTE
Clean the back of the cabinet with a commercial household
cleaner, ammonia or alcohol before applying the plastic clamps
to the water tubing.
Loading ...
Loading ...
Loading ...