Loading ...
Loading ...
3
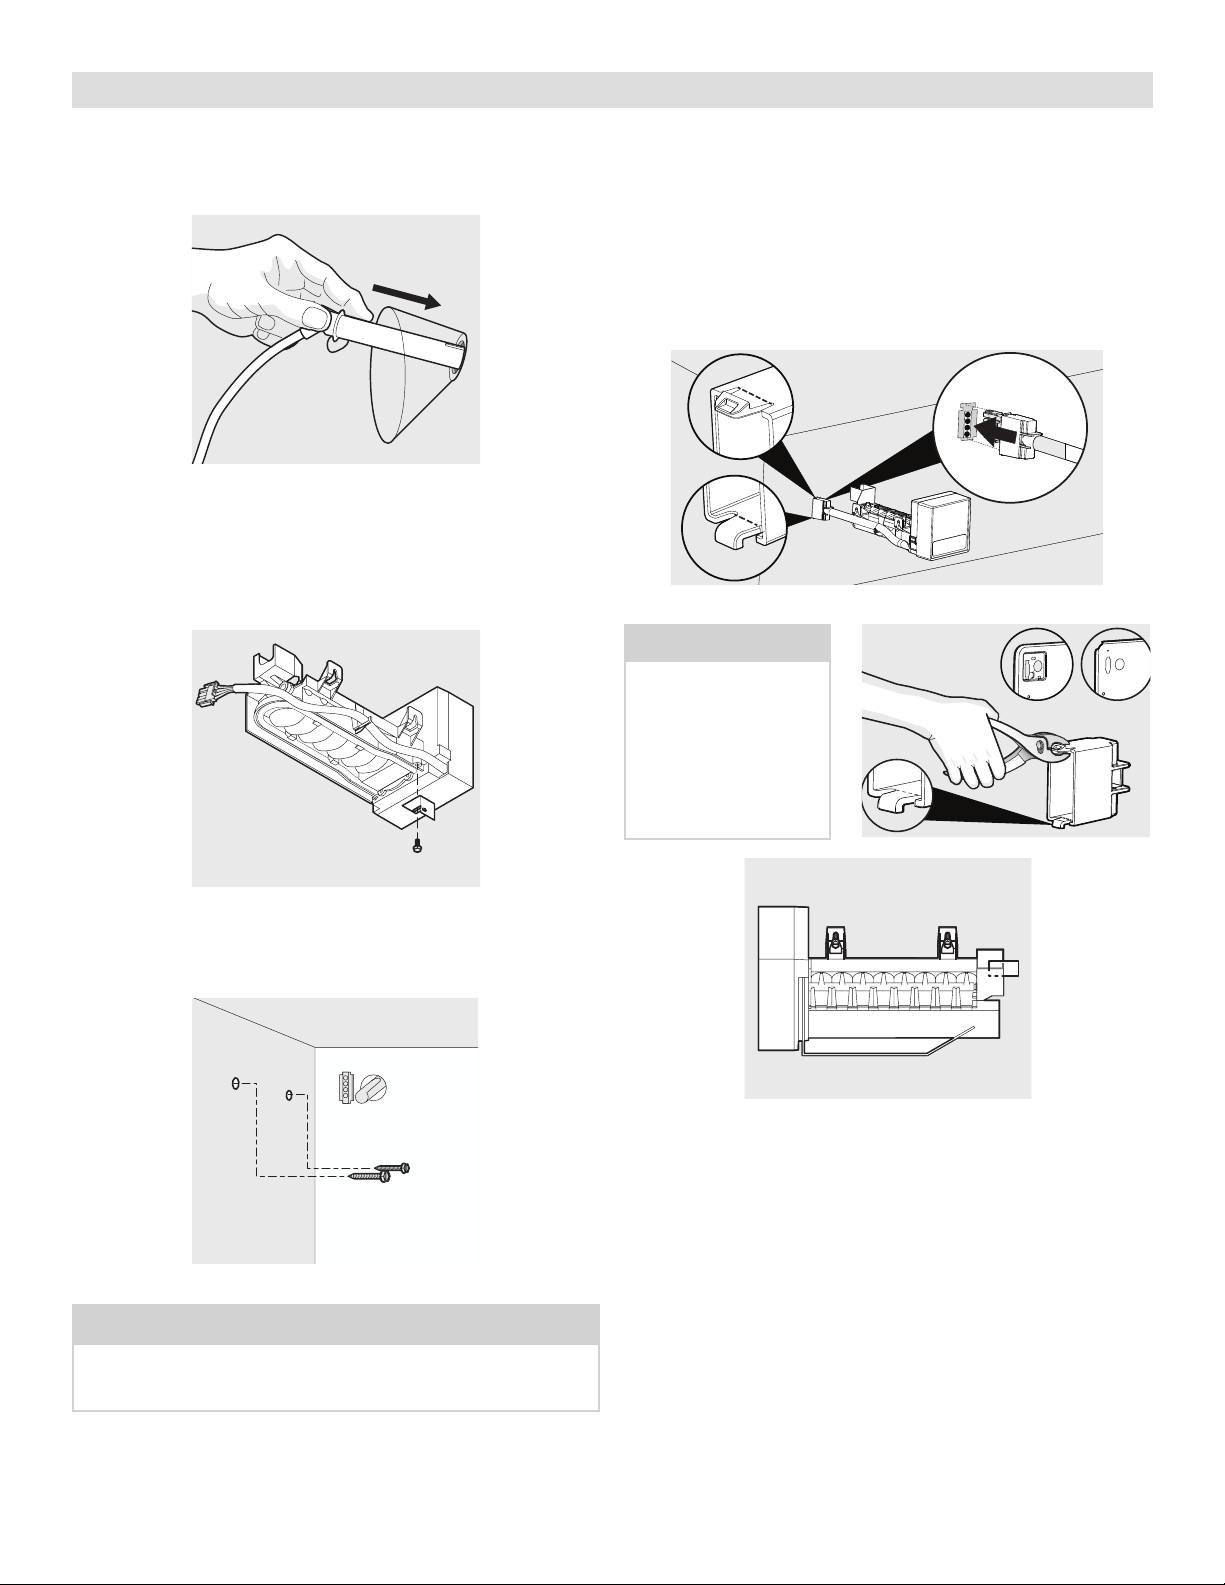
10. Push the water inlet tube through the small hole where the
Installation label was (Figure 6). Rotate while inserting the
tube until the flat surface of the inlet tube is tight against back
of the refrigerator.
11. Install the adjustable leveling bracket on the bottom of
the Ice Maker with a screw (Figure 7). Remove the leveling
bracket screw from the ice maker body and insert the bracket
between the ice maker body and the plastic heater cover. Re-
install the leveling bracket screw but DO NOT tighten bracket
at this point. It will be tightened later in this procedure.
12. Insert 2 long Ice Maker mounting screws into the freezer wall
where the plugs were removed in Step 4. Turn each screw
clockwise 5 turns (Figure 8).
Figure 6
Figure 7
Figure 8
Ice Maker Installation Instructions
NOTE
Use both hands to hook up and secure the Ice Maker to the
freezer wall. DO NOT let the Ice Maker dangle free after you plug
the wiring harness into the connector on the back freezer wall.
Figure 10
13. Connect the wiring harness into the connector mounted on the
back freezer panel, just to the left of where the water inlet tube
comes through. The harness connector is keyed so it will only
fit one way. Next, slide the Ice Maker connector cover over the
connector (see Figure 9--snap on top, hook on bottom). The
Ice maker connector cover can then be snapped into place into
the back panel or slid up tight to the back panel depending on
which version of back panel you have (see note below). Then,
mount the Ice Maker to the 2 mounting screws you inserted
earlier from Step 12. (See figure 10.) Tighten the screws. Make
sure the water inlet tube is sitting inside the fill cup.
ker (1) with scr ew (6). DO NOT tighten
It will be tightened later in this procedur e.
Figure 7
Snap
Figure 9
NOTE
If your back cover looks
like (A) proceed to
installing the ice maker.
If your back cover looks
like (B), break o the
snap and hook on con-
nector cover using pli-
ers, and then proceed to
install the ice maker.
A
B
Loading ...
Loading ...
Loading ...