Loading ...
Loading ...
Loading ...
11
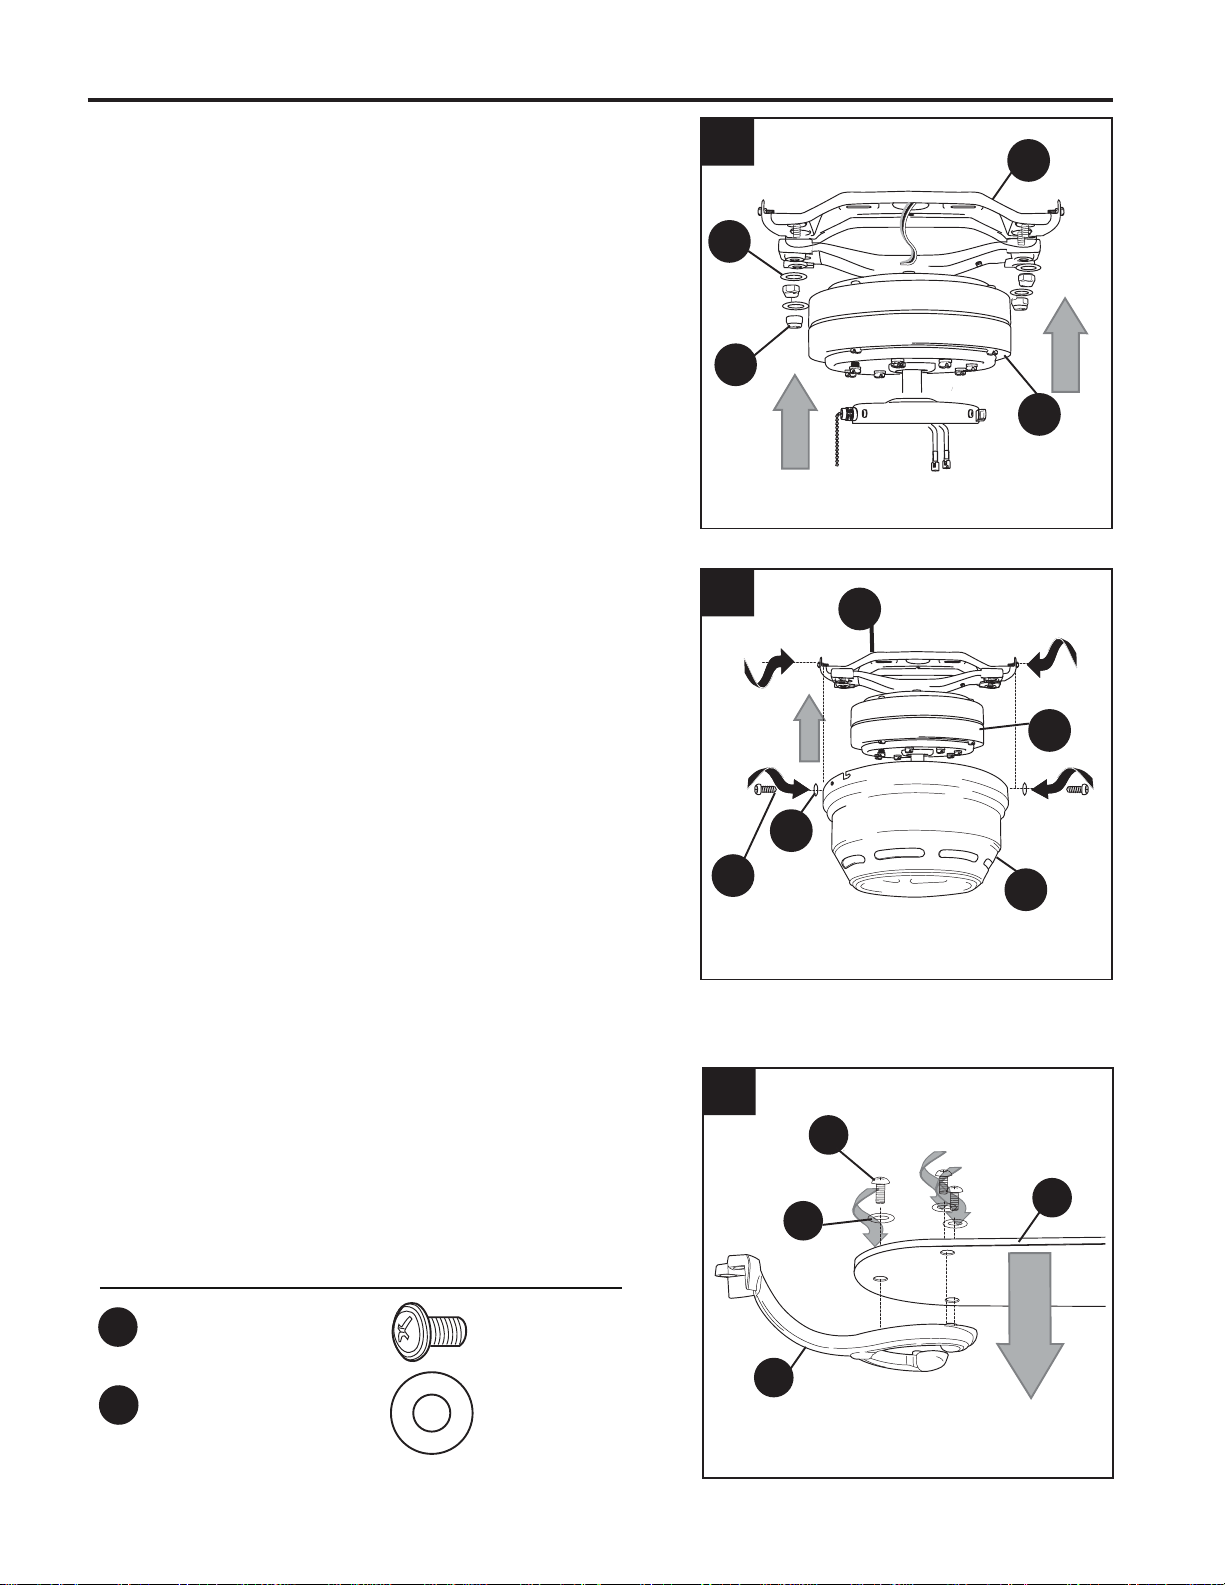
FINAL INSTALLATION
1.
Remove motor assembly (D) from "J" hook. Align
holes in motor assembly (D) with holes in
mounting bracket (B). Secure motor assembly (D)
with mounting bracket flat washers (P) and
mounting bracket nuts (K) that were previously
removed (Step 3, page 7). (Fig. 1)
D
K
P
B
1
Temporarily lift motor housing (A) to mounting
bracket (B) to determine which two motor housing
mounting screws (O) in sides of mounting bracket
(B) align with the slotted holes in the top edge of
the motor housing (A) and partially loosen these
two motor housing mounting screws (O). Remove
the other two motor housing mounting screws (O)
and motor housing lock washers (Q). Slide motor
housing (A) over motor assembly (D), aligning
slotted holes in motor housing (A) with loosened
motor housing mounting screws (O) in mounting
bracket (B). Twist motor housing (A) to lock.
Re-insert the other two motor housing mounting
screws (O), along with motor housing lock
washers (Q), that were previously removed.
Tighten all motor housing mounting screws (O)
securely. (Fig. 2)
O
A
B
D
2.
Q
2
Partially insert three blade screws (AA), along with
three fiber blade washers (BB), to attach one
blade arm (G) to a blade (H). Then, tighten each
blade screw (AA), starting with the one in the
middle (Fig. 3) Repeat with remaining blades (H).
G
AA
BB
H
BB
AA
Blade Screw x 15
Fiber Blade Washer x 15
Hardware Used
3
3.
Loading ...
Loading ...
Loading ...