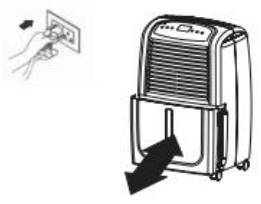
Ensure that the unit is connected to the power socket
Make sure the water tank is placed in proper position. (When plugged in for the first time the full tank lamp may light up. If so, just pull out the water tank then push it back to the proper position.)
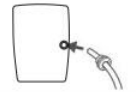
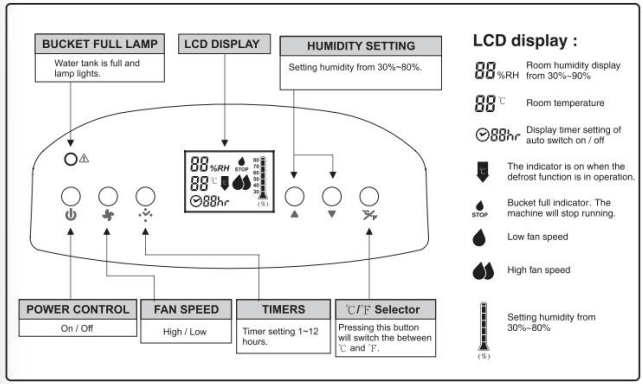
When Bucket Full Lamp Is On
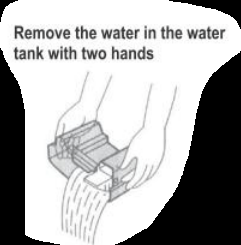
When the water tank is full, the indication lamp will light up, and the dehumidifier will stop operating. Remove the water in the tank, then place the water tank back to it's proper position and the machine will start operating again.
DEFROST
When operating in low temperatures the surface of the dehumidifier’s coil may accumulate ice and effect the efficiency of the dehumidifier. When this happens the machine will go into periodic defrost mode automatically. This is quite normal. Defrost icon will come on, the compressor will cease operating and the fan will continue to operate until the ice has thawed. As soon as the ice has melted, the compressor will restart and continue the dehumidifying process. Defrost time may vary depending on room temperature and humidity.
The dehumidifier will operate in temperatures down to 5°C, however it is not recommended to use the dehumidifier in temperatures below 5°C. If the dehumidifier freezes up, turn the machine off for a few hours and then restart.
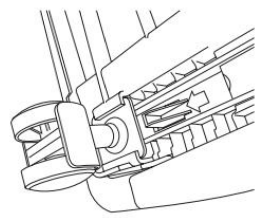
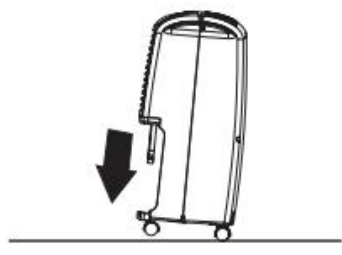
CASTOR WHEEL INSTALLATION
Castor wheel installation is recommended to avoid damage to floors .
Remove the castors from the bucket of the dehumidifier .
Position the dehumidifier on its side .
Locate the arrow on the bottom of the dehumidifier and insert the castor according to the arrow direction .
Slide the castor in as far as it will go. The castor will snap into place.
Repeat steps 1 to 4 for the other 3 castors.
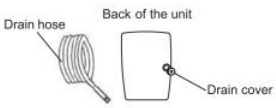
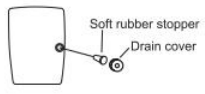
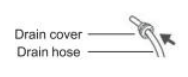
CONTINUOUS DRAINAGE
The function of continuous drainage can be started in following steps when there is a good conditions for drainage near by the dehumidifier.
1. To save having to periodically empty the water tank, this unit can be configured for continuous drainage. You can use the supplied drain hose to connect to the continuous drainage connector.
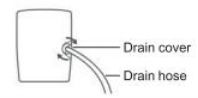
2. Unscrew and remove the drain cover at the rear of the unit.
3. Remove the soft rubber stopper. Put it into the water tank for safe keeping.
4. Insert the drain hose through the hole of the drain cover.
5. Connect the drain hose to the drain port.
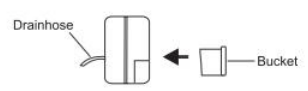
6. Tighten the drain cover in clockwise direction onto the rear of the unit.
7. Place the water bucket back into its original position.
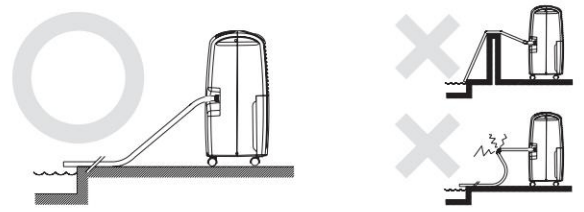
INSTALLING DRAINAGE PVC HOSE
When using the function of continuous drainage, the PVC hose must be placed horizontally below the level of the drainage hole. Avoid uneven ground and kinking the hose.
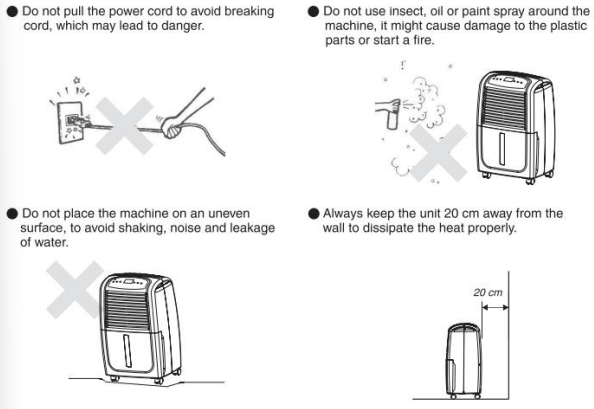
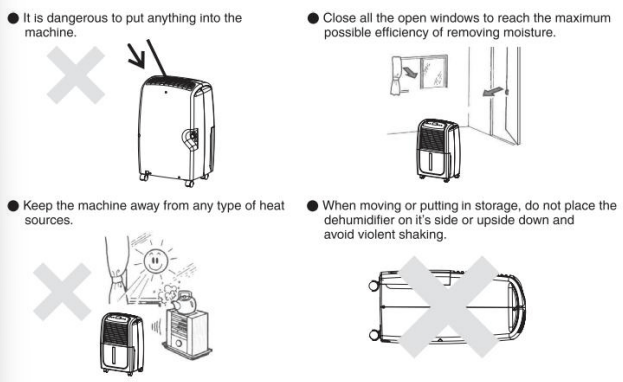
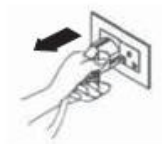
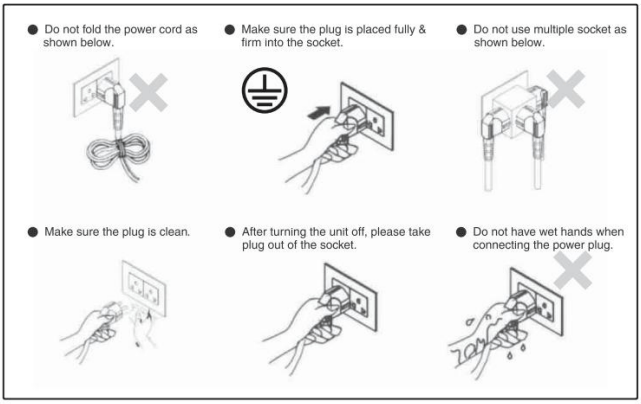
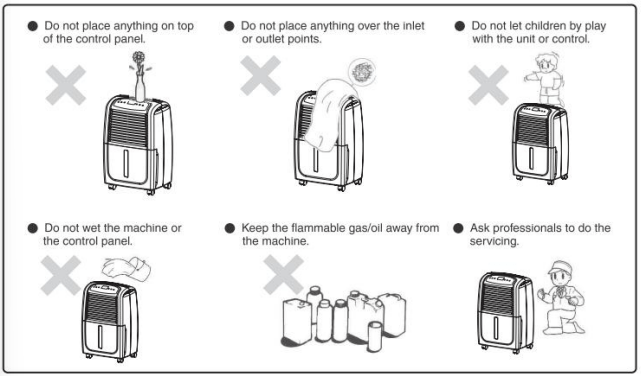
CAUTIONS
MAINTENANCE
For safety reasons, make sure the dehumidifier is unplugged before servicing or cleaning the machine.
1. Cleaning the shell
A. Wipe the shell with a clean, soft cloth.
B. If the dehumidifier is very dirty, use mild detergent then wipe off the detergent with semi dried cloth.
C. Do not wash the machine with a hose or immerse it in water.
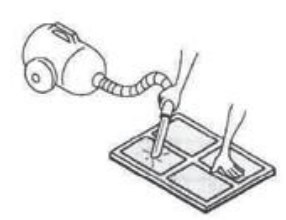
2. Cleaning the air filter
The air filter filtrates the dust and impurities in the air. For optimum dehumidifying efficiency clean the air filter every two weeks or as required.
Cleaning Steps :
A. Pull the air filter out gently.
B. Clean the filter with a vacuum cleaner or wash it with clean water and dry with a dry cloth.
C. Put the clean air filter back in place and continue to operate the dehumidifier.
 will come on, the compressor will cease operating and the fan will continue to operate until the ice has thawed. As soon as the ice has melted, the compressor will restart and continue the dehumidifying process. Defrost time may vary depending on room temperature and humidity.