Documents: Go to download!
- Owner's manual - (English, Spanish)
- USING YOUR OVEN
- CARE AND CLEANING
- TROUBLESHOOTING TIPS
Table of contents
USER MANUAL Convection / Microwave Oven
USING YOUR OVEN
Features
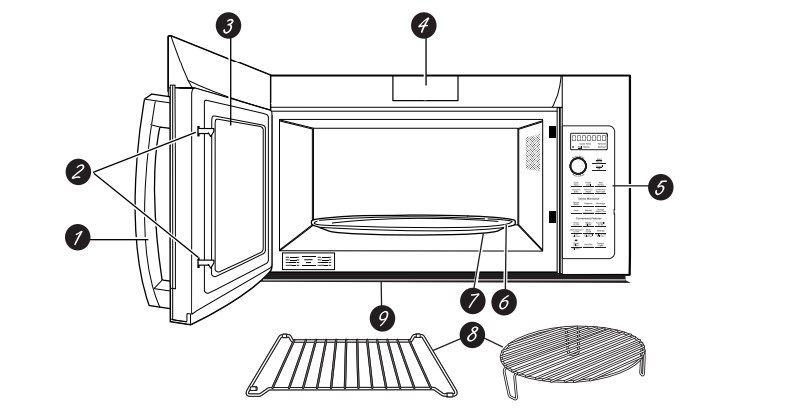
1. Door Handle.
2. Door Latches.
3. Window with Metal Shield.
- Screen allows cooking to be viewed while keeping microwaves confined in the oven.
4. Charcoal Filter Door.
- Push down two button to open the door. You can change charcoal filter easily.
5. Control Panel and Selector Dial.
6. Removable Turntable.
- Do not operate the oven in the microwave mode without the turntable and turntable support seated and in place.
7. Removable Turntable Support.
- Do not operate the oven in the microwave mode without the turntable and turntable support seated and in place.
8. Shelves.
- Use with Convection Bake, Convection Roast or Combination Fast Bake. (Do not use when microwave cooking.)
- For best results, use one shelf in the lower position and leave at least a 1-inch gap between the cooking dish and the sides of the oven. For two-level Baking or Fast Baking use both shelves.
9 Deflector.
- Provides robustness from cooktop heat. Do not remove.
Time and Auto Microwave Features
Using the Dial
- You can make selections on the oven by turning the dial and pressing it to enter the selection.
- Pressing the dial can also be used in place of the Start/ Pause button for quicker programming of the oven
Cook Time
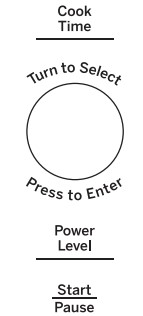
Cook Time I
Allows you to microwave for any time between 15 seconds and 99 minutes.
Power level 10 (High) is automatically set, but you may change it for more flexibility.
- Press the Cook Time button.
- Turn the dial to set the cook time and press the dial to enter.
- Change power level if you don’t want full power. (Press Power Level. Turn the dial to select. Press the dial to enter.)
- Press the dial or the Start/Pause button to start cooking.
You may open the door during Cook Time to check the food. Close the door and press the dial or Start/Pause to resume cooking.
NOTE: You may change the cook time at any time during cooking by turning the dial. You may also change the power level by pressing the Power Level button.
Cook Time II
Lets you change power levels automatically during cooking. Here’s how to do it:
- Press the Cook Time button.
- Turn the dial to set the first cook time and press the dial to enter.
- Change the power level if you don’t want full power. (Press Power Level. Turn the dial to select. Press the dial to enter.)
- Press the Cook Time button again.
- Turn the dial to set the second cook time and press the dial to enter.
- Change the power level if you don’t want full power. (Press Power Level. Turn the dial to select. Press the dial to enter.)
- Press the dial or the Start/Pause button to start cooking.
At the end of Cook Time I, Cook Time II counts down.
NOTE: You may change the cook time at any time during cooking by turning the dial. You may also change the power level by pressing the Power Level button.
Weight Defrost
Weight Defrost automatically sets the defrosting times and power levels to give even defrosting results for meats, poultry and fish weighing up to one pound.
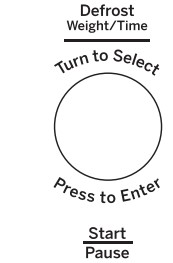
- Press the Defrost button once.
- Turn the dial to the food weight, using the Conversion Guide at right. For example, dial .5 for .5 pounds (8 oz.) Press the dial to enter.
- Press the Start/Pause button to start defrosting.
- Turn the food over if the oven signals TURN FOOD OVER.
Time Defrost
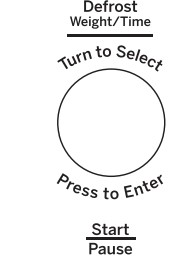
Use Time Defrost to defrost for a selected length of time.
- Press the Defrost button twice.
- Turn the dial to select the time you want. Press the dial to enter.
- Press the Start/Pause button to start defrosting.
- Turn the food over if the oven signals TURN FOOD OVER
Power Level
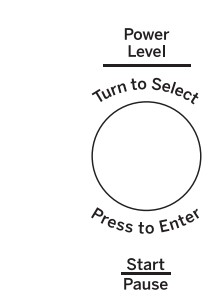
The power level may be entered or changed immediately after entering the time for Cook Time, Time Defrost or Combination Fast Cook. The power level may also be changed during time countdown.
- First, follow directions for Cook Time, Time Defrost or Combination Fast Cook.
- Press the Power Level button.
- Turn the dial clockwise to increase and counterclockwise to decrease the power level. Press the dial to enter.
- Press the Start/Pause button to start cooking.
Variable power levels add flexibility to microwave cooking. The power levels on the microwave oven can be compared to the surface units on a range. Each power level gives you microwave energy a certain percent of the time. Power Level 7 is microwave energy 70% of the time. Power Level 3 is energy 30% of the time. Most cooking will be done on High (Power Level 10) which gives you 100% power.
A lower setting will cook more evenly and need less stirring or rotating of the food. Some foods may have better flavor, texture or appearance if one of the lower settings is used. Use a lower power level when cooking foods that have a tendency to boil over, such as scalloped potatoes.
Sensor Microwave Features
Popcorn (Do not use the shelves when microwave cooking.)
To use the Popcorn feature:
- Follow package instructions, using Cook Time if the package is less than 1.5 ounces or larger than 3.5 ounces. Place the package of popcorn in the center of the turntable.
- Press the Popcorn button. The oven starts immediately.

Use only with prepackaged microwave popcorn weighing 1.5 to 3.5 ounces.
NOTE: Do not use this feature twice in succession on the same food portion—it may result in severely overcooked or burnt food.
Cook (Do not use the shelves when microwave cooking.)
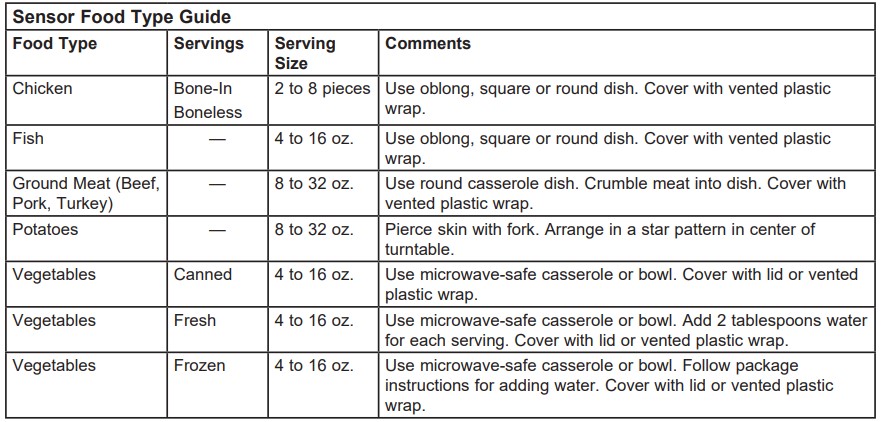
- Place covered food in the oven and close the door. Press the Cook button. ENTER FOOD TYPE appears in the display.
- Turn the dial to the desired food type. Press to enter.
NOTE: If the door was open while the control was being set, close the door and press the Start/Pause button to begin cooking.
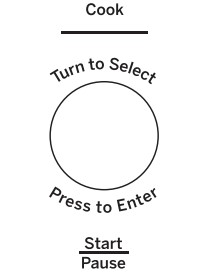
NOTE: Do not use this feature twice in succession on the same food portion—it may result in severely overcooked or burnt food.
If ground meat was selected, the oven may signal you to drain and stir the meat. Open the door, drain the meat and close the door. Press the Start/Pause button if necessary to resume cooking.
Baking and Roasting Features
- Baking or roasting uses a heating element to raise the temperature of the air inside the oven. Any oven temperature from 225°F to 425°F may be set. A fan gently circulates this heated air throughout the oven, over and around the food, producing golden brown exteriors and rich, moist interiors. This circulation of heated air is called convection.
- Because the heated air is kept constantly moving, not permitting a layer of cooler air to develop around the food, some foods cook faster than in regular oven cooking.

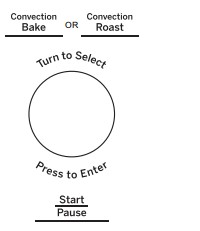
Convection Bake or Convection Roast with Preheat
- Press the Convection Bake or Convection Roast button.
- Turn the dial to set the oven temperature and press dial to enter. Do not enter bake time now. (The cook time will be entered later, after the oven is preheated.) See the Convection Bake Offset section below.
- Press the dial or the Start/Pause button to start preheating.
- When the oven is preheated, it will signal. If you do not open the door within 1 hour, the oven will turn off automatically.
- Open the oven door and, using caution, place the food in the oven.
- Close the oven door. Turn the dial to set the cook time and press the dial or Start/Pause to start cooking.
- When cooking is complete, the oven will signal and turn off.
NOTE: You may change the cook time at any time during cooking by turning the dial.
You may change the oven temperature at any time during cooking by pressing the Power Level button. Turn the dial to set the oven temperature and press the dial to enter
To view the cook time and oven temperature during cooking, press the Bake button.
Convection Bake Offset
- When using Convection Bake, the Convection Bake Offset feature will automatically convert entered regular baking temperatures to convection baking temperatures.
- This feature is activated so that the display will show OFFSET ON and the actual converted (reduced) temperature. For example, if you enter a regular recipe temperature of 350°F and press the Start/Pause button, the display will show the converted temperature of 325°F.
- This feature can be turned off in the Settings menu. See the Convection Bake Offset Selection in the Other features section.
NOTE: If convection baking and the Convection Bake Offset feature is turned off, reduce the oven temperature 25°F from the recipe to prevent overbrowning on the top of baked goods.
Fast Cook Feature
Fast Cook offers the best features of microwave energy and convection cooking. Microwaves cook food fast and convection circulation of heated air browns foods beautifully. Any oven temperature from 225°F to 425°F may be set.

Fast Cook with Preheat
- Press the Combination Fast Cook button.
- Turn the dial to set the oven temperature and press dial to enter. Do not enter Fast Cook cook time now. (The cook time will be entered later, after the oven is preheated.) Press the dial or the Start/Pause button to start preheating.
- When the oven is preheated, it will signal. If you do not open the door within 1 hour, the oven will turn off automatically.
- Open the oven door and, using caution, place the food in the oven.
- Close the oven door. Turn the dial to set the cook time and press to enter. Press the dial or the Start/ Pause button to start cooking.
- When cooking is complete, the oven will signal and turn off.
NOTE: You may change the cook time at any time during cooking by turning the dial.
You may change the oven temperature and microwave power level at any time during cooking by pressing the Power Level button. Turn the dial to set the oven temperature and press the dial to enter. Then, turn the dial to set microwave power level 1 through 4 and press the dial to enter. The default power level is 4.
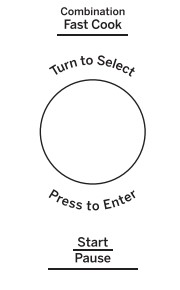
To view the cook time and oven temperature during cooking, press the Fast Cook button.
- Check the Cookware Tips section for correct cookware when using Fast Cook.
- Do not use metal cookware with Fast Cook.
- Reduce the recipe cook time by 25%.
- See the Best Method of Cooking section to determine the which foods are appropriate to cook using Fast Cook
CARE AND CLEANING
How to Clean the Inside
Walls, Floor, Inside Window, Metal and Plastic Parts on the Door
- Some spatters can be removed with a paper towel; other many require a damp clothes. Remove greasy spatters with a sudsy cloth, then rinse with a damp cloth. Do not use abrasive cleaners or sharp utensils on oven walls.
- Never use a commercial oven cleaner on any part of your microwave.

Removable Turntable and Turntable Support
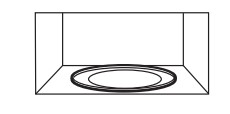
- To prevent breakage, do not place the turntable into water just after cooking. Wash it carefully in warm, sudsy water or in the dishwasher. The turntable and support can be broken if dropped. Remember, do not operate the oven in the microwave mode without the turntable and support seated and in place.
Shelves
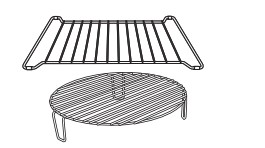
- Clean with mild soap and water or in the dishwasher.
- Do not clean in a self-cleaning oven.
How to Clean the Outside
We recommend against using cleaners with ammonia or alcohol, as they can damage the appearance of the microwave oven. If you choose to use a common household cleaner, first apply the cleaner directly to a clean cloth, then wipe the soiled area.
Case
- Clean the outside of the microwave with a sudsy cloth. Rinse and then dry. Wipe the window clean with a damp cloth.
Control Panel
- Wipe with a damp cloth. Dry thoroughly. Do not use cleaning sprays, large amounts of soap and water, abrasives or sharp objects on the panel—they can damage it. Some paper towels can also scratch the control panel.
Door Panel
- Before cleaning the front door panel, make sure you know what type of panel you have. Refer to the 11th digit of the model number. “S” is stainless steel, “L” is CleanSteel, "D" is for black slate or dark matte finish and “B”, “W” or “C” are plastic colors.
Stainless Steel (on some models)
- The stainless steel panel can be cleaned with Stainless Steel Magic or a similar product using a clean, soft cloth. Apply stainless cleaner carefully to avoid the surrounding plastic parts. Do not use appliance wax, polish, bleach or products containing chlorine on Stainless Steel finishes.
Plastic Color Panels
- Use a clean, soft, lightly dampened cloth, then dry thoroughly.
Door Seal
- It’s important to keep the area clean where the door seals against the microwave. Use only mild, nonabrasive detergents applied with a clean sponge or soft cloth. Rinse well.
Bottom
- Clean off the grease and dust on the bottom often. Use a solution of warm water and detergent.

TROUBLESHOOTING TIPS
Oven will not start
- A fuse in your home may be blown or the circuit breaker tripped.
- Replace fuse or reset circuit breaker.
- Power surge.
- Unplug the microwave oven, then plug it back in.
- Plug not fully inserted into wall outlet.
- Make sure the 3-prong plug on the oven is fully inserted into wall outlet.
- Door not securely closed.
- Open the door and close securely.
Control panel lighted, yet oven will not start
- Door not securely closed.
- Open the door and close securely.
- Start/Pause button not pressed after entering cooking selection.
- Press Start/Pause.
- Another selection entered already in oven and Cancel/Off button not pressed to cancel it.
- Press Cancel/Off
- Cooking time not entered after pressing Cook Time.
- Make sure you have entered cooking time after pressing Cook Time.
- Cancel/Off was pressed accidentally.
- Reset cooking program and press Start/ Pause.
- Food weight not entered after selecting Auto Defrost or Fast Defrost.
- Make sure you have entered food weight after selecting Auto Defrost or Fast Defrost.
- Food type not entered after pressing Auto Cook.
- Make sure you have entered a food type.
CONTROL LOCKED appears on display
- The control has been locked.
- Press and hold Mute On/Off for about 3 seconds to unlock the control.
OVEN TOO HOT FOR SENSOR COOKING-- -USING ALTERNATE METHOD appears on display
- One of the sensor cooking buttons was pressed when the temperature inside the oven was greater than 200°F.
- These features will not operate when the oven is hot. The oven will automatically change to cook by time (follow the directions in the display) or once the oven is cool enough, the sensor features will function normally.
Floor of the oven is warm even when the oven has not been used
- The cooktop light is located below the oven floor. When light is on, the heat it produces may make the oven floor get warm.
- This is normal.
You hear an unusual lowtone beep
- You have tried to change the power level when it is not allowed.
- Many of the oven’s features are preset and cannot be changed.
Oven emits a smoky odor and gray smoke after using the Bake feature
- Oils on the stainless steel cavity are burning off after using the Bake feature the first few times.
- This is normal.
Food browns on top much faster than on the bottom
- Rack has been placed in the “high” position.
- Always use the rack in its “low” position.
Oven temperature fluctuates during cooking
- The cooking element cycles on and off to maintain the oven temperature at the desired setting.
- This is normal.
Vent fan comes on automatically
- The vent fan automatically turns on to protect the microwave if it senses too much heat rising from the cooktop below.
- This is normal.
- During Bake, Roast or Fast Bake (after preheating), the vent fan will automatically come on to cool the oven components.
- This is normal.
SENSOR ERROR appears on the display
- When using a Sensor feature, the door was opened before steam could be detected.
- Do not open door until steam is sensed and time is shown counting down on the display.
- Steam was not detected in a maximum amount of time.
- Use Cook Time to heat for more time.
Things That Are Normal With Your Microwave Oven
- Moisture on the oven door and walls while cooking. Wipe the moisture off with a paper towel or soft cloth.
- Moisture between the oven door panels when cooking certain foods. Moisture should dissipate shortly after cooking is finished.
- Steam or vapor escaping from around the door.
- Light reflection around door or outer case.
- Dimming oven light and change in the blower sound at power levels other than high.
- The vent fan operating while the microwave is operating. The vent fan will not go off nor can it be turned off until the microwave is off.
- Dull thumping sound while oven is operating.
- Warm, convection bake, convection roast and combination fast cook have a maximum cooking time of 179 minutes (2 hours and 59 minutes). When the maximum cooking time is reached, the oven will automatically indicate that cooking is complete and turn off the cooking element.
- When using convection bake, convection roast or combination fast cook with a preheat, the oven door must be opened and the cooking time set after preheat or the oven will turn off the cooking element after 1 hour.
See other models: GSH25ISXJSS GTS18DBPWLCC PDW8500J00BB PFSF6PKXDWW CT9800SH3SS
