
Loading ...
Loading ...
Loading ...
LOADING THE BASKETS
• Use the appliance to wash dishwasher-safe
items only.
• Do not wash in the appliance items made of
wood, horn, aluminium, pewter and copper.
• Do not wash in the appliance items that can
absorb water (sponges, household cloths).
• Remove large food residues from dishes.
• Soak cookware with burnt-on food before
washing it in the appliance.
• Put hollow items (cups, glasses and pans) with
the opening facing downwards.
• Make sure that glasses do not touch each other.
• Put light items in the upper basket. Make sure
that the items do not move freely.
• Put cutlery and small items in the cutlery drawer.
• Move the upper basket upwards to
accommodate large items in the lower basket.
• Make sure that the spray arms can move freely
before you start a programme.
BEFORE STARTING A PROGRAMME
Before you start the selected programme, make
sure that:
• The filters are clean and correctly installed.
• The cap of the salt container is tight.
• The spray arms are not clogged.
• There is enough salt and rinse aid (unless you
use multi-tablets).
• The arrangement of the items in the baskets is
correct.
• The programme is suitable to the type of load
and the degree of soil.
• The correct quantity of detergent is used.
UNLOADING THE BASKETS
1. Let the tableware cool down before you
remove it from the appliance. Hot items can be
easily damaged.
2. First remove items from the lower basket, then
from the upper basket.
After the programme is completed,
water can still remain on the inside
surfaces of the appliance.
CARE AND CLEANING
WARNING! Before maintenance,
deactivate the appliance and
disconnect the mains plug from the
main socket.
Dirty filters and clogged spray arms
decrease the washing results. Make a
check regularly and, if necessary,
clean them.
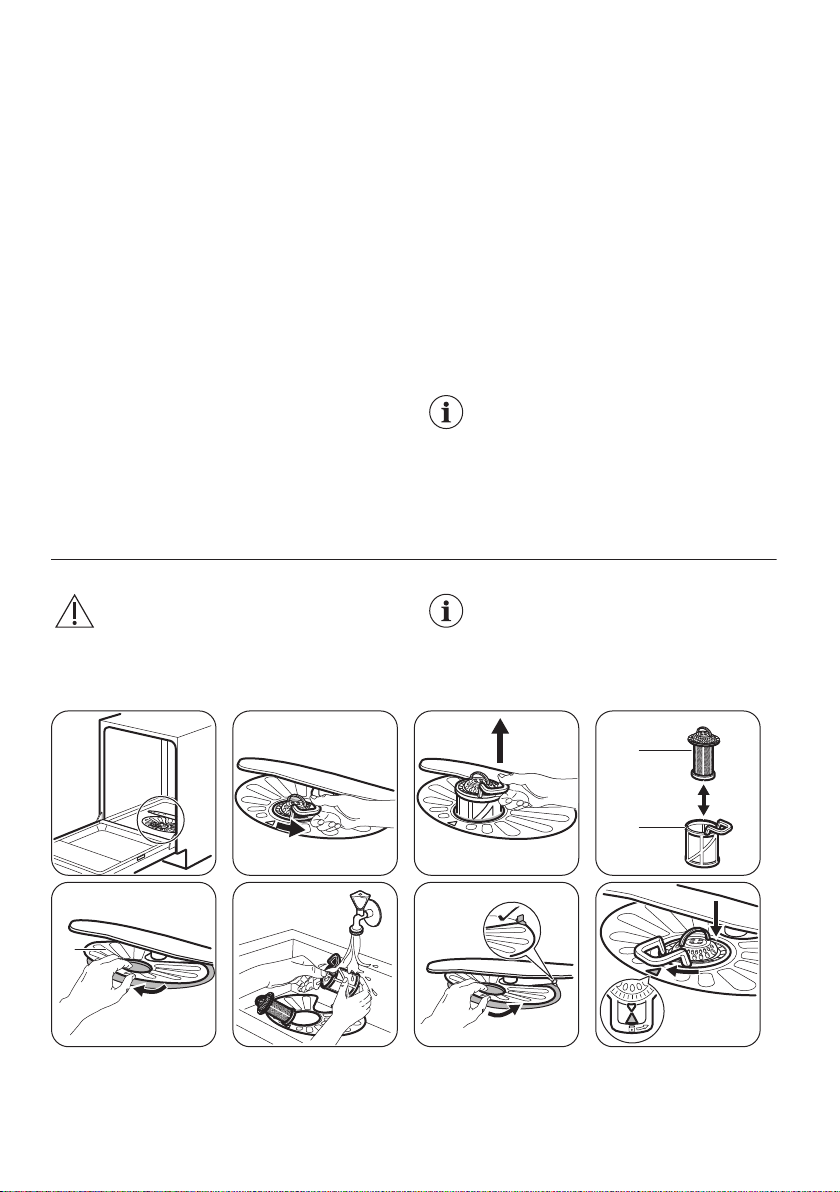
CLEANING THE FILTERS
B
A
C
• Make sure that there are no residues of food or soil in or around the edge of the sump.
• Put back in place the flat filter (C). Make sure that it is correctly positioned under the 2 guides.
12
Loading ...
Loading ...
Loading ...