Loading ...
Loading ...
Loading ...
NOTE:
Use the same number and wattage as
shown in the chart
Fog may temporarily form inside the lens of the
exterior lights in the rain or in a car wash. A
temperature difference between the inside and
the outside of the lens causes the fog. This is not
a malfunction. If large drops of water collect
inside the lens, contact a NISSAN dealer.
FOG LIGHTS (if so equipped)
Replacing the fog light bulb
CAUTION
● High pressure halogen gas is sealed
inside the halogen bulb. The bulb may
break if the glass envelope is scratched
or the bulb is dropped.
● When handling the bulb, do not touch
the glass envelope.
●
Use the same number and wattage as
originally installed as shown in the chart.
● Do not leave the bulb out of the fog light
for a long period of time as dust, mois-
ture and smoke may enter the fog light
body and affect the performance of the
fog light.
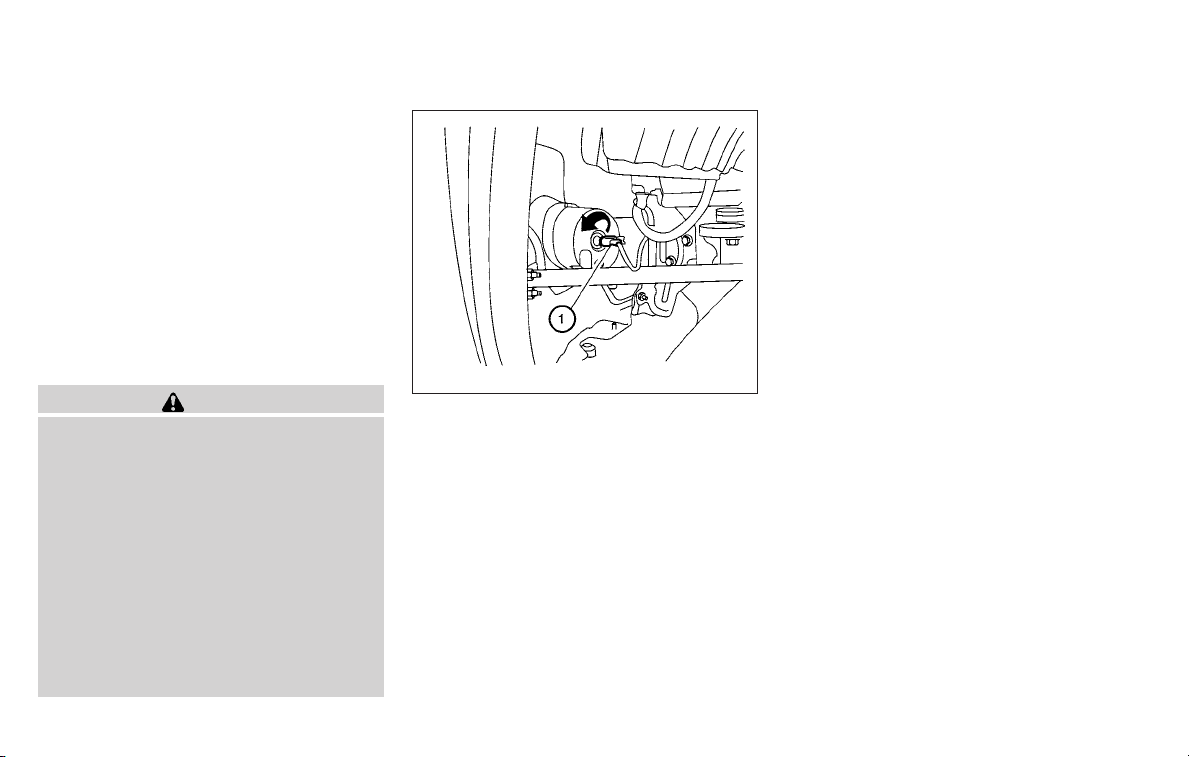
1. Disconnect the negative (-) battery cable.
2. The fog light is accessible in front of the
front tire and behind the bumper.
3. Disconnect the bulb connector
䊊
1
.
4. Rotate the bulb counterclockwise and re-
move.
5. Remove by pulling it straight out of the fog
light assembly. Do not shake or rotate the
bulb when removing it. Do not touch the
glass envelope.
6. Install in the reverse order of removal.
NOTE:
To adjust the fog light vertical aim: Access
the aiming screw from underneath the front
bumper. The aiming screw is located on the
bottom of the fog light housing. Turn the
screw clockwise to raise the pattern. Turn
the screw counterclockwise to lower the
pattern.
LDI0382
Maintenance and do-it-yourself 8-29
墌 REVIEW COPY—
2010 Armada (wzw)
Owners Manual (owners)—USA_English (nna)
02/18/09—debbie
墍
Loading ...
Loading ...
Loading ...