Loading ...
Loading ...
Loading ...
47
3
c
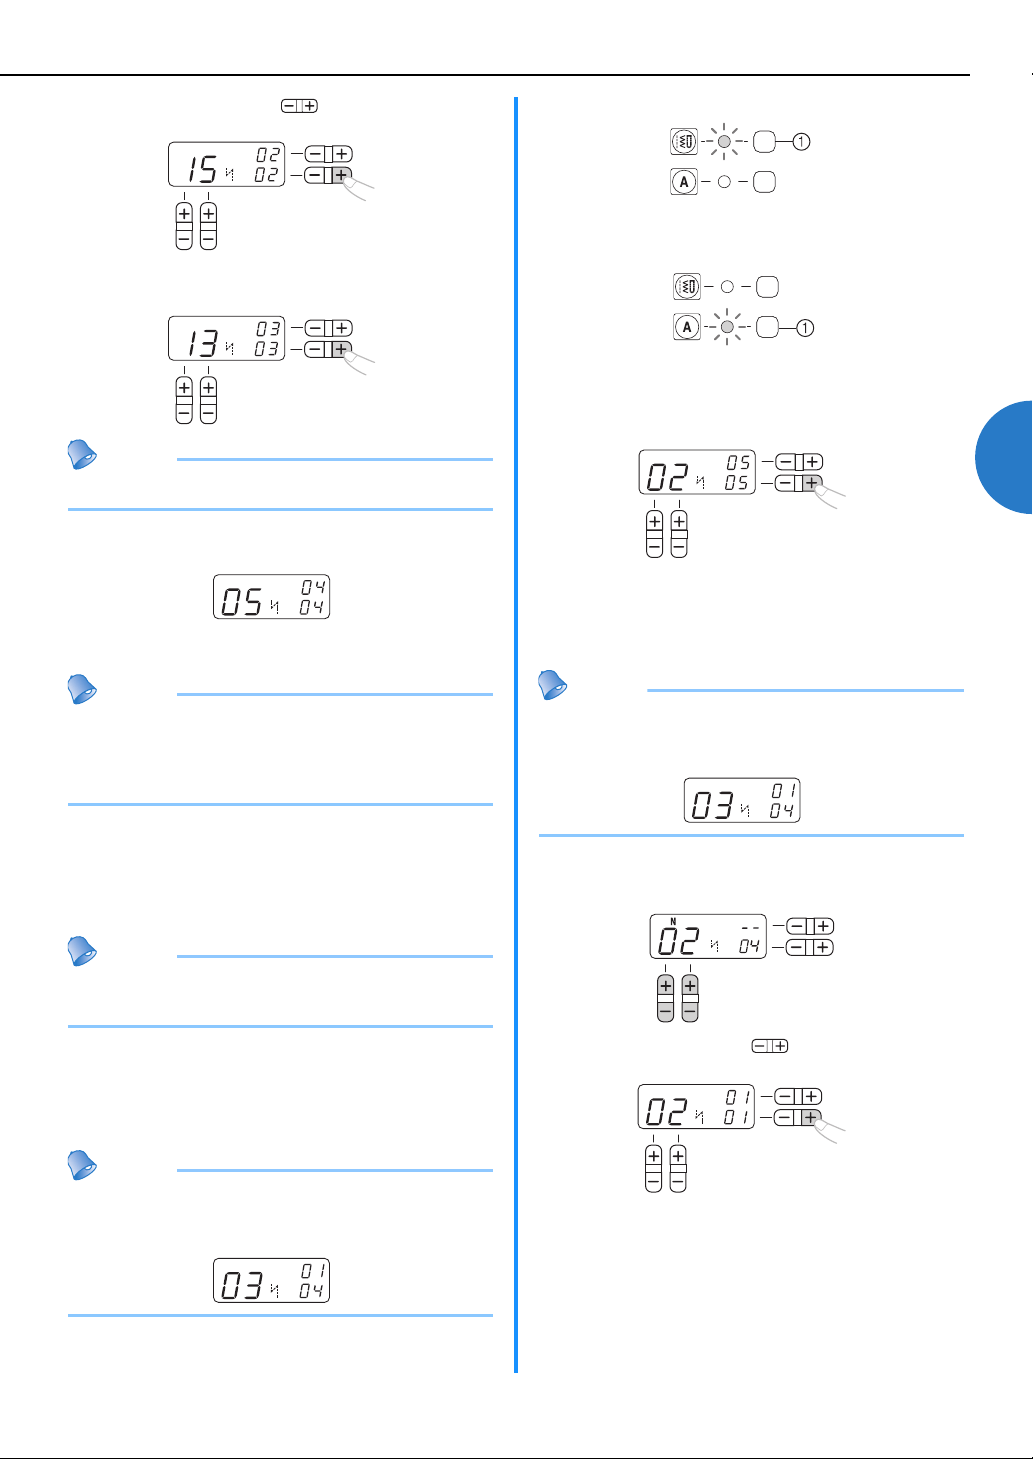
Press the “+” side of (stitch width
adjustment key) to enter the selected character.
d
Repeat steps b and c to add “M” (No. 13)
and “E” (No. 05).
Memo
● To enter a space, select “_” (No. 30).
e
When you have finished combining characters,
check the entered characters and their order.
• For details on checking characters, refer to
“Checking characters” (page 48).
Memo
● A new character can only be added next to the last
character. You cannot insert a new character
between characters or before the first character of
the sequence.
f
After checking the entered characters, start
sewing.
• For details on sewing characters, refer to
“Sewing the character stitches” (page 48).
Memo
● The combination of characters will be stored in
memory even if you turn off the machine.
■ Adding new characters after sewing
After sewing a combination of characters, you can
add characters to the combination using the
following method.
Memo
● When you have finished sewing, the pattern No. of
the first character in the current combination is
shown on the LCD.
a
Press the utility stitch key.
a Utility stitch key
b
Press the character stitch key.
a Character stitch key
c
Add new characters by following the procedure
described in “Combining characters” (page 46).
New characters are added next to the last
character of the combination.
■
Making a new combination of characters after sewing
Memo
● When you have finished sewing, the pattern No. of
the first character in the current combination is
shown on the LCD.
a
Select the first character of the new
combination.
b
Press the “+” side of (stitch width
adjustment key).
The old combination of characters is cleared from
memory, and the pattern No. shown in the LCD is
entered as the first character of a new combination.
c
Add characters by following the procedure
described in “Combining characters” (page 46).
N
N
N
N
N
N
N
Loading ...
Loading ...
Loading ...