Loading ...
Loading ...
Loading ...
23
1
d
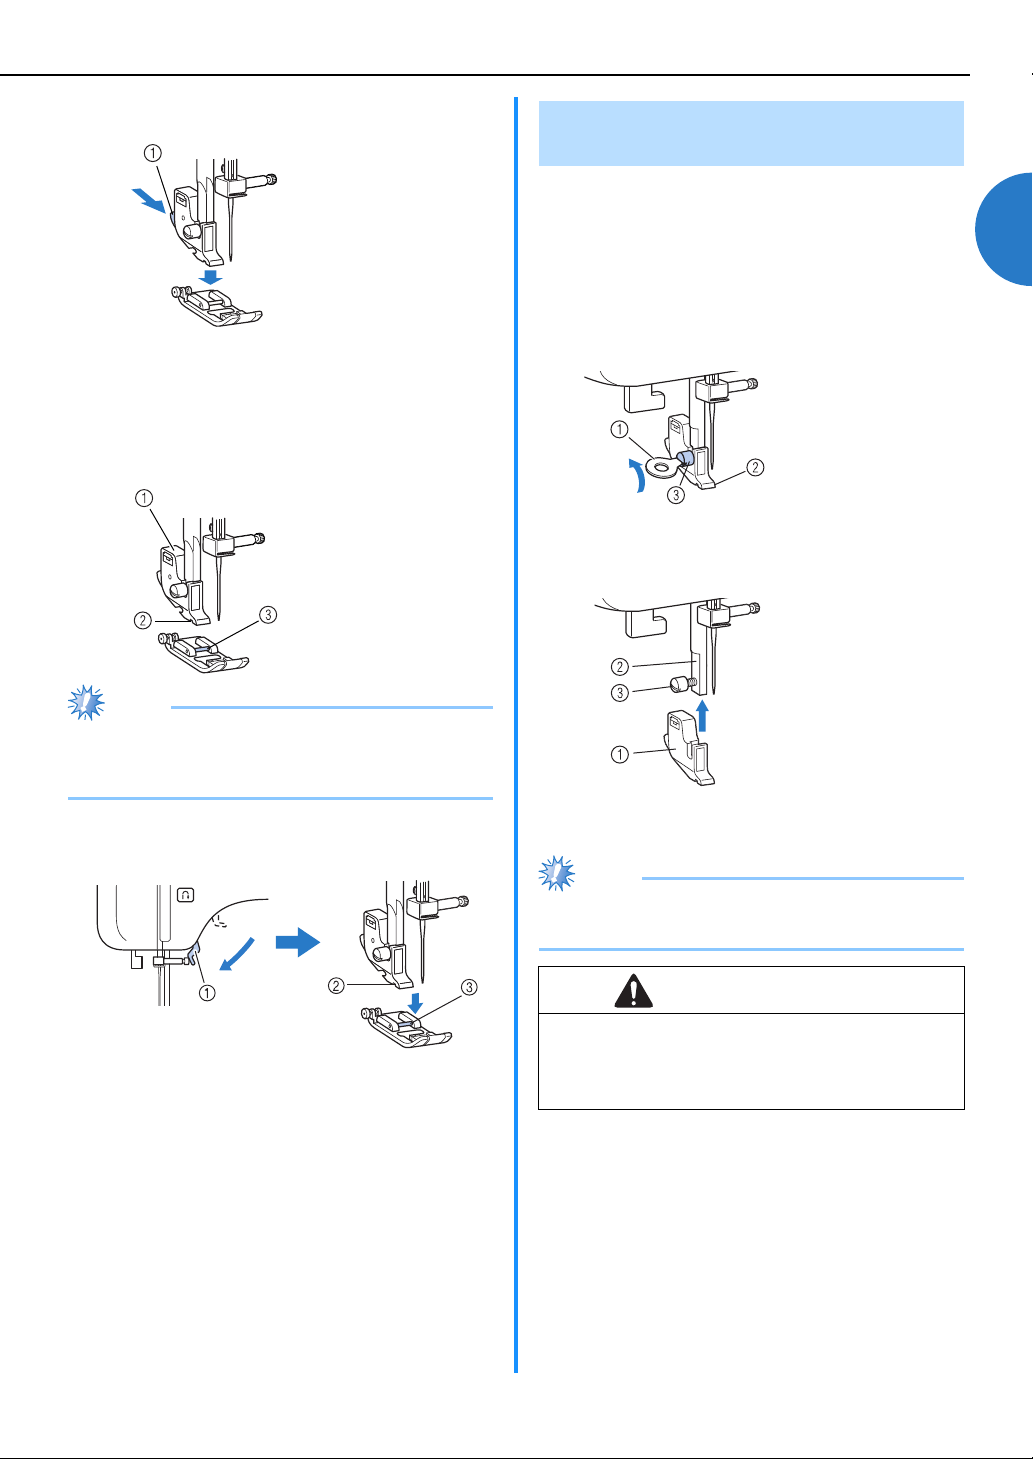
Press the black button to release the presser
foot.
e
Place a different presser foot below the presser
foot holder so that the presser foot pin is aligned
with the shank in the holder.
Position the presser foot so the letter indicating
the presser foot type (J, A, etc.) is positioned to be
read.
Note
● The presser foot to be used with each stitch
appears in the LCD. To select a stitch, refer to
“Selecting a stitch” (page 24).
f
Slowly lower the presser foot lever so that the
presser foot pin snaps into the shank.
a Presser foot lever
b Shank
c Pin
The presser foot is attached.
g
Raise the presser foot lever to check that the
presser foot is securely attached.
Remove the presser foot holder when cleaning the
sewing machine or when installing a presser foot that
does not use the presser foot holder, such as the
quilting foot. Use the disc-shaped screwdriver to
remove the presser foot holder.
a
Remove the presser foot. (Refer to page 22.)
b
Loosen the presser foot holder screw.
■ Attaching the presser foot holder
a
Align the presser foot holder with the lower-left
side of the presser bar.
b
Holding the presser foot holder in place, tighten
the screw.
Note
●
If the presser foot holder is not correctly installed,
the thread tension will be incorrect.
a Black button
a Presser foot holder
b Shank
c Pin
Removing the presser foot
holder
CAUTION
● Be sure to securely tighten the presser foot
holder screw, otherwise the presser foot holder
may fall off and the needle may strike it, causing
the needle to bend or break.
a Disc-shaped
screwdriver
b Presser foot holder
c Presser foot holder
screw
a Presser foot holder
b Presser bar
c Presser foot holder
screw
Loading ...
Loading ...
Loading ...