Loading ...
Loading ...
Loading ...
42
UTILITY STITCHES
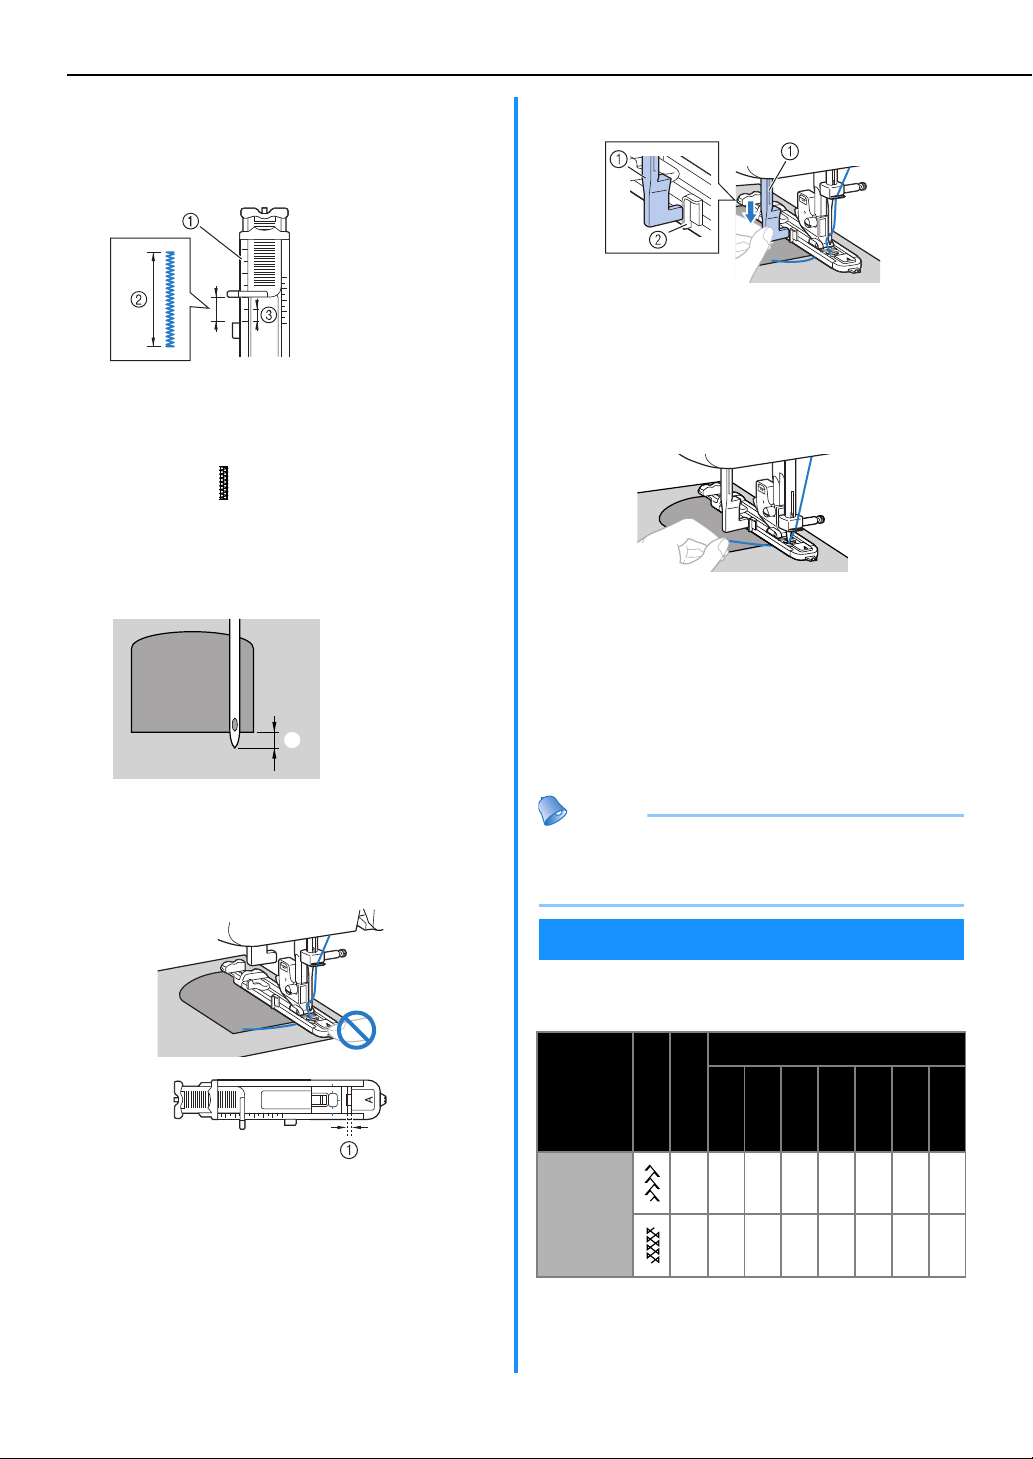
a
Determine the desired length of the bar tack.
Set the button guide plate on buttonhole foot “A”
to the desired length. (The distance between the
markings on the presser foot scale is 5 mm (3/16
inch).)
• A bar tack with a maximum length of about 28
mm (1-1/8 inches) can be sewn.
b
Attach buttonhole foot “A”.
c
Select stitch .
d
Position the fabric so that the opening of the
pocket faces toward you, and then lower the
presser foot lever so that the needle drops 2 mm
(1/16 inch) in front of the pocket opening.
Pass the upper thread down through the hole in
the presser foot.
• When lowering the presser foot, do not push in
the front of the presser foot, otherwise the bar
tack will not be sewn with the correct size.
a Do not reduce the gap.
e
Pull down the buttonhole lever as far as
possible.
a Buttonhole lever
b Bracket
The buttonhole lever is positioned behind the
bracket on the buttonhole foot.
f
Gently hold the end of the upper thread in your
left hand, and then start sewing.
Once sewing is completed, the machine
automatically sews reinforcement stitches,
then stops.
g
Raise the needle and the presser foot lever,
remove the fabric, and cut the thread.
h
Raise the buttonhole lever to its original
position.
Memo
● If the fabric does not feed, for example, because it is
too thick, increase the stitch length. For details, refer
to “Selecting a stitch” (page 24).
Various decorative stitches can be sewn with this
sewing machine.
a Presser foot scale
b Length of bar tack
c 5 mm (3/16 inch)
1
a 2 mm (1/16 inch)
DECORATIVE STITCHING
Stitch Name
Pattern
Presser Foot
Pattern No.
100 stitches
model
80/90 stitches
model
60/70 stitches
model
50 stitches
model
40 stitches
model
30 stitches
model
20 stitches
model
Fagoting
stitch
J 19191717171715
J 202018181818 -
Loading ...
Loading ...
Loading ...