Loading ...
Loading ...
Loading ...
14
WALL INSTALLATION INSTRUCTIONS—
15,00024,000 BTU MODELS
Additional Tools Required
Gather the required tools and parts before starting installation.
Read and follow the instructions provided with any tools
listed here.
■ Wood frame
■ Shims
■ 10 wood screws − 1" (2.54 cm) long minimum
Selecting a Wall Installation Site
The air conditioner has a slide-out chassis so that it can be
installed through an outside wall.
Max wall thickness: 8" (20.32 cm)
IMPORTANT: In order to ensure proper airow, the side louvers
must never be blocked.
Wall requirements:
■ Allows unblocked airflow from the rear and sides of the air
conditioner
■ Located near existing electrical outlets or where another
outlet can or will be installed
■ Does not support major structural loads, such as the frame
construction at ends of windows, under truss-bearing
points, etc.
■ Does not have plumbing or wiring inside
■ Does not have objects blocking the air vents
Preparing the Wall Installation Site
The air conditioner has a slide-out chassis, so that it can be
installed through an outside wall. Prepare the wall in-frame
construction (including brick and stucco veneer).
Working from inside the room, nd the wall stud that is nearest to
the center of the installation area. Cut a hole on each side of the
center stud, leaving at least 3
3
/" (8.57 cm) below the hole.
1. Cut a hole on sides of center stud
3
3
/"
minimum
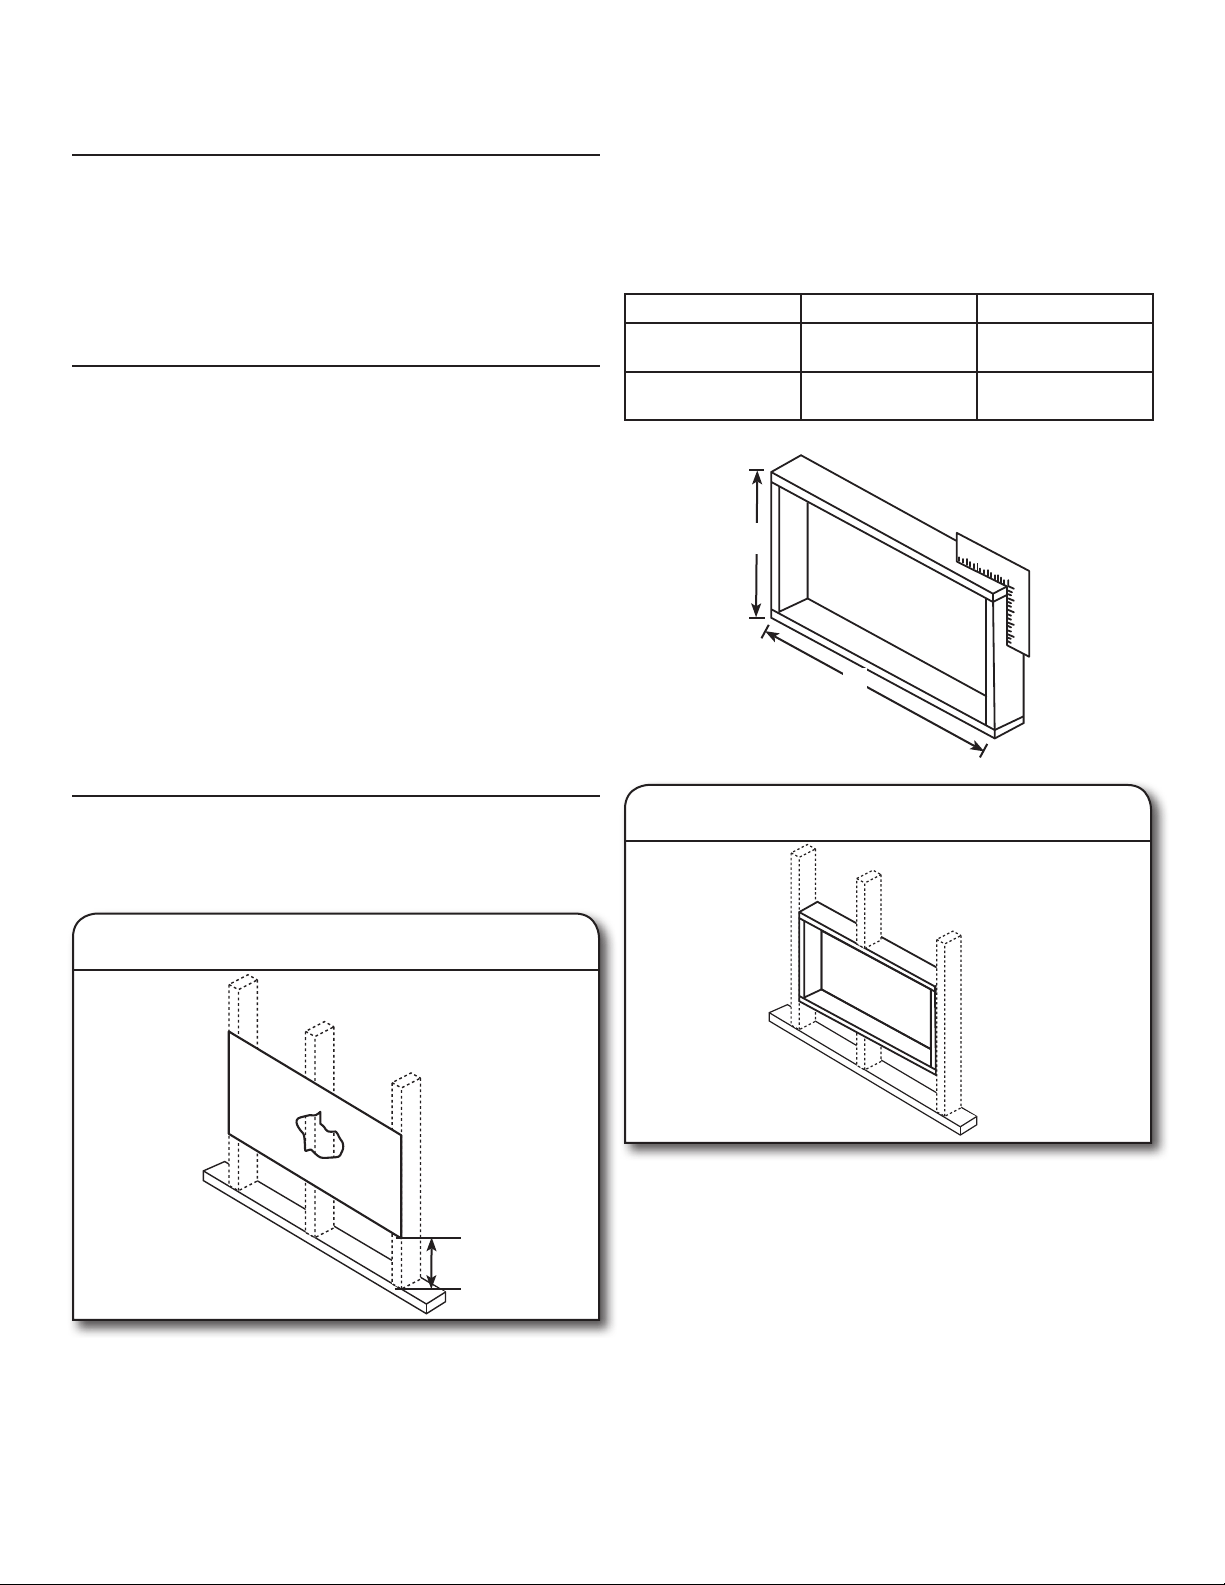
Using the below table to nd installation dimensions, measure
between the inside edges of every other stud.
Width X=inside model plus twice the thickness of the framing
material used.
Height Y= inside model height plus twice the thickness of the
framing material used.
15K/18K models 22K/24K models
Inside-frame
height
18¼" (46.4 cm) 19/" (49.5 cm)
Inside-frame
width
23/" (60.6 cm) 26
9
/" (68.3 cm)
Y
X
Build a wooden frame with the inside dimensions of your model
listed above. The frame depth should be the same as the wall
thickness. Fill in extra space from the opening to the studs with
wood spacers as shown.
Nail the spacers to the studs. They should be ush with the
drywall.
2. Build frame
Loading ...
Loading ...
Loading ...