Loading ...
Loading ...
Loading ...
13 141-877-646-5288 ninjakitchen.com
ENGLISH
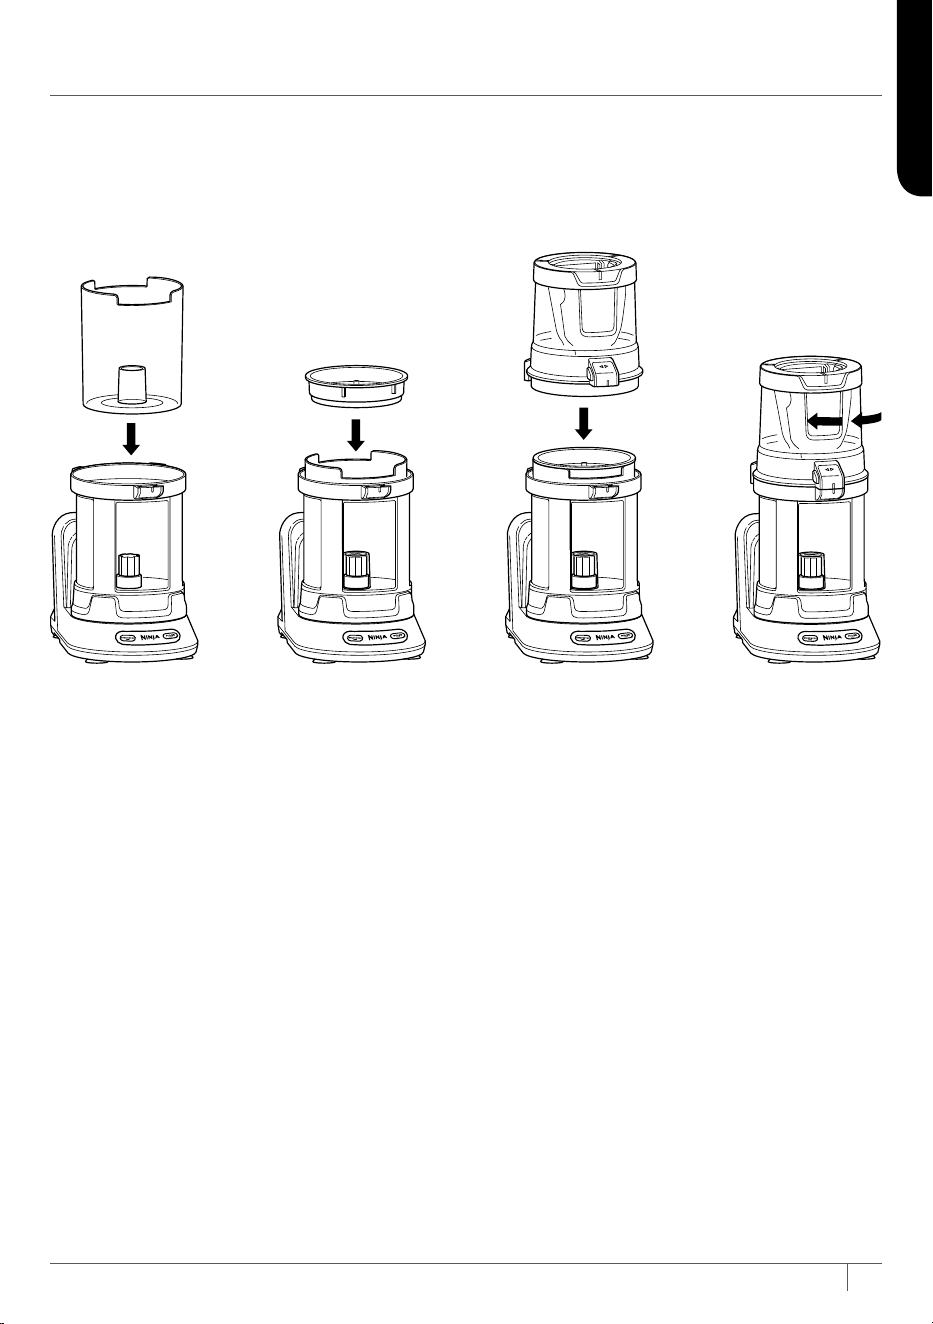
ASSEMBLING YOUR AUTO-SPIRALIZER
™
IMPORTANT: Review all
warnings on pages 3–5
before proceeding.
IMPORTANT: As a safety
feature, if the Spiralizer
Bowl and Feed Chute Lid
are not properly installed,
the unit will not power
on and the motor will be
disabled.
1 Place the unplugged
motor base on a clean,
dry, and level surface
such as a countertop or
table. Press downward on
the motor to adhere the
suction cups to the work
surface. Ensure the motor
base is connected to
power.
2 Lower the Spiralizer Bowl
onto the motor base.
3 Rotate the Spiralizer Bowl
clockwise until it clicks into
place.
4 Place the Collecting Bowl inside the
Spiralizer Bowl, aligning it over the gear post.
5 Choose your Blade Disc, making sure to
handle it carefully.
6 Install the Blade Disc onto the top of the
Collecting Bowl. The rim of the Blade Disc
should sit flush against the top of the bowl,
and the tabs on the sides of the Blade
Discs must align with the slots on the top
of the Collecting Bowl.
7 Assemble the Feed Chute Lid on top of the
Spiralizer Bowl. Turn the lid clockwise onto
the Spiralizer Bowl, making sure to align
the gray tabs on the lid with the front of the
bowl. When the unit is connected to power
and the container is correctly assembled,
the START/STOP button will illuminate,
indicating the unit is ready for use.
Loading ...
Loading ...
Loading ...