Loading ...
Loading ...
Loading ...
SEATING
Manual Seats
1 Forward/Backward: Pull the lever below the
seat up and slide the seat forward or backward.
Release the lever and make sure the seat is
locked into place.
2 Seat Height (Driver’s Seat): Pulling up or
pushing down on the lever will raise or lower the
seat cushion.
3 Recline Seatback: Pull the lever up to adjust the seatback to the desired position.
Release the lever and make sure the seat is locked into place.
Power Driver’s Seat (if equipped)
1 Forward/Backward and Height: Moving
the switch forward or backward will
adjust the seat in that direction. Pulling
up or pushing down on the front or back
of the switch will adjust the angle of the
seat cushion. Pulling up or pushing down
the entire switch will adjust the height of
the seat cushion.
2 Recline Seatback: Moving the switch forward or backward will adjust the angle of
the seatback.
3 Lumbar Support: Pressing the front of the switch will increase support. Pressing the
rear of the switch will decrease support.
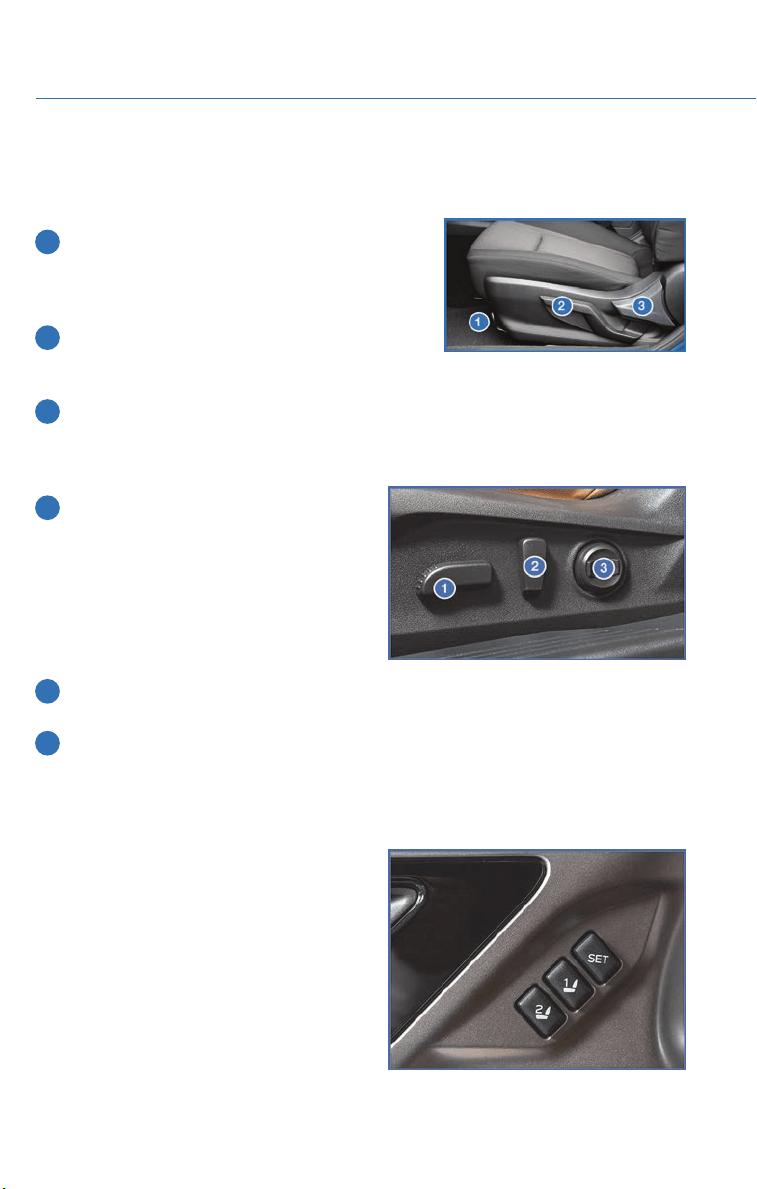
Memory Driver’s Seat (if equipped)
You can set a seat position and retrieve it using the buttons on the driver’s door or each of
the access key fobs.
To set a seat position with a button:
1. Make sure the select lever is in the “P”
position.
2. Adjust the seat to the desired position.
3. While holding the “SET” button, press and
hold either button “1” or “2”. A chirp
sounds when the position is registered.
Another option would be to press and hold
the “SET” button and either button “1” or
“2” at the same time.
GETTING COMFORTABLE
8
Loading ...
Loading ...
Loading ...