Loading ...
Loading ...
Loading ...
12
INSTALLATION
ENGLISH
Removing/Assembling the
Refrigerator Door Handles
Removing the Handles
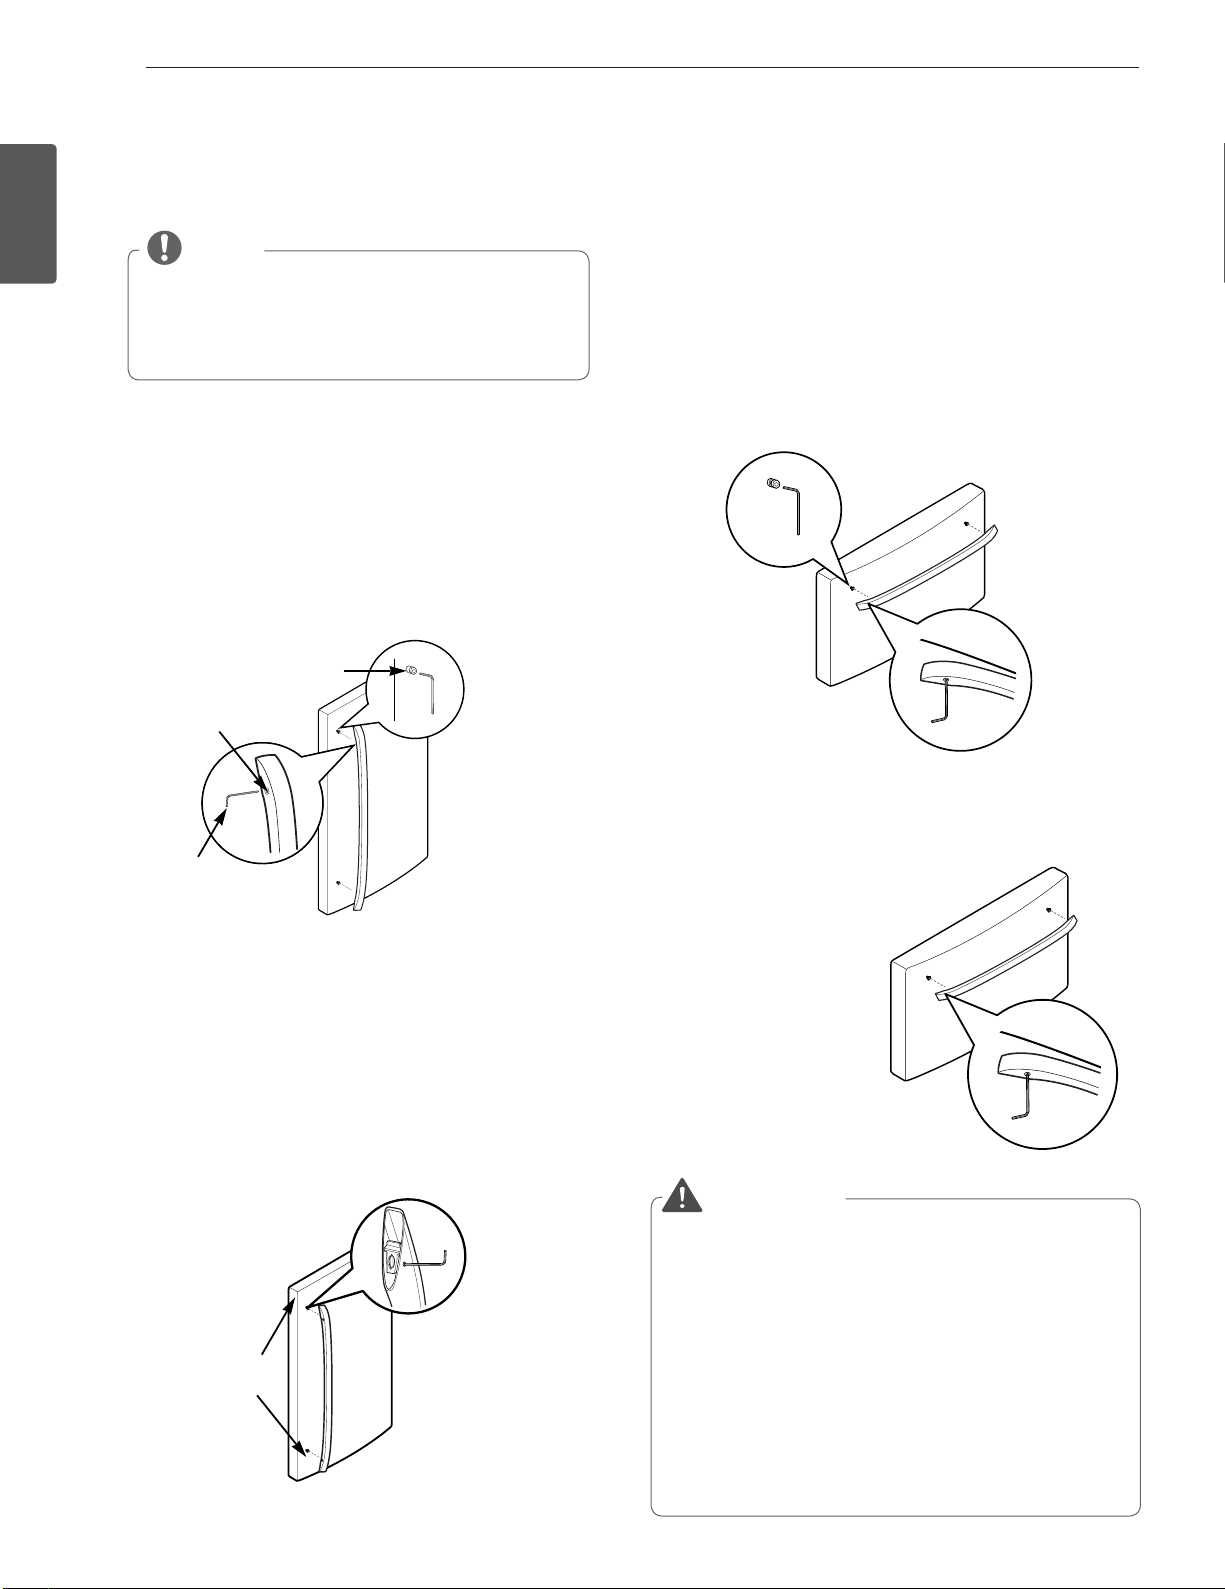
1
Loosen the set screws with a
3
/
32
in. Allen wrench and
remove the handle.
2
Loosen the mounting fasteners that connect to the
refrigerator door and handle using a
1
/
4
in. Allen wrench,
remove the mounting fasteners.
Assembling the Handles
1
Assemble the mounting fasteners at both ends of the
handle using a
1
/
4
in. Allen wrench.
2
Place the handle on the door by fitting the handle foot-
prints over the mounting fasteners and tightening the set
screws with a
3
/
32
in. Allen wrench.
Removing/Assembling the
Freezer Drawer Handle
N O T E
Removing the doors is always recommended when it
is necessary to move the refrigerator through a nar-
row opening. If it is necessary to remove the handles,
follow the directions below.
Removing the Handles
1
Loosen the set screws located on the lower side of the
handle with a
1
/
8
in. Allen wrench and remove the handle.
2
Loosen the mounting fasteners that connect to the
freezer drawer and handle using a
1
/
4
in. Allen wrench,
and remove the mounting fasteners.
Assembling the Handles
1
Assemble the mounting fasteners at both ends of the
handle using a
1
/
4
in.
Allen wrench.
2
Place the handle on
the door by fitting the
handle footprints over
the mounting fasten-
ers and tightening the
set screws with a
1
/
8
in. Allen wrench.
Mounting
Fasteners
Set Screw
Allen
Wrench
Mounting
Fasteners
WARNING
When the customer takes apart the handle or assemble it
from a refrigerator, please be cautious of following things.
Hold the handle with your own hand to make sure not
y
to drop the handle to the floor or instep while taking
apart the handle from a refrigerator.
Do not swing the handle towards people or animals
y
after taking apart the handle.
Insert the bracket hole of the handle into the stopper
y
bolt of the door exactly, and then assemble the set
screws to fix the handle.
Check if there’s any gap between the door and handle
y
after fixing the handle.
Loading ...
Loading ...
Loading ...