Loading ...
Loading ...
Loading ...
5
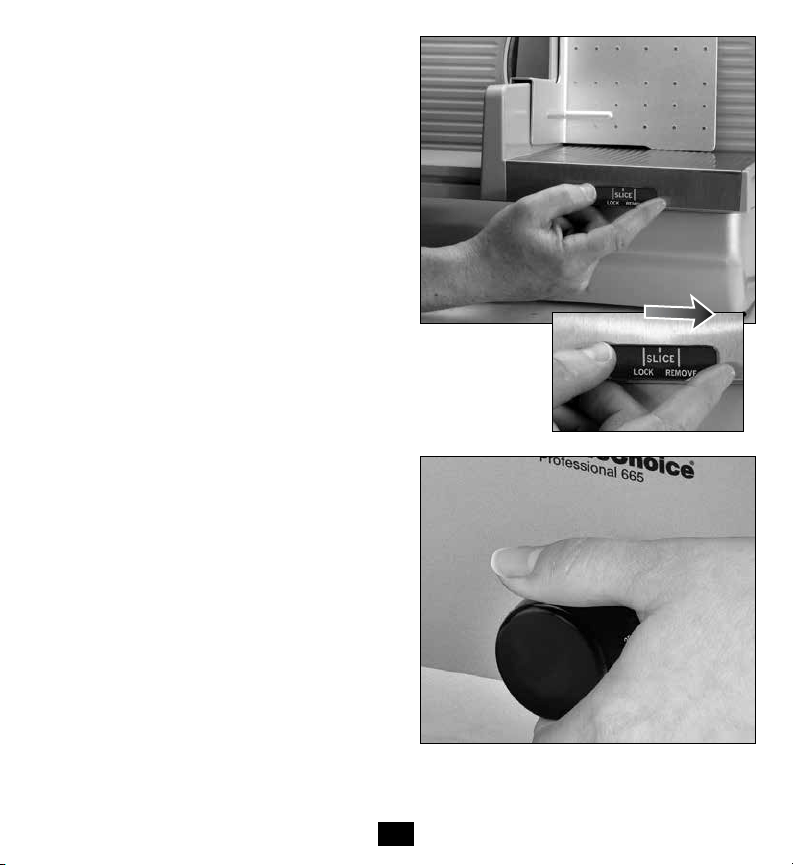
Securing the blade guard
For your safety, the food carriage (4) contains a thumb
guard plate (4a) that can be moved in front of the blade’s
cutting edge and locked in place when the slicer is not in
use. This protects you and children from inadvertent
contact with the blade edge.
Using the thickness control knob (7), set the slice thickness
to 0. Slide the carriage (4) forward to the right end stop
(Fig. 1) so that the carriage thumb protector (4a) covers the
blade edge.
The carriage can then be locked in place by sliding the
control button (10) to the right into the “Lock” position.
Always secure the carriage in the “Lock” position
whenever it is not in use or when the slicer is being moved
or stored. To release the carriage from normal slicing, slide
the button to the middle “Slice” position. To remove the
carriage from the slicer, slide the control button all the way
to the left (Fig. 1) to the “Remove” position.
Before you slice
1. Place slicer on a clean, dry, smooth surface. Position
the slicer so the carriage is to your right and the
thickness control knob is to your left. Be sure the
blade is properly secured.
2. Unlock the carriage by sliding the carriage control
button (10) to the “Slice” position (Fig. 1) and pull the
carriage toward you, away from the blade. The
carriage should move smoothly in its track. Place food
on the carriage. Extra large foods such as slab bacon
or brisket may have to be cut to fit on carriage.
Caution: Always use the food pusher when operating
the slicer. Not using it can result in serious personal
injury (see Fig. 4). Never feed the food by hand.
3. Set the thickness knob (Fig. 2) to the desired slice
thickness.
4. Place a food tray or platter on the base plate (8) under
the cutting edge of the blade to receive the food slices.
Figure 1. Securing
the blade guard.
Figure 1a.
Figure 2. Thickness control knob.
Loading ...
Loading ...
Loading ...