Loading ...
Loading ...
Loading ...
Setting Up the Label Printer
4
1
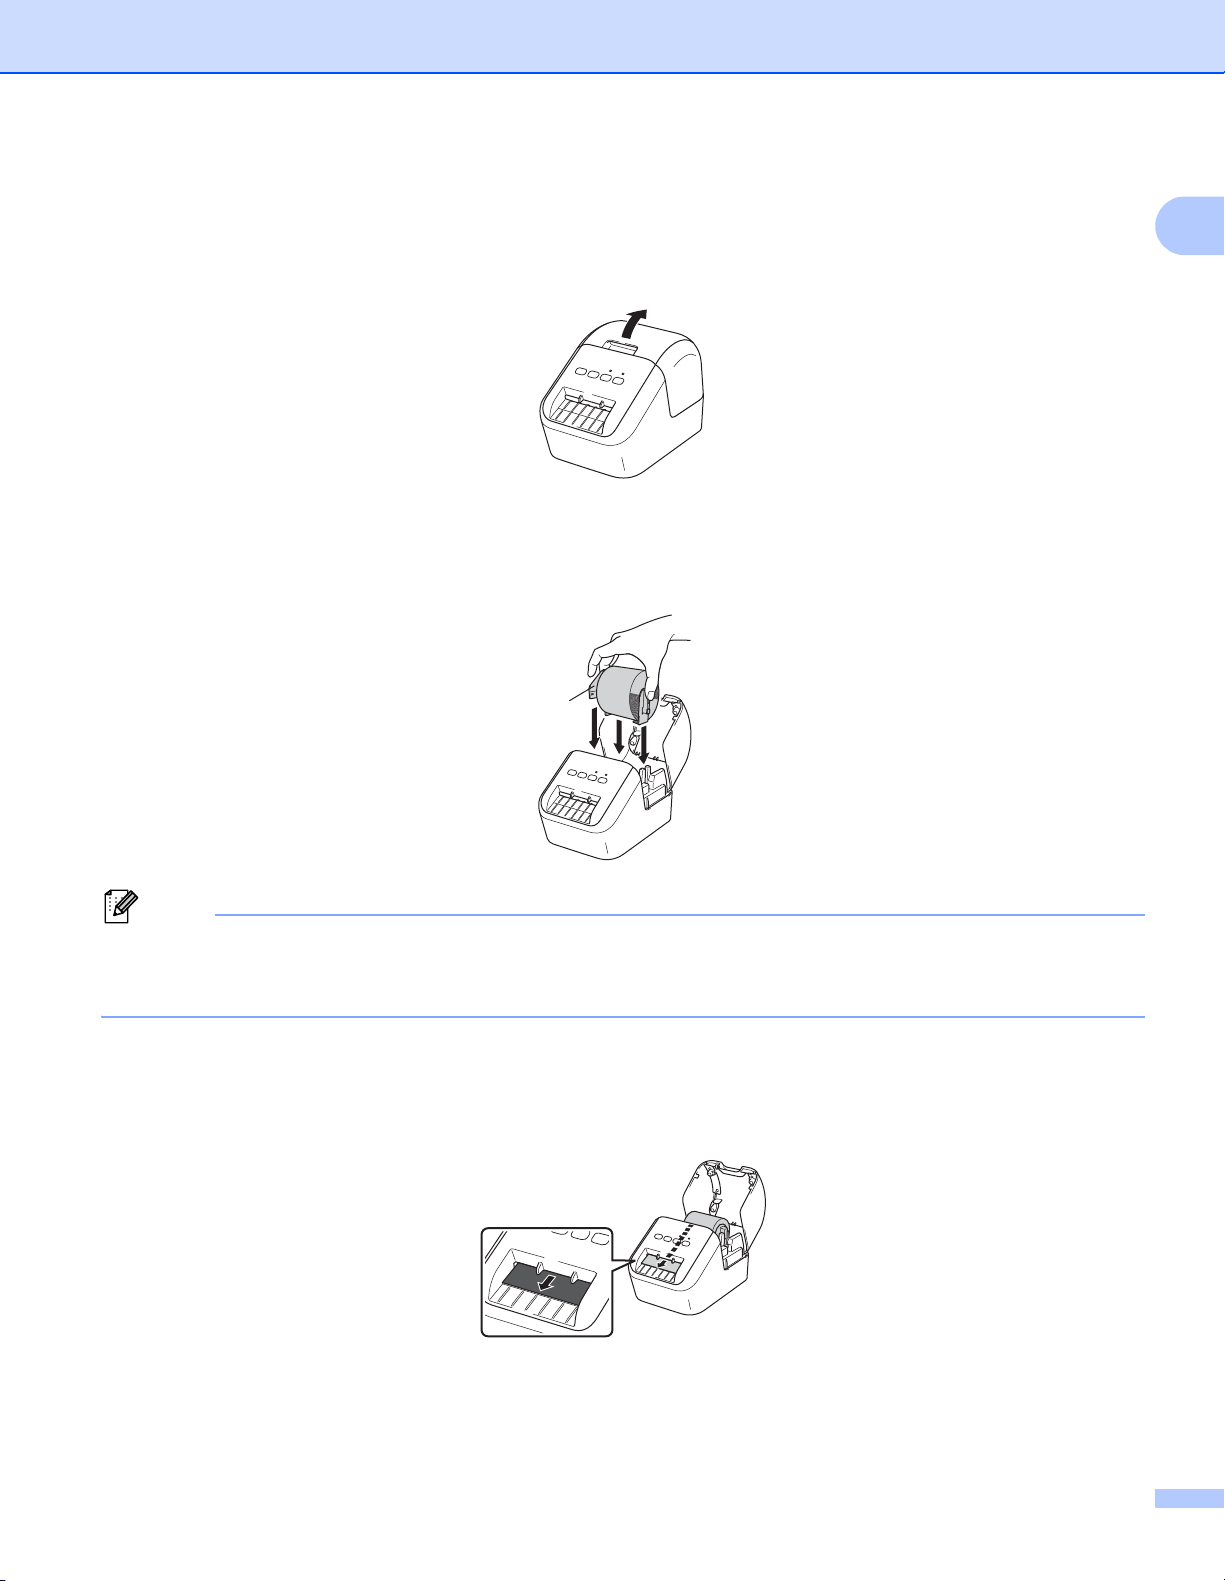
Loading the DK Roll 1
a Make sure that the Label Printer is turned Off.
Hold the Label Printer by the front and firmly lift the DK Roll Compartment Cover to open it.
b After removing the Protective Sheet, place the DK Roll into the Roll Spool Guide.
• Make sure that the Roll Spool Arm is inserted firmly in the Roll Spool Guide.
• Make sure the Stabilizer (1) slides into the notch of the Label Printer.
Note
If using P-touch Editor, select the DK Roll size in [Paper Type] (Windows) / [Print Media] (Mac) drop-down
list. For more information, see DK Label & Tape Guide which is included in the package or How to Use
P-touch Editor on page 30.
c Thread the DK Roll through the Label Printer.
• Align the edge of the DK Roll with the upright edge of the Label Output Slot.
• Insert the first label into the slot inside the compartment.
• Push the label through the Label Output Slot until the end reaches the mark, as shown below:
1
Loading ...
Loading ...
Loading ...