This section outlines and describes the features, indicators and controls of the appliance. You will also find information on the various functions of your appliance.
Note: Depending on the appliance model, individual details and colors may differ.
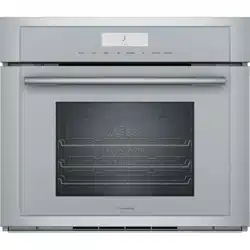
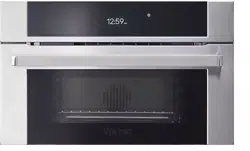
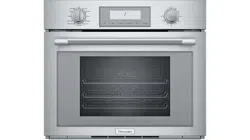
Oven Overview
A. Control panel and display
B. Oven cavity - Steam Oven
Oven Cavity
Water tank
Convection system
Telescopic rack guides
Door hinges
Door gasket
Accessory rack guides
Meat probe socket
Broil element
Oven vents
Oven Cavity Features
Oven Vent: The oven vent is located along the top and bottom of the unit. Warm air may be released from the vent before, during and after cooking. It is normal to see steam escaping from the vent and condensation may collect. This area may be warm when the oven is in use. Do not block the vent since it is important for air circulation.
Cooling Fan: The cooling fan runs based on the oven temperature. Warm air may be felt as it is released from the oven vents while the fan operates. The fan may also operate after the oven is off.
Convection Fan: The convection fan operates during all convection modes. When the oven is operating in a convection mode, the fan turns off automatically when the door is opened.
Oven Light: When you open the appliance door, the oven light turns on. If the door remains open for longer than 20 minutes, the lighting switches off again. To turn the light back on, touch the LIGHT button.
Water Tank: The steam oven is equipped with a water tank. When you open the door you can see the water tank at the right side of the oven cavity. Fill the water tank with water to operate the appliance using steam modes.
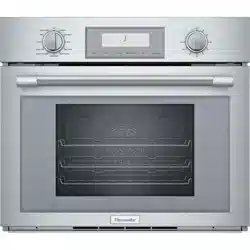
Control Panel
You can set your appliance's various functions with the control knobs and on the control panel using the full touch color display. The full touch color display shows you the current settings.
Full touch color display
Function selector
Touch buttons
Temperature selector
Operating Controls: Use the controls to set your appliance simply and directly.
Rotary Selectors: Turn the function selector to the left or right to select the desired heating mode. Use the temperature selector to set the temperature for conventional cooking modes.
Touch Buttons: There are sensors under the touch buttons. Press on the words of the touch buttons to select a function. The available functions are indicated by a light above the respective touch button. Depending on the operation you are running, the number of available functions can change.
Touch button
Use
LIGHT
Switches the appliance light on or off
TIMERS
Sets the kitchen timer, or cooking time
Activates/deactivates the Panel Lock
SETTINGS
Opens the basic settings menu
FAST PREHEAT
Activates/Deactivates fast preheating
INFO
Displays additional information
ADD STEAM
Turns on steam-assisted cooking
Full Touch Color Display: Use the full touch color display to navigate through the menus and select the settings. The feature that is active will be illuminated in blue.
Basic way of operating the display:
To select a feature/setting, touch the desired area on the display.
The touch screen also supports swiping to move left or right through the various settings.
In some instances you have further options to navigate through the menu:
Some operations allow returning to the prior screen by touching the symbol.
Some operations allow confirmation by touching the symbol
Heating Modes Menu
Your appliance has multiple heating modes. After switching the appliance on, you can select the desired heating mode and temperature using the rotary selectors.
General Tips
Aluminum Foil
WARNING: Do not use aluminum foil or protective liners to line any part of the appliance, especially the oven bottom. Installing these liners may result in risk of electric shock or fire.
Preheating the Oven
Place oven racks in desired position before heating the oven.
Preheat the oven when using the Bake, Convection Bake, True Convection, Pizza, Broil, Convection Broil, Steam Convection, Steam, Reheat, Defrost and Warm modes.
Preheat is not required for Speed Convection, Roast, Convection Roast, Proof, and Dehydrate modes.
Allow oven to preheat while preparing recipe ingredients or food items.
Setting a higher temperature does not shorten preheat time.
Once oven is preheated, open the oven door and place food in the oven as quickly as possible to minimize the loss of heat and reduction of oven temperature.
Use Fast Preheat to speed up preheating
Preheat Reminders
The lower element is hidden under the oven bottom. It is normal that the preheat time is different than your previous oven that had an exposed element on the bottom.
Preheating is not necessary for meats, poultry, casseroles and Speed Convection mode.
Preheat time will be longer when the electrical supply to your house is less than 240 volts.
Increasing the oven temperature will require a longer preheat time. For example, the preheat time for 425° F is longer than the preheat time for 350° F.
When broiling, preheat the oven 3-4 minutes. Do not preheat for more than 5 minutes.
For Best Results
Use the cooking recommendation charts which can be found in the Cooking Charts Use and Care Guide.
Open the door as briefly as possible to avoid temperature reduction.
Use the interior oven light to view the food through the oven window rather than opening the door frequently.
Use the timer to keep track of cooking times.
Baking Pans and Dishes
Glass baking dishes absorb heat. Some cookware manufacturers recommend reducing the temperature 25° F when using this type of dish. Follow manufacturers’ recommendations.
Use pans that provide the desired browning. For tender, light, golden brown crusts, use light, anodized or shiny metal bakeware.
Dark, rough or dull pans (nonstick or anodized) will absorb heat and result in a browner, crisper crust. Some manufacturers recommend reducing the temperature 25° F when using this type of pan. Follow manufacturers’ recommendations.
Insulated cookie sheets or bakeware may increase the length of cooking time.
Do not set broil pans or any other heavy object on the open oven door.
Do not keep the empty broil pan in the oven during cooking as this changes cooking performance. Store the broil pan outside the oven.
Condensation
It is normal for certain amount of moisture to evaporate from the food during any cooking process. The amount depends on the moisture content of the food. The moisture may condense on any surface cooler than the inside of the oven, such as the control panel.
Before First Use
Before you can use your new appliance, you must enter certain settings. You must also clean the oven cavity and accessories.
Before Using the Appliance for the First Time
Appliance must be properly installed by a qualified technician before use.
Remove all packing materials from inside and outside the oven.
While cool, wipe with a clean, damp cloth and dry.
There may be a slight odor from your new appliance; this is normal and will disappear after a short time.
Optimum cooking results depend on proper cookware being used.
Read and understand all safety precautions and Use and Care Manual information. Execute the following sections prior to operating:
Water Hardness
Before using the appliance for the first time, enquire about the water hardness of your tap water from your water supplier.
In order for the appliance to reliably remind you to descale it when required, you must correctly set your water hardness range.
NOTICES
The appliance may become damaged due to the use of unsuitable liquids. Do not use distilled water or other liquids. Only use cold, fresh tap water, softened water or noncarbonated mineral water.
If your water is very hard, we recommend that you use softened water.
If you only use softened water, you can set the water hardness range to "softened" in this case.
If you use mineral water, set the water hardness range to "4 very hard".
If you use mineral water, you must only use noncarbonated mineral water.
Water hardness range
Setting
0
0 softened
1 (up to 60 ppm)
1 soft
2 (60-120 ppm)
2 medium
3 (120-180 ppm)
3 hard
4 (above 180 ppm)
4 very hard
Initial Use
As soon as the appliance is connected to the power supply, the first setting "Time of day" appears on the display.
Setting the time of day
1. Touch the bottom line. The time setting options are displayed.
2. Touch the “Hours” touch field and swipe to the left or right to select the current hour.
3. Touch the "Minutes" touch field and swipe to the left or right to select the current minute.
4. Touch the symbol to apply the settings.
Setting the language
1. Touch the bottom line.
2. Swipe to the left or right to select the required language.
3. Touch the top line.
Setting the Clock Display
Touch "Clock display".
Touch the bottom line.
Swipe to the left or right to select “digital” or “analogue”.
Touch the top line.
Setting the water hardness
Touch "Water hardness".
Touch the bottom line.
Swipe to the left or right to select the appropriate water hardness.
Touch the top line.
Setting up Home Connect
You can start the Home Connect assistant to connect to the Home Connect network and pair your mobile device.
Touch “Home Connect”.
Touch “Start assistant”.
Follow the instructions in the chapter “Home Connect”.~ "Home Connect" on page 29
Note: You can also activate this feature later in the “Settings” menu.~ "Adjust Basic Settings" on page 16
Notes
You can change these settings at any time in the basic settings.
After connecting the appliance to the power or following a power failure, the settings for initial use are shown in the display
Calibrating the Appliance and Cleaning the Oven Cavity
The boiling temperature of water depends on the altitude. The oven needs to be calibrated in order to ensure optimum performance after installation.
Preparing the Appliance for Calibration
Remove the accessories from the oven cavity.
Remove any remaining packaging, such as polystyrene pellets, from the oven cavity.
Before calibrating the appliance, wipe the smooth surfaces in the oven cavity with a soft, wet cloth.
Calibration and Cleaning
Notes
The calibration can only be started when the oven cavity is cold (room temperature).
Do not open the appliance door during calibration as it will be interrupted.
NOTICE: ENAMEL DAMAGE! Do not start an operation if water is on the bottom of the oven cavity. Let appliance cool down and wipe the water from the oven cavity bottom before starting an operation.
Fill the water tank.
The oven will calibrate automatically after running a Steam heating mode at 212° F (100 °C) for 30 minutes. Set the heating mode, temperature and duration for the calibration. After a few seconds the appliance starts operating.
Calibration
Heating mode
Steam
Temperature
212° F (100 °C)
Duration
30 minutes
3. After calibration, allow the appliance to cool down.
4. Dry the oven cavity bottom floor.
5. Set Bake to 475° F (245°C).
Heating up
Heating mode
Bake
Temperature
475° F (245 °C)
Cooking time
30 minutes
6. Keep the kitchen ventilated while the appliance is heating.
7. Stop the appliance operation after the indicated duration. Turn the temperature and the function selector to OFF to switch off the appliance.
8. Wait until the oven cavity has cooled down.
9. Clean the smooth surfaces with soapy water and a dish cloth.
10.Empty the water tank and dry the oven cavity.
Note: The appliance saves the calibration settings, even in the event of a power outage or disconnection from the power supply. The calibration does not need to be repeated.
Cleaning the Accessories
Clean the accessories thoroughly using soapy water and a dish cloth or soft brush.
Adjust Basic Settings
You can adjust various settings of your appliance, to make using your appliance easy and convenient. If necessary, you can change these settings in the menu “Settings”.
Changing the Settings
The appliance has to be switched off.
Touch the SETTINGS touch button.
Swipe to the left or right to select the required setting.
Touch the bottom line.
Swipe to the left or right to select the required setting.
If required touch the symbol to apply the setting.
Touch the top line.
Touch the SETTINGS touch button.
Touch "Save" to save the changes.
Available Settings
General Operation
This chapter will describe how to use the settings and modes available on your appliance as well as highlight additional functions and features.
High Altitude Baking
When cooking at high altitudes, recipes and cooking times will vary.
Switching the appliance on and off
Set a heating mode with the function selector to switch the appliance on.
To switch the appliance off set the function selector and the temperature selector to the OFF position.
On the display, you will see whether the residual heat in the oven cavity is still high after switching the appliance off. “Oven hot” is displayed in the left lower corner of the display.
Notes
Certain displays and notes, such as those relating to the residual heat in the oven cavity, remain visible on the display after the appliance has been switched off.
After device operation, the cooling fan may continue to operate until the oven cavity has cooled.
Switch off your appliance when you do not need to use it. If no settings are applied for a long time, the appliance switches itself off automatically
Timer Options
Your appliance will beep once your set time has elapsed.
Timer option
Use
Kitchen Timer
The kitchen timer works like any standard egg timer. The appliance does not switch on and off automatically.
Oven Timer
After the set time has elapsed, the appliance switches off automatically.
End time
The appliance switches on and off automatically after setting a cooking time and end time.
Displaying and hiding timer options
To display or hide the timer options, touch the TIMERS touch button.
Note: The timer options displayed are hidden automatically after a particular time. If you have already set a cooking time, this is automatically stored.
Oven Timer
You can set the cooking time for your meal on the appliance. This means that the oven will turn off after the oven timer is complete. This offers convenience for you so you do not need to interrupt other work to tend to your meal.
1. Set the heating mode with the rotary function selector.
2. Touch the TIMERS touch button. The timer options are shown on the display
3. Touch the “Oven Timer” touch field.
4. Touch the required field and swipe to the left or right to set the oven timer. You can set hours and minutes.
5. Touch the symbol. The heating mode and the cook time are displayed.
6. Set the temperature with the temperature selector.
7. After a few seconds the appliance starts heating and the cook timer begins to count down.
Note: When the set time has elapsed, a signal sounds. “Oven Timer completed” is displayed. The appliance ends the operation automatically. Turn off the appliance.
Kitchen Timer
The Kitchen Timer can be set when the appliance is switched on or off.
1. Touch the TIMERS touch button. The kitchen timer is shown in the display. If the appliance is switched on, first touch the field.
2. Swipe to the left or right to select the timer value. You can set hours, minutes and seconds.
3. Touch the icon. The kitchen timer begins to count down. The symbol and timer value are displayed in the top left corner of the display.
Note: When the set time has elapsed, a signal sounds. “Kitchen Timer completed” is displayed.
Delayed Operation - "End time"
The appliance switches on automatically, then off at the time preselected for the end of operation. To do this, you set the cooking time and specify the end of operation. Delayed operation can only be used in combination with a heating mode.
Notes
Ensure that food is not left in the oven cavity for too long, as it may spoil.
The option to delay the start of operation is not available for every heating mode.
CAUTION: To maintain food safety, do not leave food in the oven for more than one hour before or after cooking.
Place the food onto the appropriate accessory in the oven cavity and close the appliance door.
Set the heating mode with the rotary selector.
Touch the TIMERS touch button. The timer options are shown in the display.
Select Oven Timer and set a cook time. Touch the icon.
Select TIMERS again and set an End Time. Touch the icon.
Select the temperature with the rotary selector. The appliance waits until the appropriate time to start the operation.
As soon as the end time has been reached, an audible signal sounds and the appliance ends the operation automatically
Checking, changing or deleting settings
Touch the TIMERS touch button. The time-setting options are shown in the display.
Touch the required timer option.
Swipe to the left or right on the touch display to change the settings. To delete a timer value, set “00:00“, or touch “Cancel”.
Setting a Heating Mode
Use the function selector and temperature selector to set the operating mode and temperature. Use the touch buttons and the touch fields on the touch screen to enter the different operating menus. Example: True Convection with 325° F (160 °C)
1. Turn the function selector to TRUE CONV to switch on the appliance. You go directly to the True Convection mode.
2. Turn the temperature selector to the required temperature
3. After a few seconds the appliance starts operating. For heating modes that require a preheat the status bar appears in the display to indicate the preheating progress.
4. When the appliance has reached the set temperature, “Oven preheated” is displayed and an audible signal sounds. The oven continues cooking with the set temperature.
Preheating Bar
As soon as a new heating mode is started, the preheating bar appears on the display. The preheating bar indicates the temperature increase in the oven cavity. When the oven is fully preheated, a sound signal will occur.
INFO Touch Button
If the INFO touch button lights up, important information regarding the mode you are using is available. This may include for example recommendations on suitable cookware or how to prepare food for a safe cooking result. When you touch the INFO touch button, the information is displayed for a few seconds. To exit the INFO text immediately, touch the INFO touch button or the display.
Sounds
The appliance uses various sound signals during operation. A sound signal can be heard whenever you use a touch button or touch field, or when an operation is started or finished. You can adjust the volume of these sounds in the Settings menu. ~ "Adjust Basic Settings" on page 16
Changing or Cancelling the Appliance Operation
Changing the appliance operation
To set a different temperature or a different heating mode use the temperature or function selectors.
To change any other settings, touch the display area for the setting that should be changed.
Swipe to the left or right to change the setting.
After a few seconds the oven continues with the changed settings.
Note: The cooling fan may continue to run while an operation is interrupted.
Cancelling the appliance operation
Turn the temperature selector and the function selector to OFF to cancel the appliance operation.
Fast Preheat
With "Fast Preheat", you can shorten the preheat time required for some heating modes.
Fast Preheat is available for the following modes:
True Convection
Convection Bake
Bake
Roast
Convection Roast To achieve an even cooking result, do not place your food or accessories into the oven cavity until “Fast Preheat” is complete.
Notes
If the FAST PREHEAT touch button is lit, the function can be activated.
To deactivate the function before it has finished, touch the FAST PREHEAT touch button.
Activating the "Fast Preheat" function
Set a heating mode and temperature.
Touch the FAST PREHEAT touch button to activate the function. The symbol appears on the display.
Once the set temperature has been reached, the "Fast Preheat" function switches itself off automatically. The symbol disappears from the display. Place the food in the oven cavity.
Panel Lock
Your appliance is equipped with a panel lock so that it cannot be switched on or a setting cannot be changed accidentally.
Activating and Deactivating
The appliance has to be turned off.
Touch and hold the TIMERS touch button for approximately 4 seconds until "Panel Lock activated" is displayed. The lock is activated. The 1 symbol is displayed in the top left corner of the display.
Touch and hold the TIMERS touch button for approximately 4 seconds until "Panel Lock deactivated" is displayed. The lock is deactivated.
Auto Convection Conversion
True Convection and Convection Bake modes require a 25° F (10 °C) reduction in temperature. Auto Convection Conversion reduces the temperature you enter automatically.
Enter the package or recipe temperature when setting the mode. The oven control calculates the correct temperature for these modes automatically by reducing the input temperature by 25° F (10 °C). This is then shown in the display.
To turn on this feature:
Ensure the oven is turned off.
Press the SETTINGS touch button.
Scroll over to Conv. Conversion.
Touch the bottom of the screen and select ON.
Touch the top of the screen.
Press the SETTINGS touch button again to accept.
Select “Save” to save your settings.
Temperature Offset
This feature is useful if food is consistently either too brown or too light. The setting increases or decreases the set oven temperature according to the chosen value. The following heating modes support this functionality:
Bake
Convection Bake
Roast
Convection Roast
True Convection
Note: The oven is carefully calibrated to provide accurate results. This feature is useful if you prefer your foods darker or lighter. Refer to the section entitled “Adjusting Basic Settings” to apply a temperature offset.
Note: For double ovens you can set a different temperature offset for each oven cavity.
Meat Probe
Your oven comes with a multi-point meat probe. This probe measures the temperature in three different areas of your food ensuring the most accurate cooking results. Once the set temperature has been reached, the appliance automatically switches itself off.
Suitable Heating Modes
True Convection
Convection Bake
Bake
Convection Roast
Roast
Slow Roast
Notes
The meat probe measures the temperature on the inside of the food between 85° F (30 °C) and 210° F (99 °C).
Use only the meat probe supplied with your appliance. Additional or replacement meat probes can be ordered as a spare part from Customer Service.
After use, always remove the meat probe from the oven cavity. Never store it inside the oven cavity.
Inserting the Meat Probe into the Food
Before placing your food into the oven cavity, insert the meat probe into the food. The meat probe has three measuring points. Ensure that the middle measuring point is inserted in the food.
Meat: For large pieces of meat, insert the meat probe at an angle from above as far as it will go into the meat. For relatively thin pieces of meat, insert the meat probe from the side at the thickest point.
Poultry: Insert the meat probe as far as it will go into the thickest point in the breast. Insert the meat probe into the poultry crosswise or lengthwise depending on its structure. Put the chicken in a roasting dish and place it on the wire rack.
Turning the food: If you wish to turn the food, do not unplug the meat probe from the oven. Once you have turned the food, check that the meat probe is correctly repositioned in the food.
If you unplug the meat probe from the oven, all settings will be reset and you will have to apply them again.
NOTICE: Ensure that the meat probe's cable does not become trapped.
To prevent the meat probe from being damaged by excessive heat, there must be a gap of at least an inch or more between the broil element and the meat probe. The meat may expand during the cooking process.
Setting and Starting Appliance Operation
WARNING - RISK OF BURNS: The oven interior and the meat probe become very hot. Use oven mitts to plug and unplug the meat probe.
WARNING - RISK OF ELECTRIC SHOCK: Use of a wrong meat probe can damage the insulation. Use only the meat probe intended for this appliance.
Notes
The set oven cavity temperature must be at least 50° F (10 °C) higher than the meat probe temperature.
To prevent the meat probe from being damaged, the oven cavity temperature must not be set higher than 480° F (250 °C).
1. Insert the meat probe into the socket on the left-hand side of the oven cavity. Note: The probe icon will appear on the oven display screen.
2. Close the appliance door.
NOTICE: When doing so, ensure that the meat probe’s cable is not trapped in the appliance door. It may be damaged.
3. Set the heating mode. Note: When the meat probe is plugged into the socket, you can only select a heating mode that is suitable to be used with the meat probe.
4. Set the oven cavity temperature with the temperature selector.
5. Touch the core temperature on the right in the bottom line.
6. Swipe to the left or right to select the required core temperature. After a few seconds the appliance starts the operation.
Changing or Stopping the Appliance Operation
Changing: During appliance operation, you can change the oven cavity temperature and meat probe temperature.
1. Change the oven cavity temperature with the temperature selector.
2. Touch the meat probe temperature.
3. Swipe to the left or right to change the meat probe temperature.
4. Touch the symbol to apply the setting.
Stopping: Once the set meat probe temperature has been reached, a signal sounds and the appliance stops the operation automatically.
Turn the temperature selector and the function selector to OFF to switch off the appliance
Using an oven glove, unplug the meat probe from the socket.
Core Temperatures of Different Foods
Do not use frozen food. The figures in the table are given as a guide. They will depend on the quality and composition of the food.
You can find detailed information on heating modes and temperatures in the Use and Care Cooking Charts manual.
Food
Core temperature in °F (°C)
Poultry
170° (75°)
Pork*
145° (65°)
Pork
160° (70°)
Beef, medium rare
145° (65°)
Beef, medium
160° (70°)
Beef, well done
170° (75°)
Lamb
145° (65°)
Other: Heating/reheating food
150°-165° (65°-75°)
*allow for a three minute rest period.
Sabbath Mode
With the Sabbath mode, a cooking time of up to 74 hours can be set. You can keep the food in the oven cavity warm without having to switch the oven on or off.
Note: Sabbath mode has to be activated in the Basic Settings, to use this mode.
Starting
The oven is automatically in Bake mode. The temperature can be set between 100° F (40 °C) and 450° F (230 °C).
Turn the function selector to MORE MODES.
Swipe to the left or right to select "Sabbath ".
Set the temperature with the temperature selector.
Touch the cooking time in the bottom line.
Swipe to the left or the right to select the required duration.
Touch the symbol to apply the setting.
Turn the temperature selector knob to desired temperature.
After a few seconds “Sabbath Mode will start in 5min 00sec” appears on the display. After five minutes the appliance starts the operation.
Most controls are deactivated. Temperature selection is still available but will not show changes in the display. You can switch off the appliance with the rotary selectors at any time.
Once the Sabbath mode duration has elapsed the appliance stops heating. Turn the temperature selector and the function selector to OFF to switch off the appliance.
Cancelling the appliance operation
Turn the temperature selector and the function selector to OFF to cancel the appliance operation.
Steam Operation
Food can be cooked very gently using steam. With some heating modes, you can prepare food with steam assistance. In addition, the Proof, Defrost and Reheat modes are available.
WARNING - RISK OF SCALDING: Hot steam can escape when you open the appliance door. Steam is not visible at certain temperatures. Do not stand too close to the appliance when opening it. Open the appliance door with caution. Keep children away.
Noises
You will hear a humming noise while the pump is in operation and after switching it off. This noise is caused by the pump function test. It is a normal operating noise. You will also hear this noise after running non-steam modes when the oven is turned off. This is normal.
Steam Cooking
During steaming, hot steam surrounds the food and therefore prevents loss of nutrients from the food. The shape, color and typical aroma of the dishes are retained as a result of this preparation method. With steam, flavors are not affected when cooking a whole meal at the same time.
Note: If the water tank runs dry during steaming, operation is interrupted. Fill the water tank. After the water tank is reinserted, Steam cooking will resume.
Your oven has five modes for Steam cooking:
Steam
Steam Convection
Proof
Defrost
Reheat
Setting
Example: Set heating mode Steam with 212°F (100°C) for 20 minutes.
1. Refill water tank. Note: Only switch on steaming once the oven cavity has cooled down completely (to room temperature).
2. Turn the function selector to STEAM.
3. Turn the temperature selector to the required temperature.
4. Touch the timer field .
5. Swipe to the left or the right to select the required duration. After a few seconds the appliance starts the operation.
As soon as the cooking time has elapsed, an audible signal sounds and the appliance ends the operation automatically. Touch the TIMERS touch button to end the audible signal.
Cancelling the appliance operation
Turn the temperature selector and the function selector to OFF to cancel the appliance operation.
Steam Assisted Cooking
When cooking with steam assistance, steam is introduced into the oven cavity at various intervals and with varying degrees of intensity. This gives you a better cooking result.
Your food:
Becomes crispy on the outside
Develops a shiny surface
Is juicy and tender on the inside
Only undergoes a minimum reduction in volume
You set the desired heating mode and steam intensity combination. Use the information in the table to select a suitable heating mode and steam intensity. Select a program from the available steam programs that meets your cooking needs.
Steam Intensity
Different intensity levels are available when adding steam:
low
medium
high
Suitable Heating Modes You can add steam for these heating modes:
True Convection
Convection Bake
Bake
Speed Convection
Convection Roast
Roast
Start
Refill water tank. Note: Only switch on the Add Steam setting once the oven cavity has completely cooled down (to room temperature).
Set the heating mode and temperature.
Touch the ADD STEAM touch button to switch on steam assistance.
On the display, swipe to the left or right to select the steam intensity
Touch the symbol to apply the setting.
After a few seconds the appliance starts the operation.
Cancelling Steam Addition
Touch the ADD STEAM touch button to cancel the addition of steam early.
Touch the steam intensity in the bottom right corner of the display.
Swipe to the left or right to select "Off".
Touch the symbol to apply the setting.
Note: The operation continues without adding steam.
Cancelling the appliance operation
Turn the temperature selector and the function selector to OFF to cancel the appliance operation.
Proof
Dough will proof more quickly using the "Proof " mode than at room temperature and does not dry out.
Use the information in the tables found in the Cooking Charts Use and Care Guide to select the appropriate level.
Note: If the water tank runs out of water during operation with the Proof setting, operation is interrupted. Fill the water tank.
Start
Refill water tank. Note: Only switch on this setting once the oven cavity has completely cooled down (to room temperature).
Turn function selector to “More Modes”.
Swipe to the left or right to select "Proof".
Set the desired temperature with the temperature selector.
Touch in the bottom touch field.
Swipe to the left or the right to select the required duration.
Touch the symbol to apply the setting. After a few seconds the appliance starts the operation.
As soon as the cooking time has elapsed, an audible signal sounds and the appliance ends the operation automatically.
Cancelling the appliance operation
Turn the temperature selector and the function selector to OFF to cancel the appliance operation.
Cleaning Your Oven
With good care and cleaning, your appliance will retain its appearance and remain fully functioning for a long time to come. We will explain here how you should correctly care for and clean your oven.
Suitable Cleaning Agents
To ensure that the different surfaces are not damaged by using the wrong cleaning agent, follow the information in the following table. Depending on the appliance model, not all of the areas listed may be on/in your appliance.
NOTICE: Surface damage! Do not use any
Harsh or abrasive cleaning agents
Cleaning agents with a high alcohol content
Hard scouring pads or abrasive cleaning sponges
High-pressure cleaners or steam cleaners
Special cleaners for cleaning the appliance while it is hot Wash new soft sponges and cloths thoroughly before use.
Tip: Recommended cleaning and care products can be purchased through Customer Service. Observe the respective manufacturer's instructions.
WARNING - RISK OF BURNS: The appliance becomes very hot. Never touch the hot inside surfaces of the oven interior or heating elements. Always allow the appliance to cool down. Keep children away.
Notes
Slight differences in color on the front of the appliance are caused by the use of different materials, such as glass, plastic and metal.
Shadows on the door panels, which look like streaks, are caused by reflections made by the interior lighting.
Enamel is baked on at very high temperatures. This can cause some slight color variation. This is normal and does not affect operation.
Cleaning Guide
Part
Recommendations
Broil Pan and Grid
Wash with hot soapy water. Rinse thoroughly and dry, or gently rub with cleansing powder or soap-filled pads as directed. DO NOT clean broil pan and grid in the self-cleaning oven.
Flat Rack
Wash with hot soapy water. Rinse thoroughly and dry, or gently rub with cleansing powder or soap-filled pads as directed. DO NOT clean the rack in a self-cleaning oven.
If the flat racks are cleaned in the oven during the self clean mode, they will lose their shiny finish and may not glide smoothly. If this happens, wipe the rack edges with a small amount of vegetable oil. Then wipe off excess.
Telescopic Rack
Wash with soapy water. Rinse thoroughly and dry, or gently rub with cleansing powder or soap-filled pads as directed. Avoid getting cleansing powder in the telescopic slides.
Re-lubrication may become necessary. Use only high-temperature food-grade lubricants to re-lubricate slides. DO NOT clean the rack in a self-cleaning oven.
Telescopic Guides
Hot soapy water:
Clean with a dish cloth.
Do not remove the lubricant while the pull-out rails are pulled out. It is best to clean them when they are pushed in.
Do not place in dishwasher.
Water Tank
Hot soapy water:
Clean with a dish cloth and rinse thoroughly to remove residual detergent.
Dry with a soft cloth. Leave to dry with the cover open.
Do not place in dishwasher.
Silicone Door Gasket
Clean with hot soapy water.
Glass
Wash with soap and water or glass cleaner. Use Fantastik® or Formula 409® to remove grease spatters and stubborn stains.
Glass Control Panel
Use warm soapy water on a dish cloth or glass cleaner sprayed directly on a paper towel.
Painted Surfaces
Clean with hot soapy water or apply Fantastik® or Formula 409® to a clean sponge or paper towel and wipe clean. Avoid using powder cleaning agents, steel wool pads and oven cleaners.
Porcelain Surfaces (bottom of oven cavity)
Immediately wipe up acid spills like fruit juice, milk and tomatoes with a dry cloth. Do not use a moistened sponge/cloth on hot porcelain. When cool, clean with hot soapy water or apply Bon-Ami® or Soft Scrub® to a damp sponge. Rinse and dry. For stubborn stains, use soap-filled pads. It is normal for porcelain to show fine lines with age due to exposure to heat and food soil.
Stainless Steel Surfaces
Always wipe or rub in the direction of the grain. Clean with a soapy sponge, then rinse and dry, or wipe with Fantastik® or Formula 409® sprayed on a paper towel. Protect and polish with Stainless Steel Magic® and a soft cloth. Remove water spots with a cloth dampened with white vinegar. Use Bar Keeper´s Friend® to remove heat discoloration.
Plastic & Controls
When cool, clean with soapy water, rinse and dry.
Probe
Wipe with soapy water. Do not submerge. Do not wash in the dishwasher.
Printed areas (words & numbers)
Do not use abrasive cleaners or petroleum based solvents.
Notes
Slight differences in color on the front of the appliance are caused by the use of different materials, such as glass, plastic and metal.
Shadows on the door panels, which look like streaks, are caused by reflections made by the interior lighting.
Enamel is baked on at very high temperatures. This can cause some slight color variation. This is normal and does not affect operation.
Surfaces in the Oven Cavity
The slightly textured surface of the back wall, ceiling and sides in the oven cavity consists of Ecolyse coating material and should not be cleaned with harsh chemicals.
The oven cavity bottom is enameled and has a smooth surface.
Cleaning the oven is easier because there is no cleaning around a coil element showing on the bottom of the oven. The hidden lower element is protected from food soils and spills. Wiping up excess spills is easy
Cleaning Enamel Surfaces
Clean the smooth enamel surfaces with a dish cloth and hot soapy water. Dry with a soft cloth.
Soften baked-on food residues with a damp cloth and soapy water. If there are heavy food deposits use a soapfilled pad.
Note: Food residues can leave a white coating behind. These are harmless and do not affect performance. You can remove these residues using lemon juice if required.
Keeping the Appliance Clean
Always keep the appliance clean and remove food and food spills immediately so that stubborn deposits do not build up.
Clean the oven cavity after each use. This will ensure that food and food spills cannot be baked on.
Always remove flecks of limescale, grease, starch and albumin (e.g. egg white) immediately.
Use suitable ovenware for roasting, e.g. a roasting dish.
For cakes or pies that may spill over, place on baking sheet lined with aluminum foil and place on wire rack.
Cleaning Functions
NOTICE: Do not use oven cleaner on the self-cleaning surfaces. These will damage the surfaces. If oven cleaner does get onto these surfaces, wipe it off immediately using water and a sponge. Do not rub the surface and do not use abrasive cleaning aids.
Your appliance is equipped with “Ecolytic Clean”, “Easy Clean” and a “Descale” function. The self-cleaning surfaces in the oven cavity are cleaned with the "Ecolytic Clean" cleaning function. Use the “Easy Clean” function for intermediate cleaning of the oven cavity bottom. Food and food spills are saturated with steam enabling soils to loosen when using the “Easy Clean” function and can then be removed more easily. You can use the “Descale” function to remove limescale from the evaporator.
Ecolytic Clean
Some surfaces in the oven cavity are cleaned with the Ecolytic Clean operating mode.
Ecolytic cleaning is constantly cleaning. The side panels, ceiling panel and back panel are coated with a porous, matte ceramic material known as an ecolytic coating.
The coating absorbs and breaks down splashes over time from baking, roasting and broiling while the oven is in operation.
If the surfaces no longer clean themselves adequately and dark patches appear, the surfaces can be “refreshed” using the Ecolytic Clean mode which helps clean the ecolytic coating by operating the unit at a higher temperature to help speed the process.
Note: During normal operation the appliance records the number of times it is used and indicates when it has reached a point where cleaning is recommended. The recommendation is displayed until the Ecolytic Clean mode has finished.
If this function is not performed, then the ecolytic surfaces may become damaged.
If your appliance becomes prematurely soiled or if you notice dark patches on the back panel, do not wait until your appliance recommends cleaning. The more often the appliance is cleaned, the longer the porous surfaces will retain their cleaning capability. You can clean your appliance at any time needed using the Ecolytic Clean function.
Wipe out large spills from the oven before running the Ecolytic Cleaning function.
Do not clean parts or accessories in the self-clean oven.
Before Running the Ecolytic Clean Function
Remove racks, rails, accessories and ovenware from the oven cavity.
Cleaning the Oven Bottom and the Inside of the Appliance Door
Remove the worst food spills from the oven bottom, the inside of the appliance door and the interior lighting. Otherwise, patches will appear that cannot be removed.
NOTICE: Do not use oven cleaner on the ecolytic cleaning surfaces. These will damage the surfaces. If oven cleaner does get onto these surfaces, wipe it off immediately using water and a sponge. Do not rub the surface and do not use abrasive cleaning aids.
Start
Before setting the cleaning function, ensure that you have followed all instructions for preparation. Cleaning takes 1 hour. The duration cannot be changed.
Turn the function selector to CLEAN MODES.
Swipe to the left or right to select "Ecolytic Clean ™".
Touch the bottom line. The cleaning time with Ecolytic Clean is displayed.
Touch the bottom line. After a few seconds the appliance starts Ecolytic Clean. The remaining time appears on the display.
Keep the kitchen ventilated while the cleaning function is running.
As soon as the cleaning aid has run through, a signal sounds and the appliance ends the operation automatically
Once the Cleaning Function has Ended
Once the oven cavity has cooled down, wipe down the oven cavity with a damp cloth if necessary.
Note: During operation and while the cleaning function is active, reddish patches may form on the surfaces. This is not rust, but food residues. These patches are not hazardous to your health and do not limit the cleaning capacity of the self-cleaning surfaces.
Easy Clean
The Easy Clean function makes it easier to clean the oven floor. Food and food spills are soaked beforehand by vaporizing the vinegar solution. It can then be removed more easily.
WARNING - RISK OF SCALDING: Hot steam can arise due to water in the hot oven cavity. Never pour water into the hot oven cavity.
Setting
The "Easy Clean " function can only be started once the oven cavity is cold (room temperature) and the appliance door is closed. Do not open the appliance door during this operation. Doing this will interrupt the "Easy Clean " function.
Remove the accessories and racks from the oven cavity.
Turn the function selector to CLEAN MODES.
Swipe to the left or right to select "Easy Clean ".
Touch the bottom line. After a few seconds the appliance starts the Easy Clean function. The remaining time appears on the display.
Exit
As soon as the cleaning function has run through, a signal sounds and the appliance ends the operation automatically.
As soon as you open the appliance door, the interior lighting is switched on so that you can rinse the oven cavity more easily. The remaining water in the oven cavity must be removed promptly. Do not leave the remaining water in the oven cavity for a long time (e.g. overnight). The appliance must not be operated when the oven cavity is still wet or damp.
Subsequent Cleaning
Open the appliance door and remove the remaining water with an absorbent sponge cloth.
Clean the smooth surfaces in the oven cavity with a dish cloth or a soft brush. Stubborn residues can be removed using a soft scouring pad.
Remove limescale with a cloth soaked in vinegar. Then wipe with clean water and rub dry with a soft cloth (including under the door seal).
Turn the function selector to OFF.
Leave the appliance door ajar in the stop position (approx. 30°) for approx. one hour to allow the enamel surfaces in the oven cavity to dry thoroughly. Alternatively, you can also run the Drying function for the oven cavity.
Running the Drying Function for the Oven Cavity
Turn the function selector to CLEAN MODES.
Swipe to the left or right to select "Drying ª".
Touch the bottom line. After a few seconds the appliance starts Drying. The remaining time appears on the display.
As soon as the Drying function has run through, a signal sounds and the appliance ends the operation automatically.
Removing Heavy Food Deposits
You have several options for removing particularly stubborn food deposits.
Leave the vinegar solution to work for some time before starting Easy Clean.
Rub vinegar solution onto the food and food spills on the smooth surfaces before starting Easy Clean.
Repeat the Easy Clean function after the oven cavity has cooled down.
Descale
The appliance must be descaled regularly in order for it to continue operating correctly.
There are several steps in the descaling program. For hygiene reasons, the descaling program must be run through completely so that the appliance can be ready for operation again. In total, the descaling program runs for approx. 70-90 minutes.
Descale (approx. 55-70 minutes)
First rinsing cycle (approx. 6-9 minutes)
Second rinsing cycle (approx. 6-9 minutes)
If descaling is interrupted (for example, due to a power failure or because the appliance is switched off), you are prompted to rinse the appliance twice after it is switched back on. The appliance cannot be used until the second rinsing cycle comes to an end.
The frequency with which the appliance must be descaled depends on the hardness of the water used. When only five more steam-assisted operations are possible, or fewer, the appliance reminds you to descale it with a message on the display. The number of remaining operations is displayed after the appliance is switched on. You can therefore prepare for the descaling in good time.
Start
NOTICES
Only use the descaler recommended by Thermador for the descaling program. Other descalers may damage the appliance. Descaler order no. 10008170
If you have used a steam-assisted operation immediately before descaling, you must first switch the appliance off so that the residual water is pumped out of the evaporator system.
Descaling solution: Do not allow the unmixed descaling chemicals or mixed solution to come into contact with the control panel or other surfaces on the appliance as prolonged exposure may cause damage to the surfaces. Immediately remove any descaler by rinsing with tap water.
1. Mix 32 fluid oz. (950 ml) of water with 1/2 bottle (approximately 200ml) of descale solution.
Note: Mix ratio may vary from packaging.
2. Turn the function selector to CLEAN MODES.
3. Swipe to the left or right to select "Descale ".
4. Touch “continue”. The duration of the descaling program is displayed. It cannot be changed.
5. Touch “continue” again.
6. Following the display prompt: Remove the water tank and fill it with descaling solution, then reinsert tank.
7. Press Start. The appliance will now be descaled. The remaining time counts down on the display. As soon as the descaling program has finished, an audible signal sounds.
First Rinsing Cycle
The display will prompt to open the appliance door. Remove the water tank and rinse thoroughly. Fill the tank with fresh water and reinsert.
Close the appliance door. The first rinse will begin automatically once the door is closed. When complete an audible sound will be heard and the display will prompt for the next step.
Second Rinsing Cycle
The display will prompt to open the appliance door. Remove the water tank and rinse throughly. Fill the tank with fresh water and reinsert.
Close the appliance door. The second rinse will begin automatically once the door is closed. When complete an audible sound will be heard and the display will prompt for the next step.
Completing Descale
Open the appliance door.
Empty water tank. Rinse thoroughly. Dry and reinsert.
Descaling is complete and the appliance is ready for use again.
Service
Faults often have simple explanations. Before calling Customer Service, please refer to the table below and attempt to correct the fault yourself.
WARNING - RISK OF ELECTRIC SHOCK: Improper repairs are dangerous. Only an authorized servicer may perform repairs and may replace damaged plug and connections. Remove the power plug or turn off the circuit breaker or fuse in the fuse box if the appliance is damaged or not working. Call Customer Service
WARNING - RISK OF ELECTRIC SHOCK
Work on the appliance electronics must be performed by an authorized servicer.
Always disconnect the appliance from the power supply when work is carried out on the electronics. Switch off the circuit breaker or remove the fuse from your household fuse box.
Troubleshooting Chart
Oven Problem
Possible Causes and Suggested Solutions
Oven door is locked and will not open, even after cooling
Turn the oven off at the circuit breaker and wait five minutes. Turn breaker back on. The oven should reset itself and will be operable
Oven is not heating
Check circuit breaker or fuse box to your house. Make sure there is proper electrical power to the oven. Be sure oven temperature has been selected.
Operations with steam or descaling do not start or do not continue.
The water tank is empty or operations are locked due to the descaling process. Fill the water tank and continue the descaling process.
After switching on an operating mode, a message is shown on the display that indicates that the temperature is too high.
The appliance has not cooled sufficiently. Allow the appliance to cool and switch the operating mode on again.
The appliance prompts you to rinse.
The power supply has been disconnected or the appliance has been switched off during the descaling process. Once the appliance is switched on again, rinse it twice.
Oven temperature is too hot or too cold.
The oven thermostat needs adjustment. See “Oven Temperature Offset“ under “Adjust Basic Settings“.
Oven light is not working properly.
Call Customer Service.
Oven light does not turn off.
Check for obstruction in oven door. Check to see if hinge is bent.
Cannot remove lens cover on light.
There may be soil build-up around the lens cover. Wipe lens cover area with a clean dry towel prior to attempting to remove the lens cover.
Clock and timer are not working properly.
Make sure there is electrical power to oven.
“E“ and a number appears in display and control beeps.
This is a fault code. Follow the instructions in the display. If the code remains or there are no instructions in the display, press INFO to display more information (if applicable) and to turn off the beep. If the code is still displayed, write down the fault code number, turn off the oven, and call Service.
With a new oven there is a strong odor when oven is turned on.
This is normal with a new oven and will disappear after a few uses.
Control does not react when a key is touched.
Be sure that pad is clean. Touch the center of the touchpad. Use the flat part of your finger.
Fan is running during modes that do not use convection.
On some models, the convection fan runs while the oven is preheating for the bake mode. This is normal.
Warm air or steam escapes from oven vent.
It is normal to see or feel steam or warm air escaping from the oven vent. Do not block the vent.
Cooling fan runs even when the oven is turned off.
This is normal. The cooling fan will continue to run, even after the oven has been turned off, until the oven has cooled sufficiently.
Oven door closes faster/slower than normal.
The soft-close door hinges contain a damping fluid that is affected by temperature. If the oven is in a cold environment, the door will close slower than it will in a warmer environment. A warmer than normal environment, such as when cooking, may cause the door to close slightly faster.
The appliance prompts you to descale without the counter appearing beforehand.
The set water hardness range is too low. Check the set water hardness range and adjust if necessary. Carry out descaling.
The “Fill water tank” message appears even though the water tank is full.
Check that the water tank is fully pushed in to place. The tank could also possibly be damaged from being dropped. Due to impact, components inside the water tank have come loose and the tank is leaking. If the message still appears and neither of these problems are the issue, it may need a new sensor. Call Customer Service.
The appliance cannot be switched on or is on and cannot be operated; the symbol is shown on the display.
The panel lock is activated. Press and hold the TIMERS touch button until the symbol goes away
The appliance does not heat up; is shown on the display.
Demo mode is activated in the basic settings. Turn demo mode to OFF in the settings menu.


 symbol.
 symbol


 symbol to apply the settings.


 Oven Timer” touch field.

 field.


 symbol appears on the display.


 core temperature on the right in the bottom line.
 ".
". in the bottom line.


 .
.


 " mode than at room temperature and does not dry out.
 " function can only be started once the oven cavity is cold (room temperature) and the appliance door is closed. Do not open the appliance door during this operation. Doing this will interrupt the "Easy Clean
  ".
". symbol is shown on the display.
 is shown on the display.