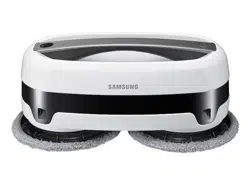
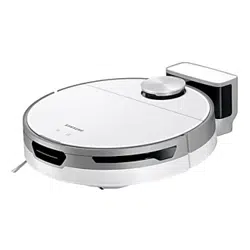
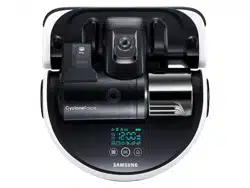
User Manual for Jetbot Mop
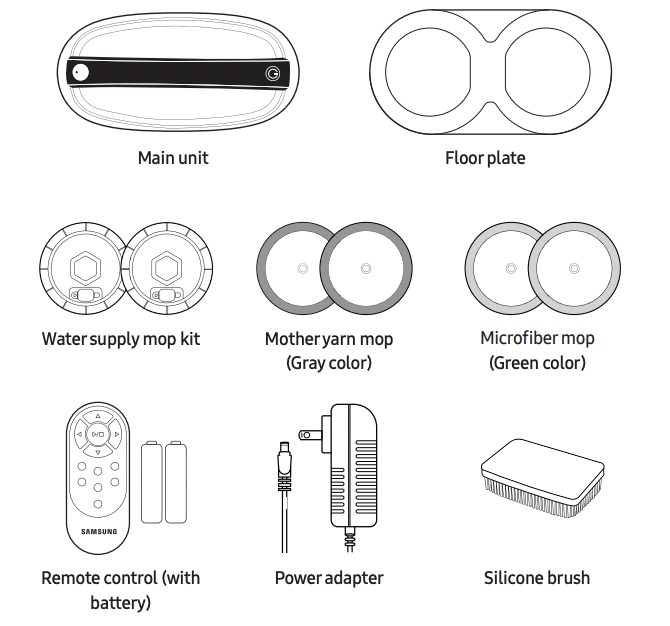
Parts name & Product component
Components
|
 Mother yarn mop (Gray color) Mother yarn mop (Gray color)
Mother yarn is 100x thicker than microfiber, ideal for cleaning dust in cracks and picking up spills.
|
|
Microfiber mop (Green color)
It is a mop with richer and longer yarns for a superior wiping performance.
|
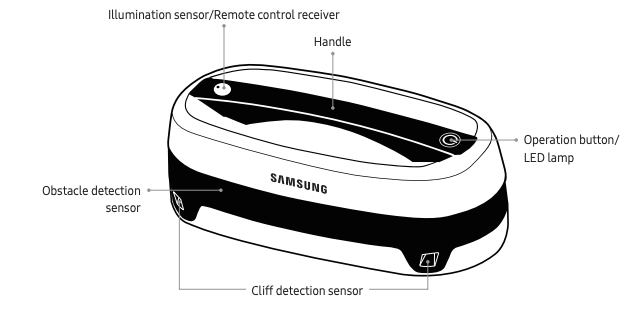
Main unit / Front
Main unit / Bottom

|
|
Main unit / Rear

|
Water supply mop kit / Top

|
|
Water supply mop kit / Bottom

|
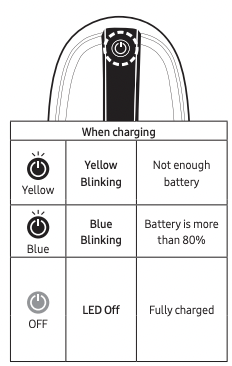
Charging status & Indication

• Only use authorized adapter. Or, it may cause serious damage to the product.
• Do not charge the non-rechargeable batteries.
How to charge
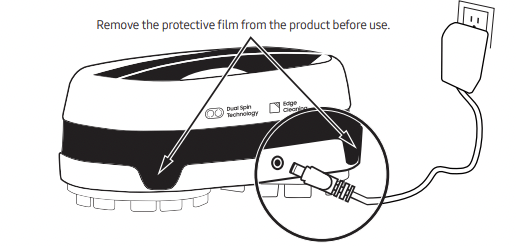
Connect the power adapter to the charging port on the back of main unit.
Battery level indication
Battery level can be checked through LED lamp.
Installing the water supply mop kit
• Please disconnect and power off the Mopping Robot when you install or detach the water supply mop kits.
• Please wring the water out of the mops prior to use, otherwise the cleaning process may slow down.
• Make sure to fill the water supply mop kit before use. Using the product without water in the water supply mop kit may cause static electricity.
How to install the water supply mop kit
|

1 Wet mops thoroughly with clean water, then wring water out.
|

2 Attach the mop pads to the water supply mop kit. (See the figure above.)
|

3 Open the rubber cap of the water supply mop kit.
|
|

4 Fill the water supply mop kit with clean water. * Water only
|

5 Close the rubber cap of the water supply mop kit and attach to the bottom of the main unit. (Pressing down while gently turning side to side. You will hear a click when they attach.)
|
Caution
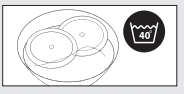
We recommend you wash the mops with detergent before first time use.

Please make sure the rubber cap is fully closed after filling the water tank. Failure to close may result in product failure or malfunction.
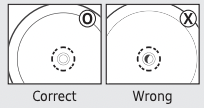
When attaching the water supply mop kit to the main unit, refer to the figure above. The main unit will not work properly if they are not attached correctly
Water supply mop kit & Mop maintenance
Washing the mops
You can use included silicon brush for easier mop washing.
|

1 Wet mops thoroughly.
|

2 Use a natural detergent for washing mops.
|

3 Squeeze out water and dry them under the sun light.
|
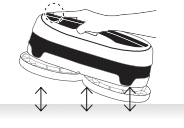
Maintaining the water supply mop kits

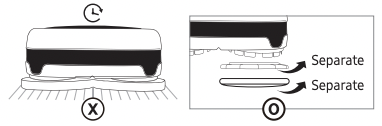
1 Separate the water supply mop kit from the main unit when cleaning operation is finished.
• Pull out the water supply mop kit by hands.
• If it is hard to pull out, twist it a little bit.
2 Open the rubber cap and pour out any remaining water from the water supply mop kit.
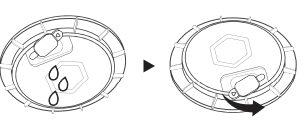
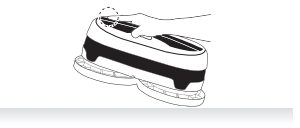
If the water supply is not working well, wash the water supply wick, as per the following pictures.

Caution Remove and allow the mop pads to dry after use. Do not leave wet mops on floors for an extended period of time, as you risk damaging your floors
Cleaning operation & Remote control
Do not use the main unit without the water supply mop kit, as it may damage the device.
Start cleaning
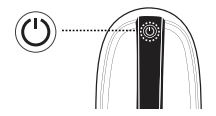
1 Press and hold the Operation button for 2 seconds until it beeps and the light stays on.
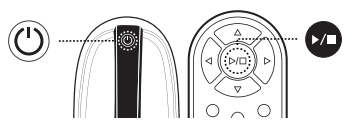
2 To start cleaning, either press the Operation button on the main unit, or press the Start/Stop button on the remote control.
• Stop the cleaning process by either pressing the Operation button on the main unit or the Start/Stop button on the remote control.
• The main unit will turn itself off after 5 minutes of inactivity. You will need to turn it back on if you want to start cleaning.
Remote control
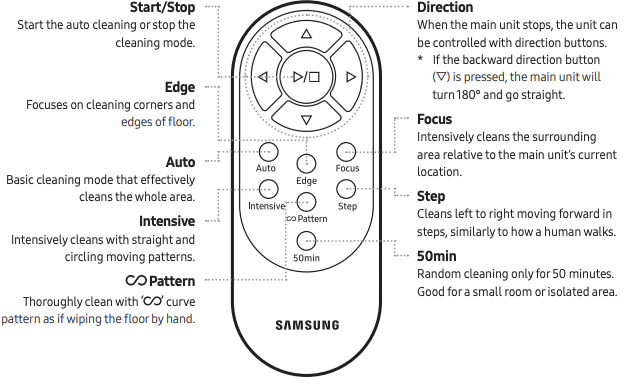
Cleaning modes
Select a cleaning mode you want by using the remote control.
|

Auto
Basic cleaning mode that effectively cleans the whole area.
|

Edge
Focuses on cleaning corners and edges of floor.
|
 Focus Focus
Intensively cleans the surrounding area relative to the main unit location.
|
|

Intensive
Intensively cleans with straight and circling moving patterns.
|

 Pattern Pattern
Thoroughly clean with  curve pattern as if wiping the floor by hands. curve pattern as if wiping the floor by hands.
|

Step
Cleans left to right moving forward in steps, similarly to how a human walks.
|
|

50min
Random cleaning only for 50 minutes. Good for a small room or isolated area.
|

Manual
Cleans with direction button keys of remote control. Only moves when the direction button is pressed.
|
|
Handy Cleaning mode & Product maintenance
• User can clean manually by holding the handle of the main unit.
• This mode is good to clean desks, tables, glass floors, and glass windows.
How to use Handy Cleaning mode
Lift the main unit by the handle, and press the Operation button twice quickly.
Press the Operation button if you want to stop the Handy Cleaning mode.
• To start the Handy Cleaning mode, make sure to hold the main unit sufficiently away from any surrounding surface before pressing the operation button twice quickly.
• When operating in the Handy Cleaning mode, all sensors are turned off.
• Do not place the main unit on the floor, table, or next to stairs, as it will bump against walls without turning around and will not sense edges/drops, leading to product damage.
• To exit the Handy Cleaning mode, press the Operation button on the main unit or Start/ Stop button on the remote control.
Cleaning sensors
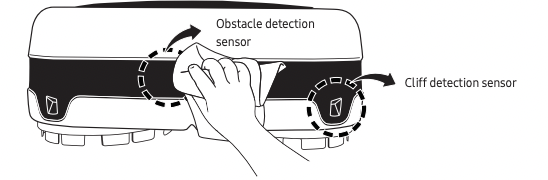
Clean obstacle detection sensors by gently wiping with a cotton swab or dry cloth
Do not use benzene or alcohol to clean sensors.
LED indications
Description of LED lamp
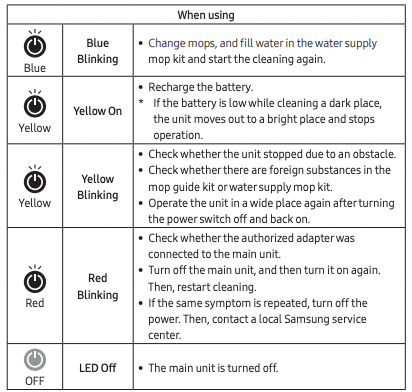
- When there is an error, the main unit will stop and sound the alarm for 5 minutes while LED blinks.
- After the alarm sounds and the LED blinks 10 times, the unit will power off after a few minutes.
This is NOT a malfunction. Please check.
|
■ LED lamp is off.

LED Off
If the machine is not used for 5 minutes, it will automatically turn itself off and the LED will go out.
LED On
If you press the Operation button for 2 sec, the LED will turn on, indicating unit is ready for use.
|
|
■ Alarm sounds while operating.

Blue blinking
After 50 min. of cleaning, the main unit will stop and sound an alarm alerting user to add water to the water supply mop kit.
For better cleaning, we recommend you recharge the unit and replace with new, clean mops.
|
Troubleshooting
 |
The unit does not turn on.
• The battery may not be charged.
• Recharge the battery fully and start the main unit again.
|
 |
The main unit does not charge.
• Check if the power adapter is correctly connected.
|
 |
Remote control does not work.
• Check if the main unit is turned on.
• Replace the remote control batteries with new ones.
• The remote control does not operate while the main unit is recharging.
• Check that the main unit is within range of the remote control (16 ft/5 m).
|
 |
The main unit does not work.
• Check if the main unit is powered on.
• Press the Operation button for 2 sec. And check if it is turned on.
• Check battery level or errors through the LED lamp.
|
 |
The movement of the main unit is abnormal during cleaning.
• Clean up the sensor windows. (refer to 12p)
• Check if the mops are properly attached on the mop kits.
|
 |
Driving or cleaning force is weak.
• Check if the water supply mop kit or the mops are installed correctly. (refer to pg 8)
• The product may get slower or the cleaning performance may decrease if the mops are too wet. In this case, wring the mops and restart the cleaning.
• Check if foreign substances like a long string are caught in the water supply mop kit or mop guide kit.
• Firmly tighten the screw of the mop guide kit on the bottom of the main unit. (refer to pg 8)
• The main unit is made to be operated in the home (floor) environments.
|
 |
The operational noise is louder than normal.
• Check if any foreign substances are caught in the rotating plate of the main unit.
• Loose screw of the rotating plate may cause noise.
|
 |
The operating time is short.
• Charge the battery until it is full.
• If the battery is completely discharged, operating time of the main unit may be shortened.
• Check if the LED lamp blinks red while charging.
• The LED lamp blinking red may be a sign indicating that battery is abnormal, so turn off and unplug the main unit. Then, contact a local Samsung service center.
|