Loading ...
Loading ...
Loading ...
15
INSTALLATION
INTEGRAL VENTILATOR INSTALLATION
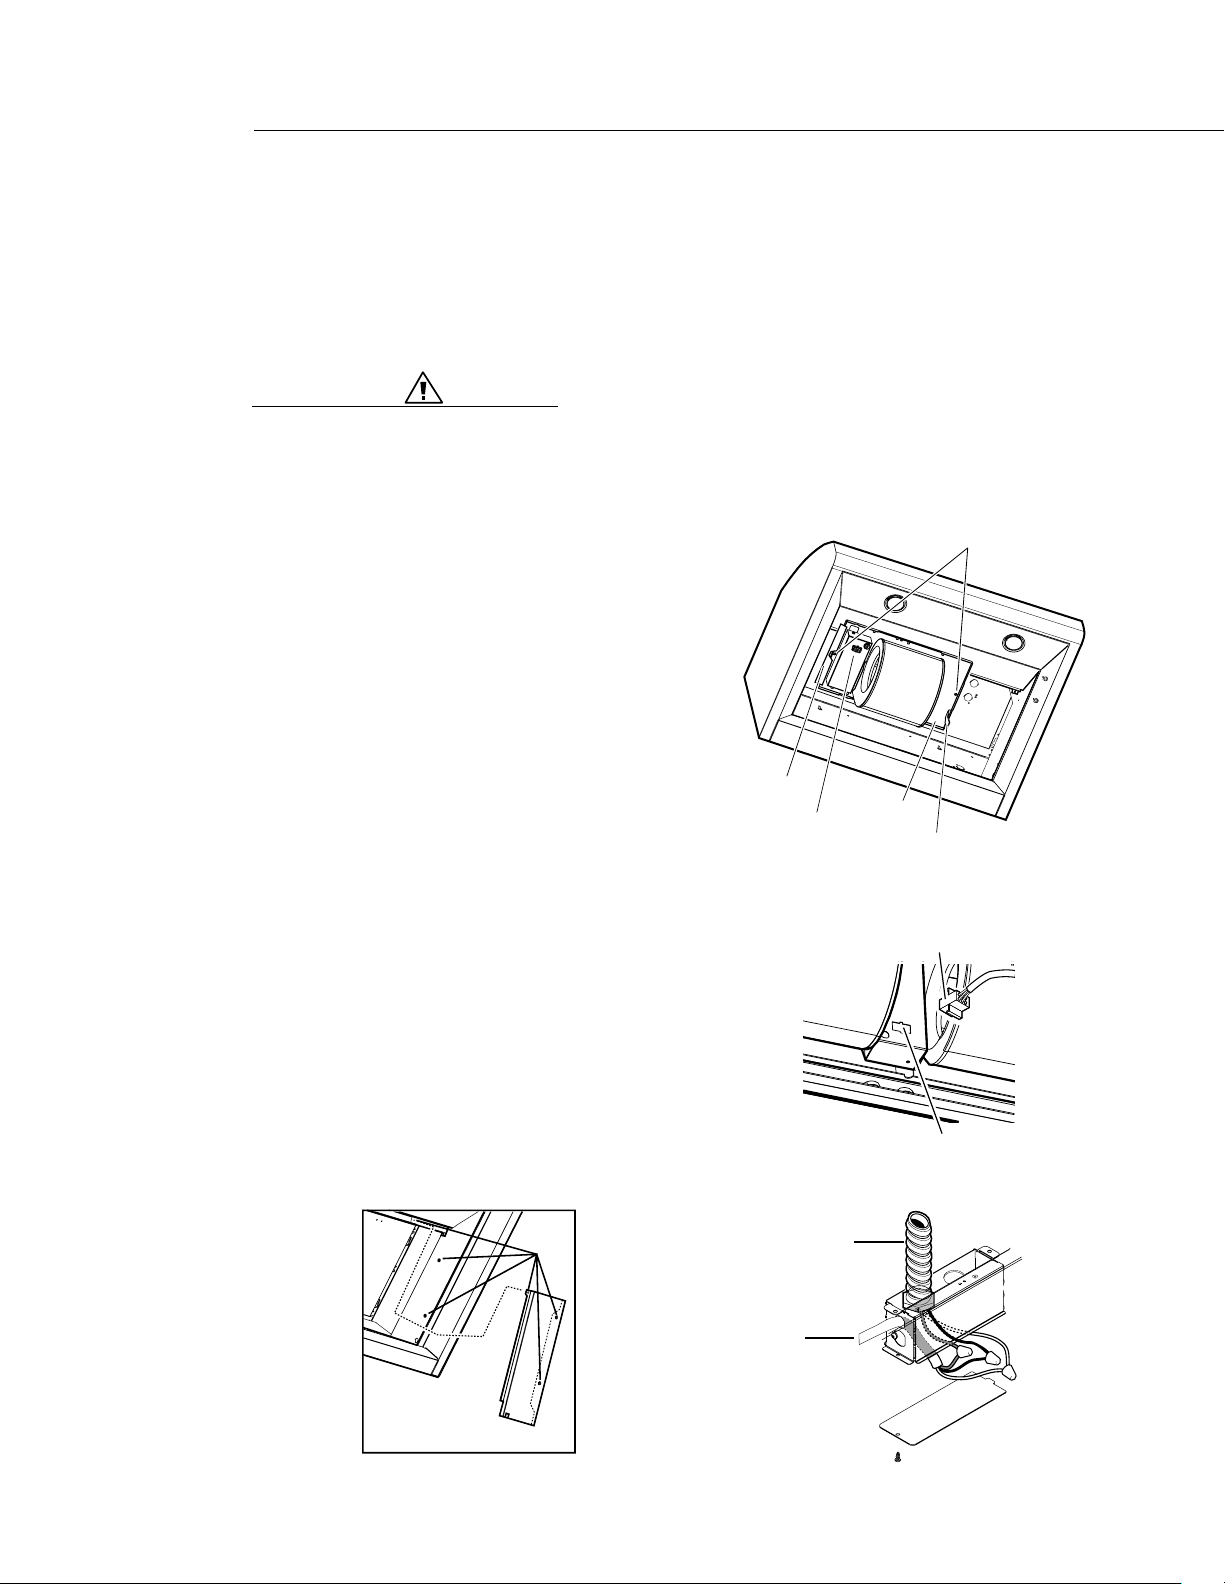
The Integral ventilator can be mounted to discharge air as shown in Figure 9. From the inside of the
hood, slip motor into the bracket on the left. Rotate motor upwards until it snaps into the spring clip
on the right.
IMPORTANT: Secure the motor to the hood with the machine screw and lock washer.
WIRING THE HOOD:
WARNING:
Turn off electricity at the service panel before wiring the unit.
Branch circuit requirement is 120V, 60Hz, 15A (minimum).
1. Connect the Integral Ventilator molex plug
connector to the connector present inside the
hood as shown in Figure 9 or Figure 10.
2. Remove the j-box cover as shown in Figure 11.
3. Remove 1 of 2 knockouts and install 1/2” conduit
connector in j-box.
4. Run black, white, and green wires (#18 AWG) in
1/2” conduit from power supply to j-box.
5. Connect the black to black (hot line) wire, white to
white (common line) wire and green/yellow wire
to ground in j-box cover.
6. Close j-box cover.
7. For ES36 only: mount the filter trim bracket
supplied on the right side of the hood. Check that
all engage points perfectly match, then fix with 3
screws as shown in figure 12.
Final installation steps
Replace filters and grease trays as described in the
Use & Care manual. Turn power on at service panel.
Check operation of the hood.
Bracket
Motor
connector
Spring clip
Integral ventilator
fixing point
Power
supply
conduit
From
control
panel
Motor
support
FIG. 11
FIG. 10
FIG. 9
FIG. 12
SCREW
LOCATIONS
Loading ...
Loading ...
Loading ...