Loading ...
Loading ...
Loading ...
14
INSTALLATION
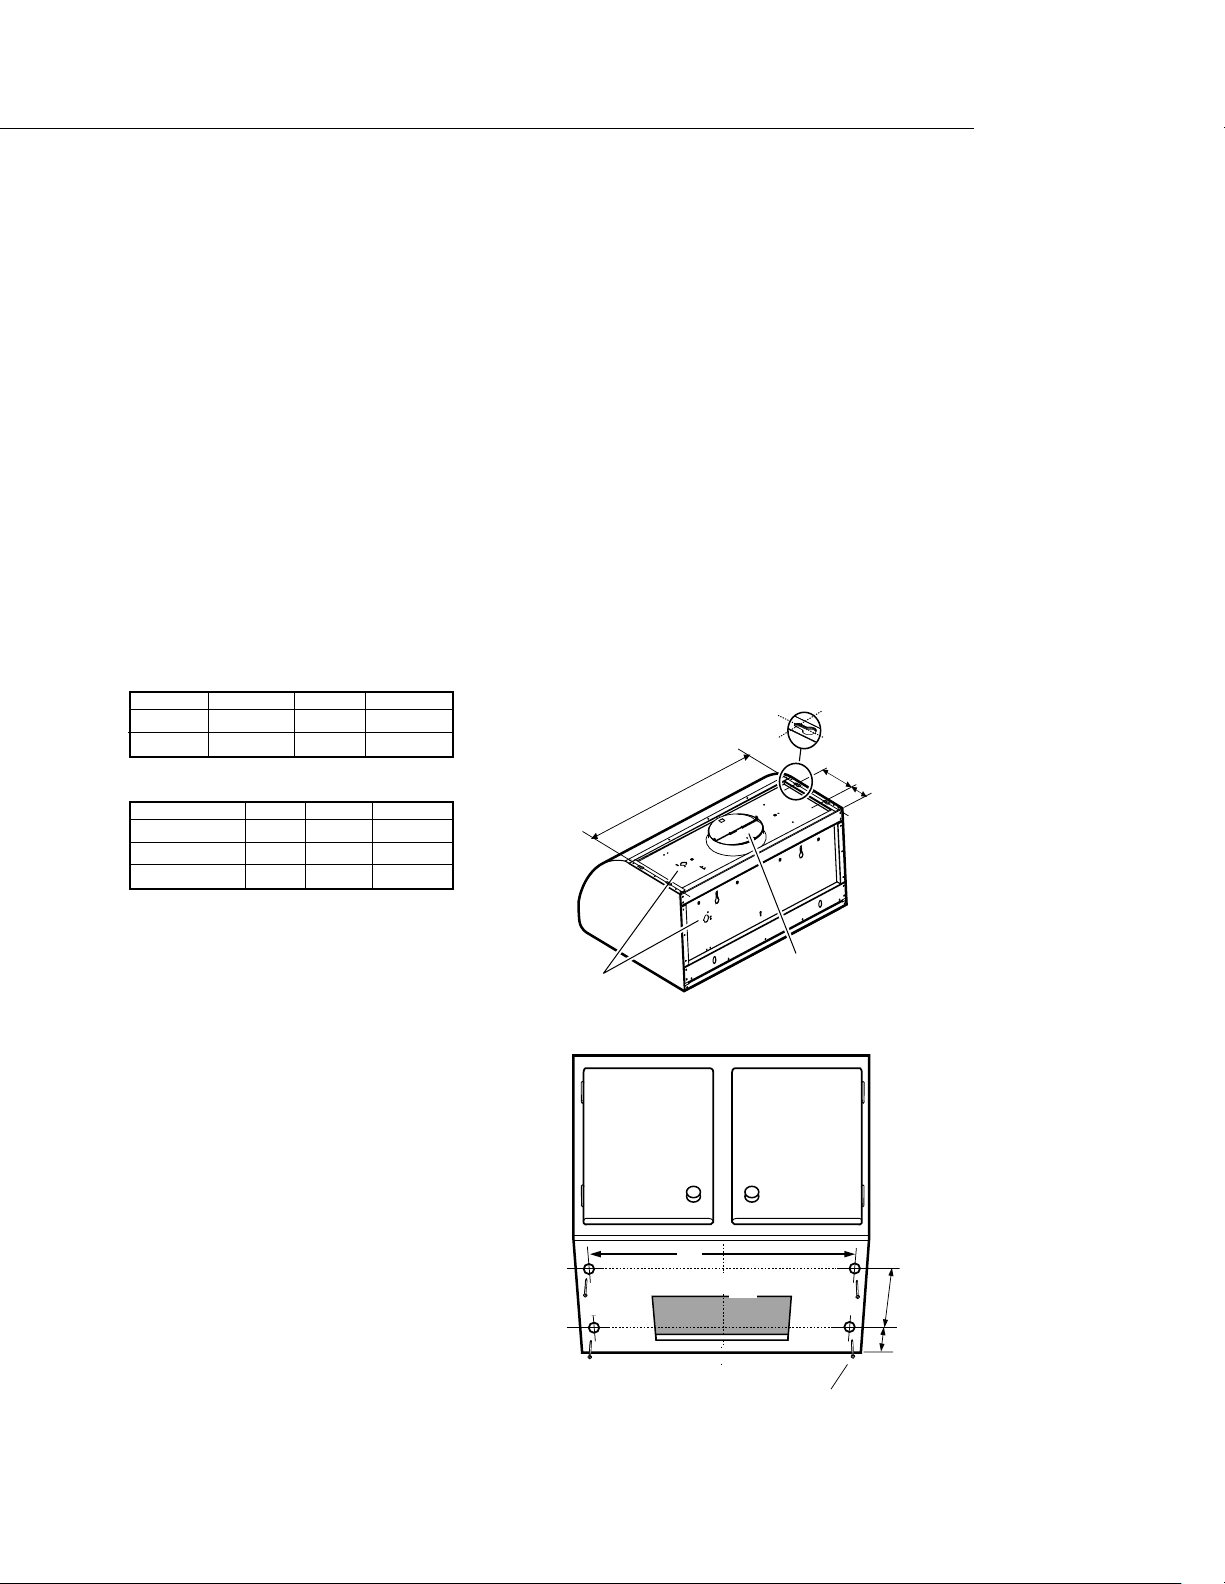
CABINET INSTALLATION
1. Find the centerline of the cabinet bottom. Draw a line along this centerline from rear to front of
the cabinet.
2. Refer to the top of the hood and Fig. 8. Draw two lines, one at distance ‘K’ from the wall, the other
one at distance ‘Z’ from the previous line. NOTE: These lines must be perpendicular to the cabinet
centerline. Mark 4 points , two along each line at a distance of half W from the center line, to
determine the screw locations.
3. Fit four #10 pan head wood screws on cabinet bottom. Do not tighten completely but leave a
space of about 1/2” from cabinet bottom surface and screw heads.
4. Hang the hood on screws through side slots provided on hood top. Tighten the four screws.
Drill a 3/8” hole through the center of the holes K into the wall. Insert two wall plugs into drilled
holes. Tighten hood to wall anchors by installing 2 screws with washers.
5. Attach duct to transition with screws and seal with duct tape. Screws must not hamper the
damper.
C/L
ww
FIG. 8
Knockouts
(junction box)
Side slot for cabinet
bottom mounting
Transition with
Backdraft (Top outlet)
Screw for cabinet bottom
installa
tion
W
Z
K
Z
K
CL
W
ES SERIES
K Z W
ES30 2-11/16" 6-7/8" 29-1/16”
ES36 2-11/16" 6-7/8" 35-1/16"
VS SERIES
K Z W
VS30 2-5/8" 7-1/16" 29-1/16"
VS36/VS1236 2-5/8" 7-1/16" 35-1/16"
VS48 2-5/8" 7-1/16" 47-1/16"
Loading ...
Loading ...
Loading ...