
Loading ...
Loading ...
Loading ...
7 8
When ready to juice, assemble your juicer following these steps.
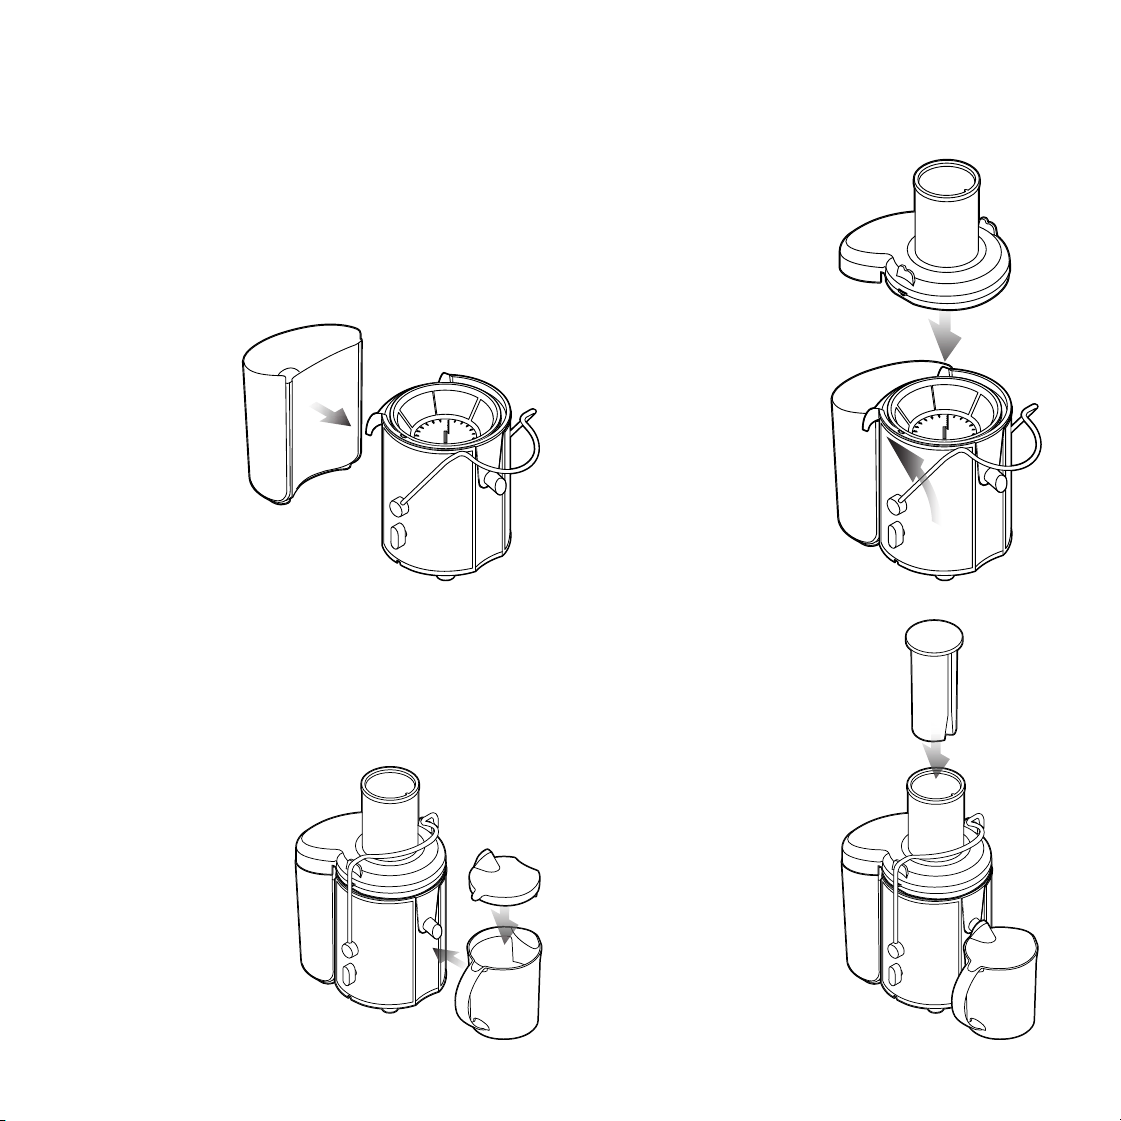
HOW TO DISASSEMBLE YOUR JUICER
To disassemble the Pro Juicer, follow these easy steps.
1. If pulp container is still in place—it does not lock on—remove
it by tilting it down and pulling it away from unit.
2. Remove the pusher from the feed tube, then unlock the safety clamp by pulling
it down and right.
3. Remove the lid, then remove the lter holder and metal lter together. Position
one hand under the spout and the other hand on the other side of unit and pull
up rmly. Carefully tap any excess pulp into the pulp container. CAUTION: Do not
use ngers to scrape away any pulp as the blades in the lter are sharp.
4. Carefully remove the metal lter.
HOW TO USE YOUR JUICER
Once assembled, the juicer is simple to operate.
1. Wash your fruits and vegetables to be juiced. Many fruits and vegetables do not
need to be peeled. If necessary, cut into pieces small enough to t in the feed tube
(see the table on p. 10 for prep suggestions).
2. Ensure your juicer is correctly assembled (see directions p. 6), then plug the unit in.
3. Turn the control knob to your selected speed.
• Use Speed 1 (Low) for softer fruits and vegetables, such as watermelon,
grapes, cucumbers, tomatoes, and raspberries. Do not use with hard
vegetables. (See chart on p. 10 for more specic suggestions.)
• Use Speed 2 (High) for all types of fruits and vegetables.
4. With the motor running, place fruits and/or vegetables in batches into the feed tube.
OPERATING INSTRUCTIONS OPERATING INSTRUCTIONS
STEP 4:
Place the pulp container in
position by tilting it slightly,
slipping the straighter
top edge underneath the
overhang of the
lter holder,
then lining up
the bottom
with the base.
STEP 6:
Put the lid on the juice pitcher
(align the semicircular tab
with the handle). Position
the Juicer's spout just inside
the large opening of the
pitcher lid. (Be sure the
black spout protector is
removed.) The handle
of the pitcher will
be facing front.
STEP 5:
Put the lid on the unit,
then lock it on by lifting
up the safety clamp and
pushing it toward the
feed tube until it snaps
into place.
STEP 7:
Have the pusher handy
to slide into the feed
tube. Note that there is a
groove in the pusher that
must align with a ridge in
the feed tube. Face the
groove toward the spout.
Loading ...
Loading ...
Loading ...