POWER
START/
STOP
T
W
MODE
PHOTO
4-170-879-11(1)
SPK-CXA
© 2010 Sony Corporation Printed in Japan
Owner’s Record
e model and serial numbers are located inside of the unit. Record the serial number
in the space provided below. Refer to them whenever you call upon your Sony dealer
regarding this product.
Model No.
SPK-CXA
Serial No.
Aide-mémoire
Les numéros de modèle et de série se situent dans l’appareil. Prendre en note le
numéro de série dans l’espace prévu di-dessous. Se reporter à ces numéros lors des
communications avec le détaillant Sony au sujet de ce produit.
Modèle no.
SPK-CXA
No de série
Camera mounting shoe
Sabot de montage de
caméscope
Zapata de montaje de
cámara
POWER button*
2
Button POWER*
2
Botón POWER*
2
PHOTO button
Bouton PHOTO
Botón PHOTO
1
English
For the Customers in the U.S.A.
CAUTION
You are cautioned that any changes or modications not expressly approved in this manual could void
your authority to operate this equipment.
NOTE:
is equipment has been tested and found to comply with the limits for a Class B digital device,
pursuant to Part 15 of the FCC Rules. ese limits are designed to provide reasonable protection
against harmful interference in a residential installation. is equipment generates, uses, and can
radiate radio frequency energy and, if not installed and used in accordance with the instructions, may
cause harmful interference to radio communications.
However, there is no guarantee that interference will not occur in a particular installation. If this
equipment does cause harmful interference to radio or television reception, which can be determined
by turning the equipment o and on, the user is encouraged to try to correct the interference by one or
more of the following measures:
Reorient or relocate the receiving antenna.
Increase the separation between the equipment and receiver.
Connect the equipment into an outlet on a circuit dierent from that to which the receiver is
connected.
Consult the dealer or an experienced radio/TV technician for help.
For the Customers in Europe
Disposal of Old Electrical & Electronic Equipment (Applicable in the European
Union and other European countries with separate collection systems)
is symbol on the product or on its packaging indicates that this product shall
not be treated as household waste. Instead it shall be handed over to the applicable
collection point for the recycling of electrical and electronic equipment. By ensuring
this product is disposed of correctly, you will help prevent potential negative
consequences for the environment and human health, which could otherwise be
caused by inappropriate waste handling of this product. e recycling of materials
will help to conserve natural resources. For more detailed information about recycling
of this product, please contact your local Civic Oce, your household waste disposal
service or the shop where you purchased the product.
< Notice for the customers in the countries applying EU Directives >
e manufacturer of this product is Sony Corporation, 1-7-1 Konan Minato-ku Tokyo, 108-0075
Japan. e Authorized Representative for EMC and product safety is Sony Deutschland GmbH,
Hedelnger Strasse 61, 70327 Stuttgart, Germany. For any service or guarantee matters please
refer to the addresses given in separate service or guarantee documents.
is Sports Pack SPK-CXA (referred to below as “
this unit
”) is exclusively for use
with the Sony digital video camera recorders (referred to below as “
camera
”)
HDR-CX370V/CX370/CX350V/CX350/CX305/CX300/CX170/CX155/CX150/
CX116/CX115/CX110, DCR-SX83/SX73/SX63/SX53/SX44/SX43/SX34/SX33.
* e above camera models may not be available in all countries/regions.
Fitting this unit to a compatible camera lets you shoot in the rain or at the seaside.
Useable at depths of up to 5m (17 feet) underwater.
For how to use your camera with this unit, refer to the operating instructions of
the camera.
Before you start recording, make sure the camera is working correctly and there is
no water leakage.
Sony accepts no liability for damage to the camera, battery, etc. or for any
recording costs if water leakage occurs as a result of incorrect use of this unit.
Precautions on use
Do not subject the front glass to strong shock, as it may crack.
Avoid opening this unit at the beach or on the water. Preparation such as installing
the camera and changing the “Memory Stick Duo” media should be done in a place
with low humidity and no salty air.
Do not throw this unit into the water.
Avoid using this unit in places with strong waves.
Avoid using this unit under the following situations:
in a very hot or humid place.
in water hotter than 40 ˚C (104 ˚F).
at temperatures lower than 0 ˚C (32 ˚F).
In these situations moisture condensation or water leakage may occur and damage
the equipment.
Avoid installing the camera in a humid place. Installing in a humid place will lead to
condensation.
Use this unit for no longer than one hour at a time in temperatures above 35 ˚C (95 ˚F).
Do not leave this unit under direct sunlight for a long period of time. If you cannot
avoid leaving this unit under direct sunlight, be sure to cover this unit with a towel or
other protection.
Do not open the buckles while holding this unit. If you do, you may drop this unit
and damage it.
Use the supplied spacer to keep this unit open if you take it onboard a plane. If it is
shut tight, changes in cabin pressure may make it dicult to open. It is recommended
that you take this unit onto a plane in the state shown in Illustration
.
If sun oil gets on this unit, be sure to wash it o thoroughly with lukewarm water.
If sun oil is le on this unit, the surface of this unit may become discolored or
damaged (cracks may appear on the surface).
Water Leakage
If water happens to leak in, stop exposing this unit to water immediately.
If the camera gets wet, take it to the nearest Sony dealer immediately.
Repair costs must be borne by the customer.
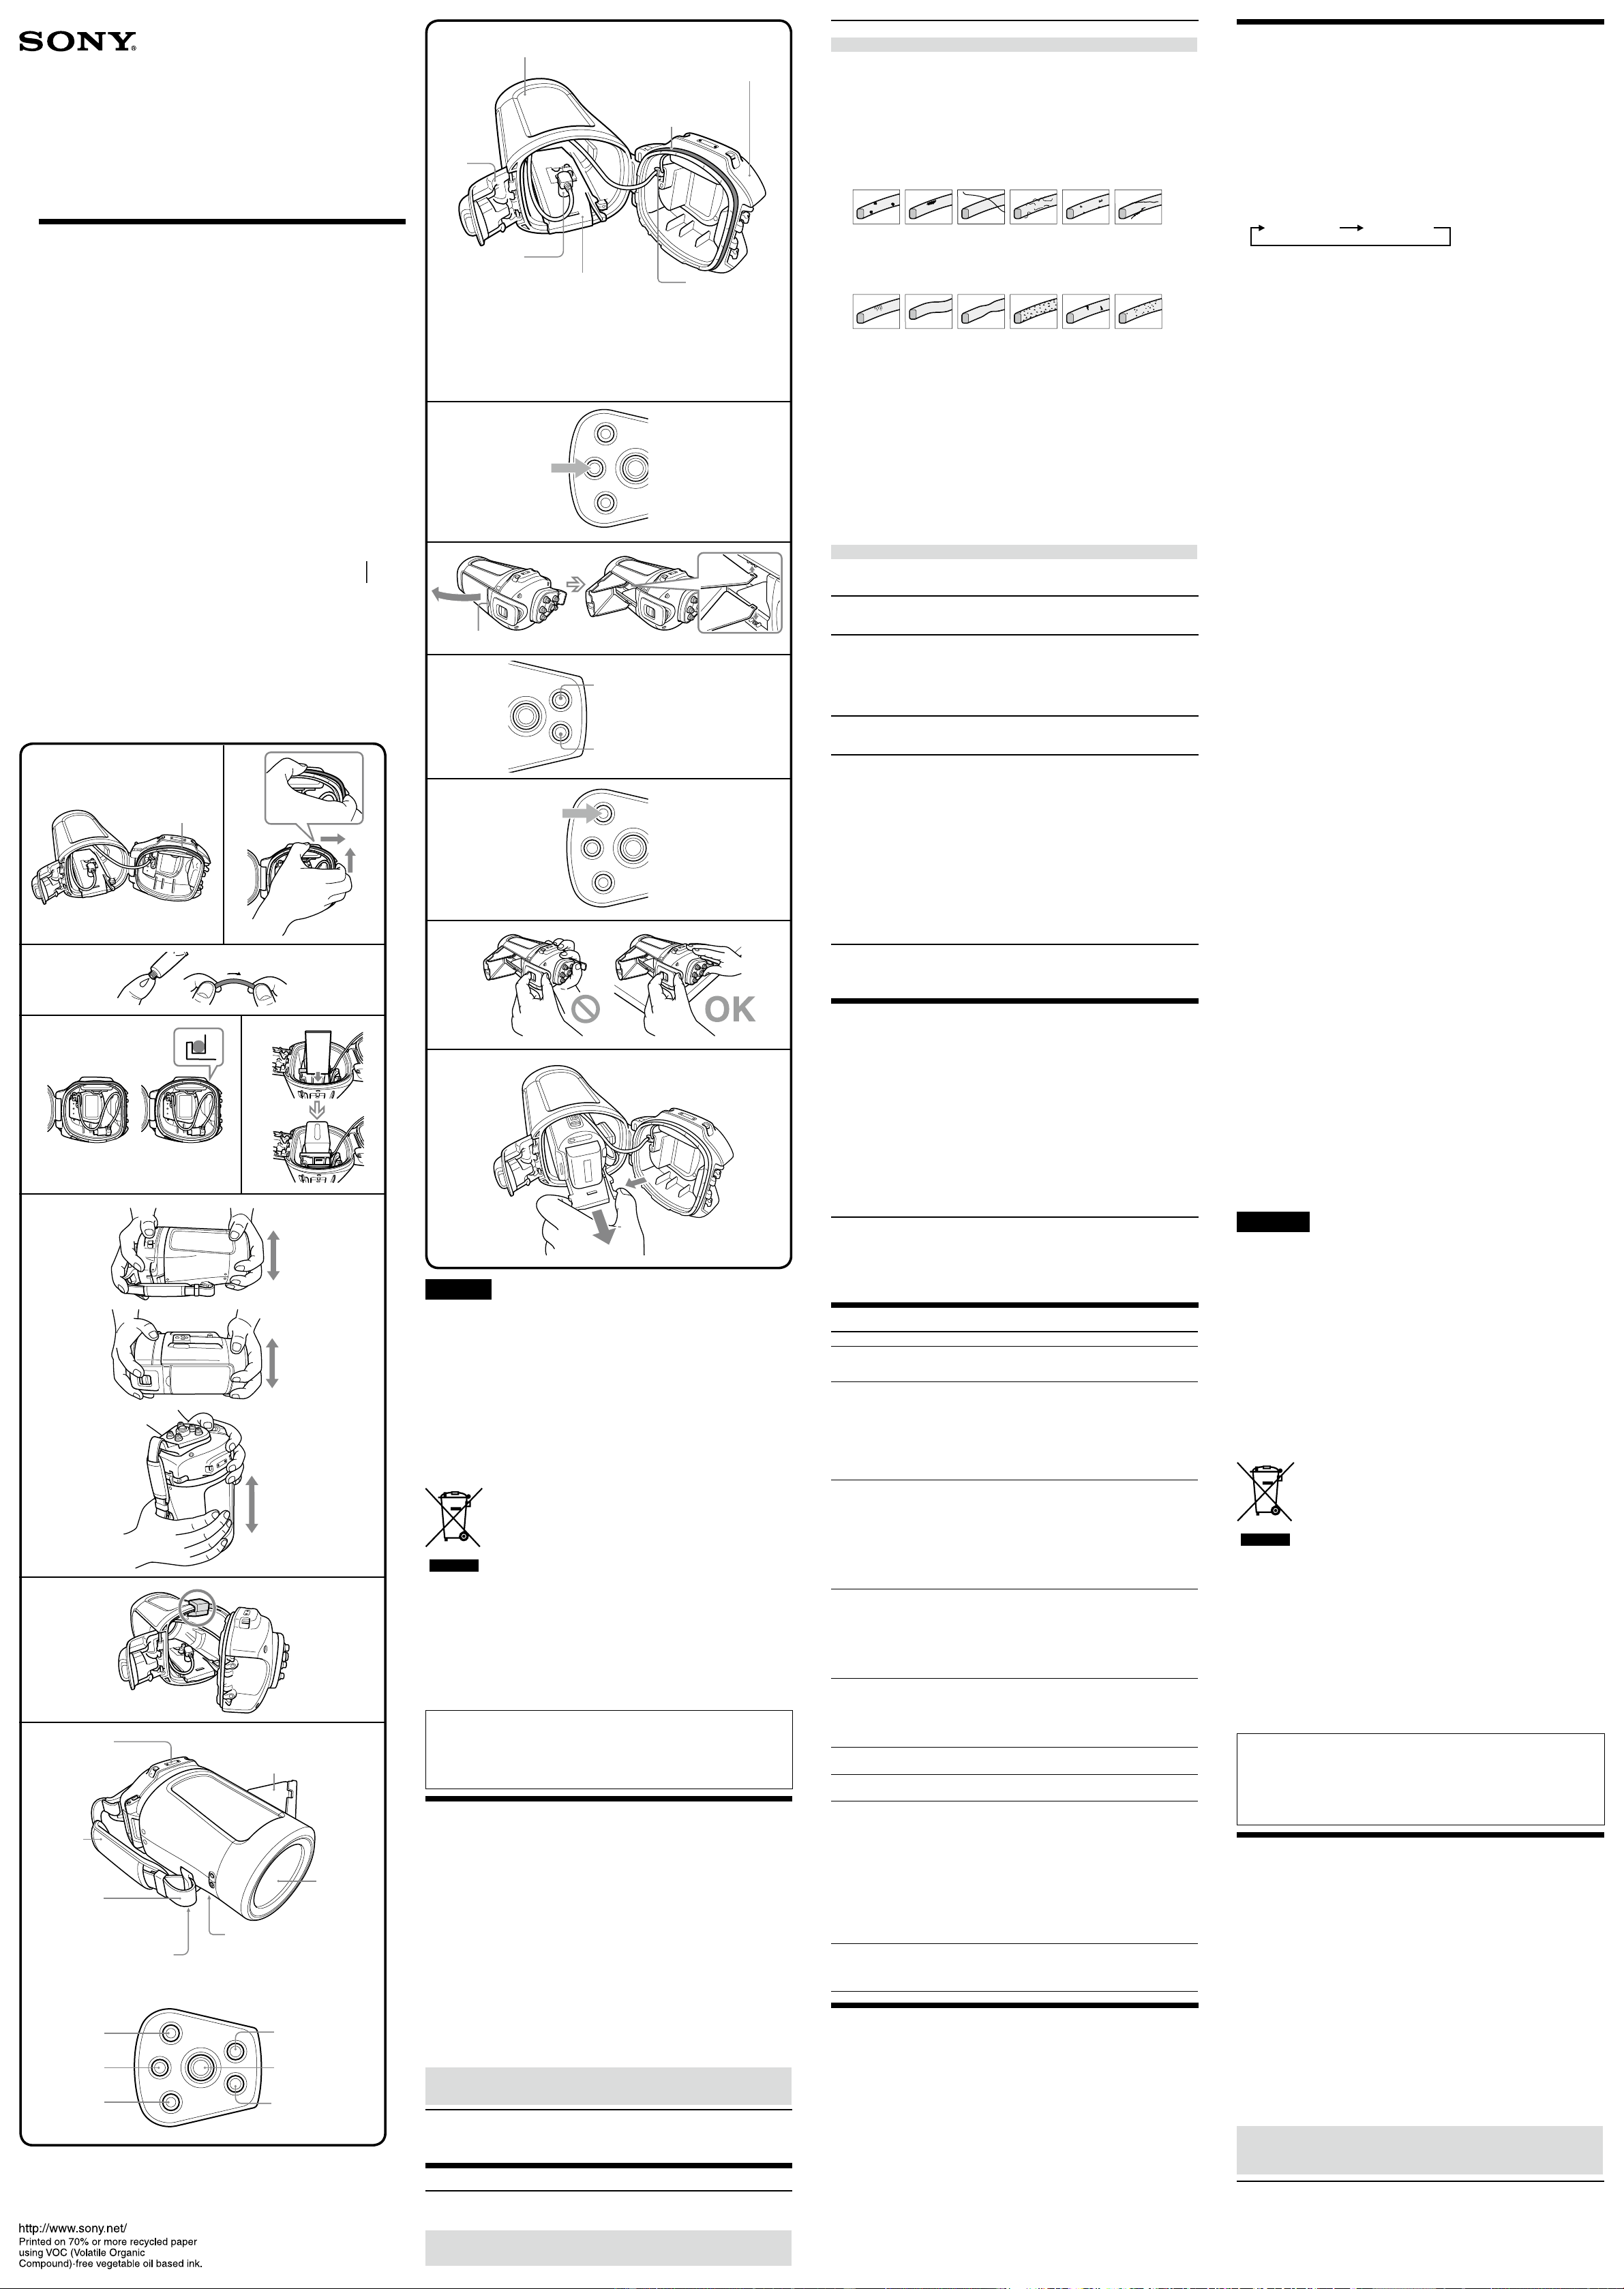
Handling the O-ring
What is the O-ring?
e O-ring ensures the waterproof qualities of this unit or other equipment. (See
illustration
)
O-ring maintenance is very important. Failure to carry out O-ring
maintenance according to the instructions may lead to water leakage and
cause this unit to sink.
Handling the O-ring
Fit the O-ring
Avoid tting the O-ring in dusty or sandy locations.
1 Remove the O-ring. (See illustration
)
To remove the O-ring, press it and slide it in the direction of the arrow as
illustrated. e O-ring has enough slack to be able to be removed easily.
Be careful not to scratch the O-ring with your ngernails.
Do not use a pointed or metal object to remove the O-ring. is kind of object
may scratch or damage this unit groove or O-ring.
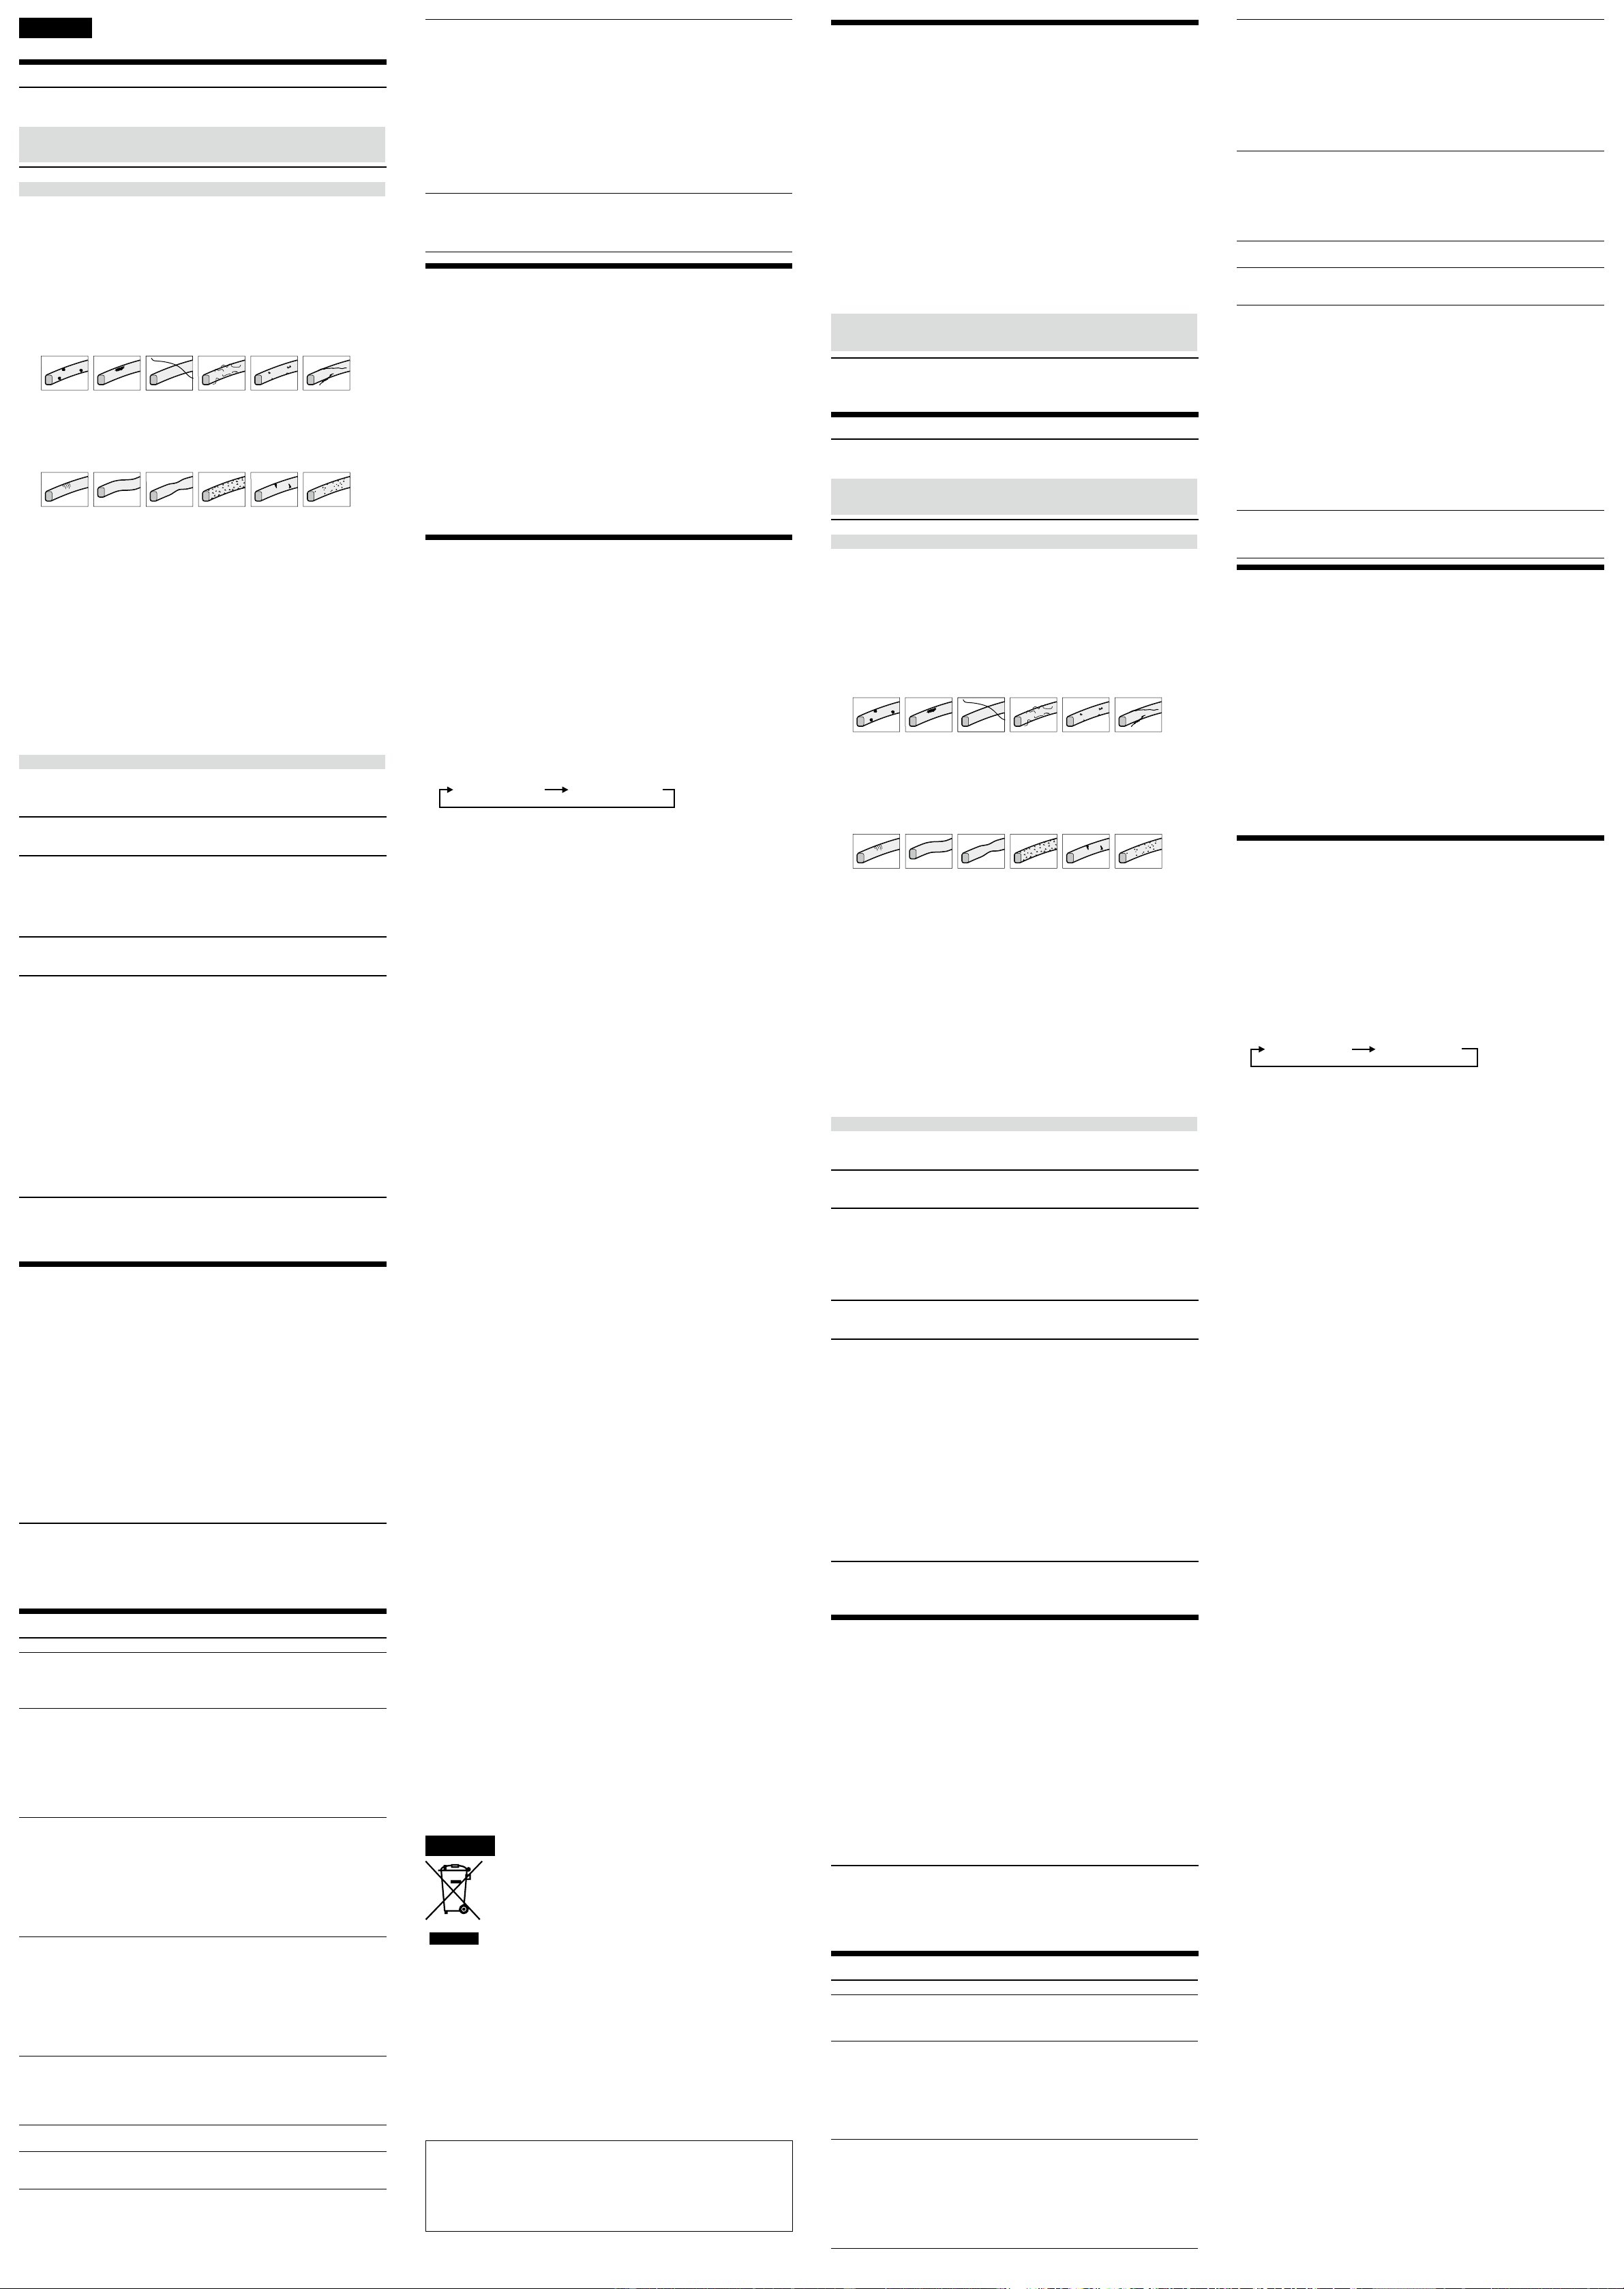
2 Inspect the O-ring.
Check carefully for the following. If found, wipe them o with a so cloth or tissue
paper.
Is there any dirt, sand, hair, dust, salt, thread scraps, etc. on the O-ring?
Is there any old grease on the O-ring?
Dirt
Sand
Hair
Dust
Salt
Thread
scraps
Lightly run your ngertip around the O-ring to check for any invisible dirt.
Be careful not to leave any cloth or tissue paper bers on the O-ring aer wiping it.
Check the O-ring for cracks, skewing, distortion, ne splitting, scratches, sand
inclusion, etc. Replace the O-ring if it is cracked or scratched.
Cracks
Skewing
Distortion
Fine
Splitting
Scratches
Sand
inclusion
3 Inspect the O-ring groove.
Grains of sand or hardened salt sometimes get into the groove. Carefully remove
them by blowing with an air spray or by wiping them with a cotton wool bud. Be
careful not to leave any bers from the cotton wool bud inside.
4 Inspect the contact surface on the other side of the O-ring in the same way.
5 Coat the O-ring with grease.
Use your ngertips to thinly coat the entire surface of the O-ring with
a small
drop of grease
. (See illustration
)
Do not use paper or cloth as bers may stick to the O-ring.
Make sure there is always a thin coating of grease on the surface of the O-ring.
Grease protects the O-ring and prevents wear.
Fit the O-ring immediately aer coating it with grease. Do not leave the greased
O-ring on a table or other surface.
6 Fit the O-ring into the groove of this unit.
Fit the O-ring evenly into the groove paying attention to the following points:
Check for dirt on the O-ring.
Check the O-ring is not twisted. (See illustration
)
How to check for water leakage
Aer replacing the O-ring, close this unit without inserting the equipment you are
going to use. Immerse this unit in water to a depth of about 15 cm for about three
minutes and check that no water leaks in.
Maintenance
If this unit is allowed to dry with sea water still in the O-ring groove, salt crystals form
which may impair the O-ring’s functions.
O-ring serviceable life
e serviceable life of the O-ring varies with frequency of use of this unit and
conditions. Generally, it is about one year.
Even if the O-ring is not cracked or scratched, deformation or wear reduces its
waterproof qualities. Replace the O-ring with a new one if you nd cracks, skewing,
distortion, ne splitting, scratches, sand inclusion, etc.
Aer replacing, check that no water leaks in.
Grease
Use the grease supplied. Using other manufacturer’s grease will damage the O-ring, and
cause water leaks.
Desiccant
Using the supplied desiccant is eective against fogging.
Insert one new desiccant into this unit 1 to 2 hours before recording.
Put the desiccant into this unit aer attaching the camera to the camera mounting shoe,
connecting the Audio/Remote plug and installing the camera into this unit.
Insert the desiccant all the way in, as illustrated. (See illustration
)
Notes
Always put the desiccant into this unit aer installing the camera.
Put the desiccant between the camera mounting shoe rails inside the front body. Be
careful not to pinch the desiccant with the camera mounting shoe.
Be careful not to catch the desiccant when you close the rear body.
Store the unused desiccant in its original bag and keep the bag rmly closed. If you
fully dry the desiccant, it can be used about 200 times.
Use a new desiccant each time to increase the anti-fogging eect.
Do not return the desiccant to the bag aer use, or you will reduce the eect of the
unused desiccant.
Do not leave the desiccant in this unit aer use.
O-ring and grease
You can obtain the O-ring and grease at the nearest Sony dealer.
O-ring (model No. 4-171-698-01)
Grease (model No. 2-582-620-01)
Maintenance
Aer using this unit underwater or near water, hold it in the position illustrated
and shake it several times to remove any water. Before storing this unit in a bag etc.,
leave it for about two hours then hold it in the position illustrated and shake it again
several times to completely remove any water. (See illustration
)
Aer recording in a location with a sea breeze, wash this unit thoroughly in fresh
water with the buckles fastened to remove salt and sand, then wipe with a so dry
cloth. It is recommended that you submerge this unit in fresh water for about 30
minutes. If salt is le on it, metal portions may become damaged or rusty and cause
water leakage. Be careful not to hit this unit with other equipment when submerging
this unit in fresh water. When the water pressure is low and the bend of the O-ring
is small, an excessive impact may cause water leakage. To remove any sand that may
have collected around the buttons, hold this unit under fresh water with the buttons
facing downwards and slowly press and release each button 2 or 3 times.
If sun oil gets on this unit, be sure to wash it o thoroughly using lukewarm water.
Wipe the inside of this unit with a so dry cloth. Do not wash it with water.
Be sure to perform the above maintenance each time you use this unit.
Do not use any type of solvent such as alcohol, benzine or thinner for cleaning, as
this might damage the surface nish of this unit.
When storing this unit
Attach the spacer supplied with this unit to prevent wear of the O-ring. (See
illustration
)
Close this unit without fastening the buckles to prevent wear of the O-ring.
Prevent dust from collecting on the O-ring.
Avoid storing this unit in a cold, very hot or humid place, or together with
naphthalene or camphor, as these conditions might damage the unit.
Troubleshooting
Symptom Cause Corrective Actions
e sound is not
recorded.
e Audio/Remote plug is
not connected.
Connect the Audio/Remote plug to
the A/V jack, A/V OUT jack or A/V
remote jack on the camera.
Water leaks into
this unit.
e buckles are not
fastened.
e O-ring is not set
correctly.
ere are scratches or
cracks on the O-ring.
e cable is caught between
the front body and rear
body.
Fasten the buckles until they click.
Place the O-ring evenly in the
groove.
Replace the O-ring with a new one.
Release the cable so that the rear
body closes tightly.
e recording
function does not
work.
e battery pack has run
out.
e Audio/Remote plug is
not connected.
e “Memory Stick Duo”
media is full.
e internal memory is full.
Charge the battery pack fully.
Connect the Audio/Remote plug
to the A/V jack, A/V OUT jack or
A/V remote jack on the camera.
Insert another “Memory Stick Duo”
media or erase unneeded data from
the “Memory Stick Duo” media.
Erase unneeded data from the
internal memory.
e power does
not turn on.
Some camera models take
a few seconds to be ready
to record aer being turned
on. is is not malfunction.
e power cannot be turned
on immediately aer being
turned o.
Check that the camera is ready
before starting to record.
Leave this unit for at least 10
seconds aer the LCD screen of the
camera turns o and then turn this
unit back on.
e button of
this unit does not
depress easily,
feels caught, or
does not return
quickly.
ere is an O-ring inside this
unit’s button.
is may occur when you use this
unit aer a long period of disuse.
is is not a malfunction.
e zoom does
not adjust.
e cable is caught on the
zoom lever.
Rearrange the cable so that it does
not catch on the zoom lever.
e buckle does
not lock.
e cable is caught between
the front body and rear body.
Release the cable so that the rear
body closes tightly.
Fogging or
condensation can
be seen.
When you open the rear body,
fogging or condensation
can sometimes be seen from
inside the rear body and front
body. e rear body and
front body of this unit are of
double-wall construction,
and fogging or condensation
can occur in the space
between the walls. is is not
a malfunction. No fogging
or condensation can occur
inside this unit.
is is not a malfunction. No action
is necessary.
e camera
mounting shoe is
sti and does not
lock.
e desiccant is caught by the
camera mounting shoe.
Release the desiccant so that it is not
caught by the camera mounting shoe.
Specications
Material
Plastic (PC, ABS), glass
Waterproof
O-ring, buckles
Built-in microphone
Stereo
Dimension
Approx. 120 × 103 × 207 mm (4 3/4 × 4 1/8 × 8 1/4 in.) (w / h / d)
(excluding the grip strap, the grip pad)
Mass
Approx. 670 g (1 lb 8 oz) (only sports pack)
Included items
Waterproof Case (1)
Shoulder strap (1)
Camera mounting shoe (A (1)/B (1))
Tripod screw plate (1)
Reex prevention ring (M30 × Ø 47 (1)/M30 × Ø 39 (1))
Grease (1)
Spacer (1)
Desiccant (1)
Set of printed documentation
Design and specications are subject to change without notice.
–
–
–
–
Using the sports pack
Preparation
1 Install the camera in this unit.
Refer to “Sports Pack Preparation Guide” to install the camera.
2 Turn on this unit.
Press the POWER button of this unit to turn on the camera and this unit. e camera
is set to the movie recording mode.
Notes
If the camera is le in Standby mode for ve minutes or more, the camera turns o
automatically to prevent the battery pack from running out.
You can change the “A.SHUT OFF” setting of this function to [Never] on the camera.
For details, refer to the operating instructions of your camera.
To return to Standby mode, turn the POWER button to “ON” again.
3 Set the mode of the camera.
Press the MODE button of this unit to switch the mode of the camera in the
following order.
Movie recording
mode
Still image
recording mode
Press the MODE button of this unit while checking the LCD screen of the camera in
the retractable mirror until the desired mode is displayed.
For details about each camera mode, refer to the operating instructions of the
camera.
Open the retractable mirror
You can record while watching the reection in the retractable mirror.
1 Open the retractable mirror by holding the “
” part.
2 Open the wings and insert the projections into their holes.
To close the retractable mirror
Release the projections on both wings, and close the lower wing rst.
Recording
Recording movies
Movies are recorded onto a “Memory Stick Duo” media or internal memory.
1 Press the MODE button of this unit to set the camera to the mode for
recording movies.
2
Press the START/STOP button.
Recording starts.
To stop recording
Press the START/STOP button.
If you press the START/STOP button once more, recording will start again.
To turn o the power
Stop recording before turning the POWER button to “OFF.”
Zooming (See illustration
)
e zoom speed is changed in two steps.
Press the zoom button gently to zoom more slowly and press it longer to zoom faster.
Press the wide button to zoom out.
Press the telephoto button to zoom in.
Recording still images
Still images are recorded onto a “Memory Stick Duo” media or internal memory.
1 Press the MODE button of this unit to set the camera to the mode for
recording still images.
2
Lightly press the PHOTO button.
e green mark at the top of the LCD screen stops ashing and remains on. You can
now record a still image.
* No image is recorded yet.
3 Firmly press the PHOTO button.
e image shown on the screen is recorded.
Some models have a Dual Rec function. For details, refer to the operating
instructions of the camera.
Notes
You cannot use Nightshot or other function for shooting in the dark with this unit.
Y
ou cannot use the camera’s built-in light, ash or tele-macro functions with this
unit.
Y
ou cannot use the SteadyShot function, Face Detection function, Auto Back Light
function, Spot (Metering, Focus) function, internal microphone of the camera with
this unit.
Y
ou cannot use the GPS that identies the location of the camera with this unit.
S
ome camera models let you select more than one recording media for movies and
still images (e.g. “Memory Stick” media plus internal memory). For details, refer to
the operating instructions of the camera.
ere are several kinds of “Memory Stick Duo” media. Dierent kinds are
compatible with dierent cameras. For details, refer to the operating instructions of
the camera.
T
o keep the camera steady when recording still images, it is recommended that you
keep your upper right arm to your body, hold the camera with the le hand too, and
press the PHOTO button with the thumb of the le hand.
W
hen recording movies, be careful not to put your ngers on the stereo
microphone.
Removing the video camera
1 Press the POWER button to turn o the camera. (See illustration
-1)
2 Release the buckles and open the rear body. (See illustration
-2)
For details, refer to step 1 of “Installing the Video Camera” in this unit’s Preparation
Guide.
Notes
Before opening this unit, wipe any moisture o this unit and yourself. Do not
allow water onto the camera.
Place this unit on a at surface such as a desktop when opening the buckles. Do
not open the buckles while holding this unit.
3 Pull out the camera mounting shoe. (See illustration
-3)
Hold in the knob on one side of the camera mounting shoe to release the lock and
slide the camera out slowly.
4 Remove the camera until the plugs connected to it are just out of this unit,
and then disconnect the plugs from the camera.
Notes
Make sure you disconnect the Audio/Remote plug properly by holding the plug
part.
If the cable is being held by the cable holder, release it.
Do not disconnect the plug by holding the cable part, or pull the camera mounting
shoe out while the plug is connected. Doing so may damage the plug or the camera’
s jack.
5 Detach the camera mounting shoe.
Français
À l’intention des clients aux É.-U.
AVERTISSEMENT
Par la présente, vous êtes avisé du fait que tout changement ou toute modication ne faisant pas
l’objet d’une autorisation expresse dans le présent manuel pourrait annuler votre droit d’utiliser
l’appareil.
Note
L’appareil a été testé et est conforme aux exigences d’un appareil numérique de Classe B,
conformément à la Partie 15 de la réglementation de la FCC.
Ces critères sont conçus pour fournir une protection raisonnable contre les interférences
nuisibles dans un environnement résidentiel. L’appareil génère, utilise et peut émettre des
fréquences radio; s’il n’est pas installé et utilisé conformément aux instructions, il pourrait
provoquer des interférences nuisibles aux communications radio.
Cependant, il n’est pas possible de garantir que des interférences ne seront pas provoquées dans
certaines conditions particulières. Si l’appareil devait provoquer des interférences nuisibles à la
réception radio ou à la télévision, ce qui peut être démontré en allumant et éteignant l’appareil,
il est recommandé à l’utilisateur d’essayer de corriger cette situation par l’une ou l’autre des
mesures suivantes :
Réorienter ou déplacer l’antenne réceptrice.
Augmenter la distance entre l’appareil et le récepteur.
Brancher l’appareil dans une prise ou sur un circuit diérent de celui sur lequel le récepteur est
branché.
Consulter le détaillant ou un technicien expérimenté en radio/téléviseurs.
Pour les clients en Europe
Traitement des appareils électriques et électroniques en n de vie (Applicable
dans les pays de l’Union Européenne et aux autres pays européens disposant
de systèmes de collecte sélective)
Ce symbole, apposé sur le produit ou sur son emballage, indique que ce produit ne
doit pas être traité avec les déchets ménagers. Il doit être remis à un point de collecte
approprié pour le recyclage des équipements électriques et électroniques. En
s’assurant que ce produit est bien mis au rebut de manière appropriée, vous aiderez
à prévenir les conséquences négatives potentielles pour l’environnement et la santé
humaine. Le recyclage des matériaux aidera à préserver les ressources naturelles. Pour
toute information supplémentaire au sujet du recyclage de ce produit, vous pouvez
contacter votre municipalité, votre déchetterie ou le magasin où vous avez acheté le
produit.
< Avis aux consommateurs des pays appliquant les Directives UE >
Le fabricant de ce produit est Sony Corporation, 1-7-1 Konan Minato-ku Tokyo, 108-0075 Japon.
Le représentant agréé pour la compatibilité électromagnétique et la sécurité du produit est Sony
Deutschland GmbH, Hedelnger Strasse 61, 70327 Stuttgart, Allemagne. Pour toute question
relative à la garantie ou aux réparations, reportez-vous à ľadresse que vous trouverez dans les
documents ci-joints, relatifs à la garantie et aux réparations.
Ce caisson sport SPK-CXA (appelé ci-dessous «
ce boîtier
») est destiné à être utilisé
exclusivement avec les caméscopes numériques Sony (appelés ci-dessous
«
le caméscope
») HDR-CX370V/CX370/CX350V/CX350/CX305/CX300/CX170/
CX155/CX150/CX116/CX115/CX110, DCR-SX83/SX73/SX63/SX53/SX44/SX43/
SX34/SX33.
*
Les modèles de caméscopes mentionnés ci-dessus ne sont pas forcément
commercialisés dans tous les pays ou toutes les régions.
La mise en place d’un caméscope compatible dans ce boîtier permet de faire des
prises de vue sous la pluie ou au bord de la mer.
Utilisable sous l’eau jusqu’à une profondeur de 5 mètres (17 pieds).
Pour la façon d’employer votre caméscope avec ce boîtier, reportez-vous au mode
d’emploi du caméscope.
Avant la prise de vue, assurez-vous que le caméscope fonctionne correctement et
que l’eau ne s’inltre pas à l’intérieur du caisson sport.
Sony décline toute responsabilité quant aux dommages subis par le caméscope,
la batterie, etc., ou aux pertes d’enregistrement, résultant d’une inltration d’eau
provoquée par une utilisation incorrecte de ce boîtier.
Précautions d’emploi
Ne soumettez pas la vitre avant à des chocs trop forts, car elle pourrait se briser.
Evitez d’ouvrir ce boîtier à la plage ou sur l’eau. Les préparatifs, tels que la mise en
place du caméscope et le remplacement du « Memory Stick Duo » doivent être
eectués à l’abri de l’humidité et de l’air salin.
Ne pas jeter ce boîtier dans l’eau.
Evitez d’utiliser ce boîtier aux endroits exposés à de fortes vagues.
Ne pas utiliser ce boîtier dans les situations suivantes :
à un endroit très chaud ou humide ;
dans une eau à plus de 40 ˚C (104 ˚F);
à des températures inférieures à 0 ˚C (32 ˚F).
Dans de telles situations, le matériel peut être endommagé par la condensation
d’humidité ou les inltrations d’eau.
Evitez d’installer le caméscope à un endroit humide. De la condensation risque de se
former à l’intérieur.
Ne pas utiliser ce boîtier pendant plus d’une heure à une température supérieure à
35 ˚C (95 ˚F).
Ne laissez pas ce boîtier en plein soleil pendant longtemps. Si ce boîtier doit rester
longtemps exposé au soleil, veillez à le recouvrir d’une serviette ou d’un tissu
quelconque.
N’ouvrez pas les fermoirs tout en tenant ce boîtier. Sinon, il risquerait de tomber et
d’être endommagé.
Utilisez l’entretoise fournie pour laisser ce boîtier ouvert si vous l’emportez au bord
d’un avion. S’il est bien fermé, les changements de pression à l’intérieur de la cabine
rendront l’ouverture plus dicile. Il est conseillé d’emporter ce boîtier dans un avion
dans l’état indiqué sur l’illustration
.
Si de l’huile solaire devait tomber sur ce boîtier, prenez soin de l’enlever avec de l’eau
tiède.
Si de l’huile solaire reste sur ce boîtier, la surface de celui-ci peut se décolorer ou
être endommagée (apparition de craquelures à la surface).
Inltration d’eau
Si de l’eau devait pénétrer dans ce boîtier, retirez-le immédiatement de l’eau.
Si le caméscope devait être mouillé, portez-le immédiatement au revendeur Sony le plus
proche.
Les frais de réparation seront à la charge du client.
–
–
–
Good example
Bon exemple
Buen ejemplo
Bad example
Mauvais exemple
Mal ejemplo
Wide button
Bouton Grand angle
Botón de gran angular
START/STOP button*
1
Bouton START/STOP*
1
Botón START/STOP*
1
Telephoto button
Bouton Téléobjectif
Botón de telefoto
MODE button
Bouton MODE
Botón MODE
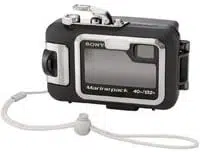
Rear body
Partie arrière
Parte posterior del hombro
O-ring
Joint torique
Junta tórica
Cable holder
Support de câble
Soporte del cable
Audio/Remote plug
Fiche Audio/
Télécommande
Clavija de control
remoto y audio
Telephoto button
Bouton Téléobjectif
Botón de telefoto
Wide button
Bouton Grand angle
Botón de gran angular
3
*1 There is a red ring mark on the top of the START/STOP button.
*2 There is a green mark on the POWER button.
*1 Une cercle rouge se trouve sur le haut du bouton START/STOP.
*2 Le bouton POWER est pourvu d’une marque verte.
*1 Existe una marca de anillo roja en la parte superior del botón START/STOP.
*2 Existe una marca verde en el botón POWER.
3
POWER
START/
STOP
MODE
PHOTO
POWER
START/
STOP
T
W
PHOTO
POWER
START/
STOP
MODE
PHOTO
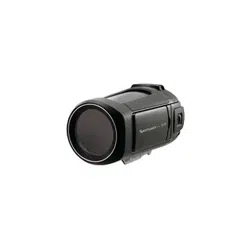
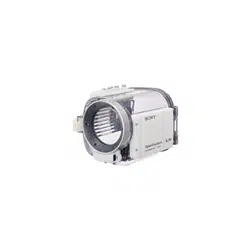
Waterproof Case
Sports Pack
Boîtier étanche
Caisson Sport
Operating Instructions
Mode d’emploi
Manual de instrucciones
O-ring
Joint torique
Junta tórica
Retractable mirror
Miroir rétractable
Espejo retráctil
Hook for shoulder strap
Crochet de bandoulière
Gancho para la correa
para el hombro
Grip strap
Sangle
Correa de la
empuñadura
Tripod mounting hole
Filetage de pied photo
Oricio de montaje en
trípode
Front glass
Vitre avant
Vidrio frontal
Stereo microphone
Microphone stéréo
Micrófono estéreo
Grip pad
Coussinet de
sangle
Almohadilla
de la
empuñadura
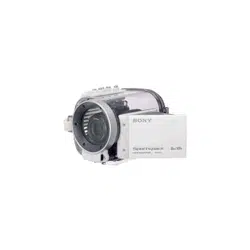
Front body
Partie avant
Parte frontal del cuerpo
Buckle
Fermoir
Hebilla
2
(Suite à la page arrière)
Entretien du joint torique
Qu’est-ce que le joint torique ?
Le joint torique assure l’étanchéité de ce boîtier et de l’appareil qu’il contient. (Voir
l’illustration
)
L’entretien du joint torique est très important. De l’eau risque de pénétrer
à l’intérieur de ce boîtier et de le faire couler si vous ne nettoyez pas
correctement le joint torique.
Entretien du joint torique
Mise en place du joint torique
Évitez de mettre le joint torique en place à un endroit poussiéreux ou sableux.
1 Retirez le joint torique. (Voir l’illustration
)
Pour retirer le joint torique, appuyez légèrement dessus, puis faites-le glisser
dans le sens de la èche, comme indiqué sur l’illustration. Le joint torique est
susamment souple pour être facilement retiré.
Veillez à ne pas abîmer le joint torique avec vos ongles.
N’utilisez pas d’objet pointu ou métallique pour retirer le joint torique. Ce type
d’objet risque de rayer ou d’endommager la rainure de ce boîtier ou le joint torique.
2 Inspectez le joint torique.
Vériez soigneusement les points suivants. Si nécessaire, essuyez le joint torique
avec un chion doux ou un mouchoir en papier.
Présence de saletés, grains de sable, cheveux, poussière, sel, ls, etc. sur le joint
torique ?
Présence de vieille graisse sur le joint torique ?
Saleté
Sable
Cheveu
Poussière
Sel
Fils
Passez légèrement votre doigt sur le joint torique pour repérer les saletés invisibles.
Veillez à ne pas laisser de bres de tissu ou de papier sur le joint torique après
l’avoir nettoyé.
Assurez-vous que le joint torique ne présente aucune craquelure, déformation,
irrégularité, coupure, éraure, incrustation de sable, etc. Remplacez-le s’il est
craquelé ou rayé.
Craquelure
Déformation
Irrégularité
Coupure
Éraure
Incrustation
de sable
3 Inspectez la rainure du joint torique.
Des grains de sable ou de sel s’incrustent parfois dans la rainure. Retirez-les
soigneusement à l’aide d’un pulvérisateur à air ou essuyez-les avec un disque de
coton. Veillez à ne pas laisser de bres de coton à l’intérieur.
4 Inspectez de la même manière la surface en contact avec l’autre côté du
joint torique.
5
Mettez de la graisse sur le joint torique.
Avec le bout du doigt, étalez
une petite goutte de graisse
en ne couche sur
toute la surface du joint torique. (Voir l’illustration
)
N’utilisez pas de mouchoir en papier ni de tissu, car les bres risquent de coller au
joint torique.
Assurez-vous qu’une ne couche de graisse recouvre toujours la surface du joint
torique. La graisse protège le joint torique et l’empêche de s’user.
Fixez le joint torique immédiatement après l’avoir enduit de graisse. Ne posez pas
le joint torique enduit de graisse sur une table ou une surface.
6 Insérez le joint torique dans la rainure de ce boîtier.
Insérez le joint torique uniformément dans la rainure en prêtant attention aux points
suivants :
Assurez-vous qu’il n’y a pas de saleté sur le joint torique.
Assurez-vous que le joint torique n’est pas tordu. (Voir l’illustration
)
Vérication de l’étanchéité
Après avoir remis le joint torique en place, fermez ce boîtier sans mettre à l’intérieur
l’appareil que vous voulez utiliser. Plongez ce boîtier dans l’eau à une profondeur de
15 cm environ pendant trois minutes environ et assurez-vous que de l’eau ne pénètre
pas à l’intérieur.
Entretien
Si vous laissez sécher ce boîtier sans enlever l’eau de mer de la rainure du joint torique,
des cristaux de sel se formeront et réduiront l’étanchéité du joint torique.
Durée de vie du joint torique
La durée de vie du joint torique varie selon la fréquence et les conditions d’utilisation de
ce boîtier. Le joint torique dure environ un an.
Même si le joint torique n’est ni craquelé ni rayé, toute déformation ou usure réduit
ses qualités d’étanchéité. Remplacez le joint torique par un nouveau s’il présente des
craquelures, déformations, irrégularités, coupures, rayures, incrustations de sable, etc.
Une fois le remplacement eectué, assurez-vous que le boîtier est étanche.
Graisse
Utilisez la graisse fournie. L’emploi de graisse d’une autre marque peut endommager le
joint torique et causer des inltrations d’eau.
Dessiccatif
Le dessiccatif fourni empêche la formation de buée.
Insérez un nouveau dessiccatif dans ce boîtier 1 à 2 heures avant l’enregistrement.
Mettez le dessiccatif dans ce boîtier après avoir rattaché le caméscope au sabot de
montage de caméscope, branché la che Audio/Télécommande et installé le caméscope
dans ce boîtier.
Insérez le dessiccatif tout au fond, comme indiqué sur l’illustration. (Voir l’illustration
)
Remarques
Mettez toujours le dessiccatif dans ce boîtier après avoir installé le caméscope.
Placez le dessiccatif entre les rails du sabot de montage de caméscope dans la partie
avant du caisson. Veillez à ne pas coincer le dessiccatif avec le sabot de montage de
caméscope.
Veillez à ne pas prendre le dessiccatif lorsque vous fermez la partie arrière du boîtier.
Rangez le dessicatif inutilisé dans son emballage original et fermez bien celui-ci. Le
dessicatif peut être utilisé 200 fois environ si vous le séchez toujours bien.
Utilisez chaque fois un nouveau dessiccatif an d’augmenter l’eet antibuée.
Ne remettez pas le dessiccatif dans l’emballage après utilisation, cela réduirait l’eet du
dessiccatif non utilisé.
Ne laissez pas le dessiccatif dans ce boîtier après utilisation.
Joint torique et graisse
Vous pouvez vous procurer un joint torique et de la graisse auprès du revendeur Sony le
plus proche.
Joint torique (Référence : 4-171-698-01)
Graisse (référence : 2-582-620-01)
Entretien
Après avoir utilisé ce boîtier sous l’eau ou près de l’eau, prenez-le de la façon illustrée
et secouez-le plusieurs fois pour faire sortir l’eau. Avant de ranger ce boîtier dans un
sac, etc., laissez-le reposer environ deux heures, puis prenez-le de la façon illustrée et
secouez-le plusieurs fois pour faire sortir toute l’eau. (Voir l’illustration
)
Après une prise de vue à un endroit exposé à la brise marine, lavez soigneusement ce
boîtier à l’eau douce, en laissant bloqués les fermoirs, pour enlever le sel et le sable,
puis essuyez-le avec un chion doux et sec. Il est conseillé de laisser ce boîtier dans
de l’eau douce pendant 30 minutes environ. Si du sel reste sur le boîtier, les pièces
métalliques risquent d’être endommagées ou de rouiller, et de causer par la suite des
inltrations d’eau. Veillez à ne pas cogner ce boîtier contre autre chose lorsque vous
l’immergez dans l’eau fraîche. Lorsque la pression de l’eau est faible et que le cintrage
du joint torique est réduit, un impact excessif peut provoquer une inltration d’eau.
Pour éliminer le sable accumulé autour des boutons, tenez ce boîtier sous l’eau douce
avec les boutons orientés vers le bas et appuyez 2 ou 3 fois lentement sur les boutons
et relâchez-les.
Si de l’huile solaire devait tomber sur ce boîtier, prenez soin de l’enlever avec de l’eau
tiède.
Essuyez l’intérieur de ce boîtier avec un chion doux et sec. Ne le lavez pas à l’eau.
Eectuez toutes les opérations mentionnées ci-dessus chaque fois que vous utilisez ce
boîtier.
N’utilisez pas de solvant, comme de l’alcool, de la benzine ou du diluant pour le
nettoyage, car ces substances peuvent attaquer la nition de ce boîtier.
Avant de ranger ce boîtier
Fixez l’entretoise fournie avec ce boîtier pour que le joint torique ne s’use pas. (Voir
l’illustration
)
Fermez ce boîtier sans verrouiller les fermoirs pour limiter l’usure du joint torique.
Eviter d’exposer le joint torique à la poussière.
Ne rangez pas ce boîtier à un endroit froid, très chaud ou humide, ou à proximité de
naphtaline ou de camphre. Cela pourrait l’endommager.
Résolution de problèmes
Symptôme Cause Solutions
Le son n’est pas
enregistré.
La che Audio/
Télécommande n’est pas
raccordée.
Branchez la che Audio/
Télécommande sur la prise A/V,
la prise A/V OUT ou la prise
de télécommande A/V de votre
caméscope.
De l’eau pénètre
dans ce boîtier.
Les fermoirs ne sont pas
bloqués.
Le joint torique n’a pas été
mis en place correctement.
Le joint torique présente
des craquelures ou des
rayures.
Le câble est pris entre la
partie avant et la partie
arrière du boîtier.
Un clic doit être audible lorsque
vous bloquez les fermoirs.
Placez le joint torique uniformément
dans la rainure.
Remplacez le joint torique par un
neuf.
Libérez le câble de sorte que la
partie arrière se ferme bien.
La prise de vue n’
est pas possible.
La batterie est épuisée.
La che de télécommande
n’est pas raccordée.
Le « Memory Stick Duo »
est plein.
La mémoire interne est
pleine.
Rechargez complètement la batterie.
Branchez la che Audio/
Télécommande sur la prise A/V,
la prise A/V OUT ou la prise de
télécommande A/V de votre
caméscope.
Insérez un autre « Memory Stick
Duo » ou eacez les données inutiles
du « Memory Stick Duo. »
Eacez les données inutiles de la
mémoire interne.
La mise sous
tension n’est pas
possible.
Certains modèles de
caméscopes n’enregistrent
pas dès leur mise sous
tension, il faut attendre
quelques secondes. Il ne
s’agit pas d’une
défectuosité.
Impossible de mettre sous
tension immédiatement
après la mise hors tension.
Assurez-vous que le caméscope est
prêt avant d’enregistrer.
Laissez ce boîtier au repos au moins
10 secondes après l’extinction de
l’écran LCD du caméscope, puis
remettez-le sous tension.
Le bouton de ce
boîtier ne s’enfonce
pas facilement,
semble se coincer
ou ne ressort pas
rapidement.
Il y a un joint torique à
l’intérieur du bouton de ce
boîtier.
Ceci peut se produire si le boîtier
n’a pas été utilisé pendant un
certains temps. Il ne s’agit pas d’une
défectuosité.
Le zoom ne se
règle pas.
Le câble est pris sur le levier
de zoom.
Replacez le câble de sorte qu’il ne se
coince pas sur le levier de zoom.
Le fermoir ne se
verrouille pas.
Le câble est pris entre la
partie avant et la partie
arrière du boîtier.
Libérez le câble de sorte que la partie
arrière se ferme bien.
–
–
–
–
Apparition
de buée ou de
condensation.
Lorsque vous ouvrez la
partie arrière, de la buée ou
de la condensation peuvent
parfois apparaître de
l’intérieur de la partie avant
et de la partie arrière. La
partie arrière et la partie
avant de ce boîtier ont une
double paroi, et de la buée
ou condensation peut se
former dans l’espace entre
les parois. Il ne s’agit pas
d’une défectuosité. Il ne se
forme pas de buée ou de
condensation à l’intérieur
même de ce boîtier.
Il ne s’agit pas d’une défectuosité.
Aucune mesure n’est à prendre.
Le sabot de
montage de
caméscope est
bloqué et ne se
verrouille pas.
Le dessiccatif est coincé
par le sabot de montage de
caméscope.
Libérez le dessiccatif de sorte
qu’il ne soit pas coincé par le sabot de
montage de caméscope.
Spécications
Matériau
Plastique (PC, ABS), verre
Etanchéité
Joint torique, fermoirs
Microphone intégré
Stéréo
Dimensions
Environ 120 × 103 × 207 mm (4 3/4 × 4 1/8 × 8 1/4 po.) (l / h / p)
(sans la sangle, le coussinet de sangle)
Poids
Environ 670 g (1 li 8 oz) (caisson sport uniquement)
Articles inclus
Boîtier étanche (1)
Bandoulière (1)
Sabot de montage de caméscope (A (1)/B (1))
Plaquette à vis (1)
Bague antireet (M30 × Ø 47 (1)/M30 × Ø 39 (1))
Graisse (1)
Entretoise (1)
Dessiccatif (1)
Jeu de documents imprimés
La conception et les spécications peuvent être modiées sans préavis.
Utilisation du caisson sport
Préparation
1 Installez le caméscope dans ce boîtier.
Reportez-vous au « Guide de préparation du caisson sport » pour installer le
caméscope.
2 Mettez ce boîtier sous tension.
Appuyez sur le bouton POWER de ce boîtier pour mettre le caméscope et ce boîtier
sous tension. Le caméscope se met en mode d’enregistrement de lm.
Remarques
Si le caméscope reste cinq minutes ou plus en mode de veille, il se met
automatiquement hors tension pour éviter d’user la batterie.
Vous pouvez changer le réglage « A.SHUT OFF » de cette fonction et spécier [Never]
sur le caméscope.
Pour de plus amples informations, reportez-vous au mode d’emploi de votre
caméscope.
Pour revenir en mode de veille, mettez de nouveau le bouton POWER en position
« ON ».
3 Sélectionnez le mode du caméscope.
Appuyez sur le bouton MODE de ce boîtier pour changer le mode du caméscope
comme suit.
Mode d’enregistrement
de lm
Mode d’enregistrement
de photos
Appuyez sur le bouton MODE de ce boîtier tout en regardant l’écran LCD du
caméscope dans le miroir rétractable jusqu’à ce que le mode souhaité apparaisse.
Pour le détail sur chaque mode du caméscope, reportez-vous au mode d’emploi du
caméscope.
Ouverture du miroir rétractable
Vous pouvez lmer tout en regardant les images se rééchissant sur le miroir
rétractable.
1 Ouvrez le miroir rétractable par la partie «
».
2 Ouvrez les volets et insérez les languettes dans les orices.
Pour refermer le miroir rétractable
Détachez les languettes sur les deux volets et fermez d’abord le volet inférieur.
Enregistrement
Enregistrement de lms
Les lms sont enregistrés sur un « Memory Stick Duo » ou dans la mémoire interne.
1 Appuyez sur le bouton MODE de ce boîtier pour mettre le caméscope en
mode d’enregistrement de lms.
2
Appuyez sur le bouton START/STOP.
L’enregistrement commence.
Pour arrêter l’enregistrement
Appuyez sur le bouton START/STOP.
Si vous appuyez de nouveau sur le bouton START/STOP, l’enregistrement se poursuit.
Pour mettre le caméscope hors tension
Arrêtez l’enregistrement avant de mettre le bouton POWER en position « OFF. »
Zoom (Voir l’illustration
)
La vitesse du zoom change sur deux niveaux.
Appuyez légèrement sur le bouton de zoom pour eectuer un zoom plus lentement et
appuyez plus longuement sur le bouton pour eectuer un zoom plus rapide.
Appuyez sur le bouton Grand angle pour eectuer un zoom arrière.
Appuyez sur le bouton Téléobjectif pour eectuer un zoom avant.
Enregistrement de photos
Les photos sont enregistrées sur un « Memory Stick Duo » ou dans la mémoire interne.
1 Appuyez sur le bouton MODE de ce boîtier pour mettre le caméscope en
mode d’enregistrement de photos.
2
Appuyez légèrement sur le bouton PHOTO.
La marque verte au haut de l’écran LCD cesse de clignoter et reste achée. Vous
pouvez à présent prendre une photo.
* La photo n’est pas encore enregistrée.
3 Appuyez fermement sur le bouton PHOTO.
La photo apparaissant sur l’écran est enregistrée.
Certains modèles présentent une fonction Dual Rec. Pour le détail, reportez-
vous au mode d’emploi du caméscope.
Remarques
Vous ne pouvez pas utiliser la fonction Nightshot ou les fonctions destinées à la prise
de vue nocturne avec ce boîtier.
V
ous ne pouvez pas utiliser la lumière intégrée, le ash ou la fonction télé-macro du
caméscope avec ce boîtier.
V
ous ne pouvez pas utiliser la fonction SteadyShot, la fonction de Détection de
visages, la fonction de Rétroéclairage auto, la fonction Ponctuelle (Mesure de la
lumière, Mise au point) ni le microphone interne du caméscope avec ce boîtier.
V
ous ne pouvez pas utiliser le GPS qui identie l’emplacement du caméscope avec ce
boîtier.
C
ertains modèles de caméscope permettent de sélectionner plus d’un support d’
enregistrement pour les lms et les photos (par ex. un « Memory Stick » plus la
mémoire interne). Pour le détail, reportez-vous au mode d’emploi du caméscope.
Il exi
ste plusieurs types de « Memory Stick Duo ». Diérents types sont compatibles
avec diérents caméscopes. Pour le détail, reportez-vous au mode d’emploi du
caméscope.
P
our maintenir le caméscope immobile pendant l’enregistrement de photos, il est
conseillé de plaquer l’avant-bras droit contre le corps, de tenir le caméscope avec la
main gauche et d’appuyer sur le bouton PHOTO avec le pouce de la main gauche.
P
endant l’enregistrement de lms, veillez à ne pas poser les doigts sur le microphone
stéréo.
Retrait du caméscope
1 Appuyez sur le bouton POWER pour mettre le caméscope hors tension. (Voir
l’illustration
-1)
2
Débloquez les fermoirs et ouvrez la partie arrière. (Voir l’illustration
-2)
Pour le détail, reportez-vous à l’étape 1 de « Installation du caméscope » dans le
Guide de préparation de ce boîtier.
Remarques
Avant d’ouvrir ce boîtier, essuyez toute l’humidité sur le boîtier et vous-même.
Evitez de laisser tomber de l’eau sur le caméscope.
Posez ce boîtier sur une surface plane, par exemple un bureau, avant d’ouvrir les
fermoirs. N’ouvrez pas les fermoirs tout en tenant ce boîtier.
3 Détachez le sabot de montage de caméscope. (Voir l’illustration
-3)
Appuyez sur le bouton sur le côté du sabot de montage de caméscope pour libérer le
verrou et sortez lentement le caméscope en le faisant glisser.
4 Retirez le caméscope jusqu’à ce que les ches branchées dessus
apparaissent hors de ce boîtier, puis débranchez ces ches du caméscope.
Remarques
Veillez à débrancher correctement la che Audio/Télécommande en saisissant la
che.
Si le câble est retenu par le support de câble, détachez-le.
Ne débranchez pas la che en tirant sur le câble, et ne tirez pas sur le sabot de
montage de caméscope lorsque la che est branchée. La che ou la prise du
caméscope pourrait être endommagée.
5 Détachez le sabot de montage de caméscope.
Español
Tratamiento de los equipos eléctricos y electrónicos al nal de su vida
útil (aplicable en la Unión Europea y en países europeos con sistemas de
recogida selectiva de residuos)
Este símbolo en el equipo o el embalaje indica que el presente producto no puede
ser tratado como residuos domésticos normales, sino que debe entregarse en
el correspondiente punto de recogida de equipos eléctricos y electrónicos. Al
asegurarse de que este producto se desecha correctamente, Ud. ayuda a prevenir
las consecuencias negativas para el medio ambiente y la salud humana que podrían
derivarse de la incorrecta manipulación en el momento de deshacerse de este
producto. El reciclaje de materiales ayuda a conservar los recursos naturales. Para
recibir información detallada sobre el reciclaje de este producto, póngase en contacto
con el ayuntamiento, el punto de recogida más cercano o el establecimiento donde ha
adquirido el producto.
< Aviso para los clientes de países en los que se aplican las directivas de la UE >
El fabricante de este producto es Sony Corporation, 1-7-1 Konan Minato-ku Tokyo, 108-0075,
Japón. El representante autorizado en lo referente al cumplimiento de la directiva EMC y a
la seguridad de los productos es Sony Deutschland GmbH, Hedelnger Strasse 61, 70327
Stuttgart, Alemania. Para resolver cualquier asunto relacionado con el soporte técnico o la
garantía, consulte las direcciones que se indican en los documentos de soporte técnico y garantía
suministrados por separado.
Este portacámara deportivo SPK-CXA (en adelante “
esta unidad
”) es para utilizarse
exclusivamente con videocámaras digitales Sony (en adelante “
cámara
”) HDR-
CX370V/CX370/CX350V/CX350/CX305/CX300/CX170/CX155/CX150/CX116/
CX115/CX110, DCR-SX83/SX73/SX63/SX53/SX44/SX43/SX34/SX33.
* Es posible que los modelos de cámaras de arriba no estén disponibles en todos los
países o regiones.
La colocación de esta unidad en una cámara compatible le permitirá fotograar bajo
la lluvia o en playas.
Utilizable hasta una profundidad de 5 metros bajo el agua.
Con respecto a cómo utilizar su cámara con esta unidad, consulte el manual de
instrucciones de la cámara.
Antes de iniciar la grabación, cerciórese de que la cámara funcione correctamente
y de que no haya inltración de agua.
Sony no se hará responsable por ningún daño que pueda sufrir la cámara, la
batería, etc., ni por ningún coste de grabación, si se inltra agua debido al uso
inadecuado de esta unidad.
Precauciones en la utilización
No someta el vidrio frontal a golpes fuertes, ya que podría rajarse.
Evite abrir esta unidad en la playa o cerca del agua. Los preparativos, tales como la
instalación de la cámara y el cambio de “Memory Stick Duo” deberán realizarse en un
lugar con poca humedad y sin aire salado.
No arroje esta unidad al agua.
Evite utilizar esta unidad en lugares con mucho oleaje.
Evite utilizar esta unidad en las situaciones siguientes:
en un lugar muy cálido o húmedo.
en agua con temperatura superior a 40 ˚C.
a temperaturas inferiores a 0 ˚C.
En estas situaciones podría condensarse humedad o inltrarse agua, y el equipo
podría dañarse.
Evite instalar la cámara en un lugar húmedo. Su instalación en un lugar húmedo
podría provocar condensación.
Utilice esta unidad durante no más de una hora cada vez a temperaturas superiores a
35 ˚C.
No deje esta unidad bajo la luz solar directa durante mucho tiempo. Si no puede
evitar dejar esta unidad bajo la luz solar directa, cerciórese de cubrirla con una toalla
u otro tipo de material protector.
No abra las hebillas mientras sujete esta unidad. Si lo hiciese, esta unidad podría caer
y dañarse.
Utilice el espaciador suministrado para mantener esta unidad abierta cuando la lleve
en un avión. Si estuviese bien cerrada, los cambios de presión en la cabina podrían
dicultar su apertura. Se recomienda que lleve esta unidad en un avión en el estado
mostrado en la ilustración
.
Si en esta unidad entra aceite bronceador, lávela bien con agua cálida.
Si en esta unidad entra aceite bronceador, la supercie de la misma podría decolorar
o dañarse (pueden aparecer rajas en la supercie).
Inltración de agua
Si se inltra agua, deje inmediatamente de exponer esta unidad al agua.
Si la cámara se moja, llévela inmediatamente a su proveedor Sony más próximo.
El coste de las reparaciones tendrá que abonarlo el usuario.
Manejo de la junta tórica
¿Qué es la junta tórica?
La junta tórica asegura las propiedades de impermeabilidad de esta unidad u otros
equipos. (Consulte la ilustración
.)
El mantenimiento de la junta tórica es muy importante. Si no realizase el
mantenimiento de la junta tórica de acuerdo con las instrucciones, podría
producirse la inltración de agua y hacer que esta unidad se hundiese.
Manejo de la junta tórica
Fijación de la junta tórica
Evite jar la junta tórica en lugares polvorientos o arenosos.
1 Quite la junta tórica. (Consulte la ilustración
.)
Para quitar la junta tórica, presione y deslícela en el sentido de la echa, como se
muestra en la ilustración. La junta tórica tiene holgura suciente como para poder
quitarse con facilidad.
Tenga cuidado de no rayar la junta tórica con sus uñas.
No utilice objetos puntiagudos ni metálicos para quitar la junta tórica. Este tipo
de objetos podría rayar o dañar la ranura de esta unidad o la junta tórica.
2 Inspeccione la junta tórica.
Compruebe cuidadosamente lo siguiente. Si encuentra algo, limpie todo con un
paño suave o un pañuelo de papel.
¿Hay suciedad, arena, pelos, polvo, sal, trozos de hilos, etc., en la junta tórica?
¿Hay grasa vieja en la junta tórica?
Suciedad
Arena
Pelo
Polvo
Sal
Trozos de
hilos
Pase ligeramente la punta de sus dedos por la junta tórica para poder detectar
suciedad invisible.
Tenga cuidado de no dejar ninguna hilacha ni bras de papel en la junta tórica
después de haberla limpiado.
Compruebe que la junta tórica no esté rajada, sesgada, deformada, con cortes
nos, rayada, con arena incrustada, etc. Si la junta tórica está rajada o rayada,
reemplácela.
Rajas
Sesgo
Deformación
Cortes
nos
Rayazos
Incrustación
de arena
3 Inspeccione la ranura de la junta tórica.
Es posible que en la ranura entren granos de arena o que se solidique sal. Elimine
cuidadosamente estas materias soplando con un aerosol o frotando con un palillo
de cabeza de algodón. Tenga cuidado de no dejar bras del palillo de algodón en el
interior de la ranura.
4 Inspeccione, de la misma forma, la supercie de contacto del otro lado de la
junta tórica.
5
Recubra la junta tórica con grasa.
Utilice la punta de sus dedos para engrasar namente toda la supercie de la junta
tórica con
una pequeña gota de grasa
. (Consulte la ilustración
.)
No utilice papel ni un paño ya que podrían quedar bras en la junta tórica.
Cerciórese de que haya siempre una ligera capa de grasa en la supercie de la junta
tórica. La grasa protegerá la junta tórica contra el desgaste.
Fije la junta tórica inmediatamente después de haberla recubierto con grasa. No
deje la junta tórica engrasada sobre una mesa ni otra supercie.
6 Fije la junta tórica en la ranura de esta unidad.
Fije uniformemente la junta tórica en la ranura prestando atención a los puntos
siguientes:
Compruebe que no haya suciedad en la junta tórica.
Compruebe que la junta tórica no esté retorcida. (Consulte la ilustración
.)
Cómo comprobar la inltración de agua
Después de haber reemplazado la junta tórica, cierre esta unidad sin insertarle el equipo
que vaya a utilizar. Sumerja esta unidad en agua hasta una profundidad de unos 15 cm
durante aproximadamente tres minutos, y compruebe si se inltra agua.
Mantenimiento
Si dejase que esta unidad se secase con agua salada en la ranura de la junta tórica, los
cristales de sal formados podrían desvirtuar las funciones de la junta tórica.
Duración útil de la junta tórica
La duración útil de la junta tórica variará con la frecuencia de utilización de esta unidad
y las condiciones. En general, durará aproximadamente un año.
Aunque la junta tórica no esté rajada ni rayada, la deformación o el desgaste reducirá
sus características de impermeabilidad. Reemplace la junta tórica por otra nueva no si
encuentra en ella rajas, sesgo, deformación, cortes nos, rayazos, incrustación de arena,
etc.
Después de haberla reemplazado, compruebe que no haya inltración de agua.
Grasa
Utilice la grasa suministrada. La utilización de grasa de otros fabricantes dañará la junta
tórica y causará la inltración de agua.
Desecante
la utilización del desecante suministrado será muy efectiva contra el empañamiento.
Inserte un nuevo desecante en esta unidad 1 a 2 horas antes de realizar una grabación.
Coloque el desecante en esta unidad después de haber jado la cámara a la zapata de
montaje de cámara, de haber conectado la clavija de audio/controlo remoto, y de haber
instalado la cámara en esta unidad.
Inserte el desecante a fondo, como se muestra en la ilustración. (Consulte la ilustración
.)
Notas
Coloque siempre el desecante en esta unidad después de haber instalado la cámara.
Coloque el desecante entre los rieles de la zapara de montaje de cámara del interior de
la parte frontal del cuerpo. Procure no atrapar el desecante con la zapata de montaje
de cámara.
Tenga cuidado de no pillar el desecante cuando cierre la parte posterior del cuerpo.
Guarde el desecante restante en su bolsa original, y mantenga la bolsa bien cerrada. Si
seca completamente el desecante, podrá utilizarlo unas 200 veces.
Utilice un nuevo desecante cada vez para aumentar el efecto de desempañamiento.
No vuelva a introducir el desecante en la bolsa después de utilizarlo, o reducirá el
efecto del desecante que no haya utilizado.
No deje el desecante en esta unidad después de haberla utilizado.
Junta tórica y grasa
Podrá adquirir juntas tóricas y grasa en el distribuidor Sony más próximo.
Junta tórica (Núm. de modelo 4-171-698-01)
Grasa (Núm. de modelo 2-582-620-01)
Mantenimiento
Después de haber utilizado esta unidad bajo el agua o cerca de ella, sujétela en la
posición mostrada en la ilustración y sacúdala varias veces para eliminar el agua.
Antes de guardar esta unidad en una bolsa, etc., déjela durante unas dos horas, y
después sujétela como se muestra en la ilustración y acúdala de nuevo varias veces
para eliminar completamente el agua. (Consulte la ilustración
.)
Después de haber grabado en un lugar con brisa del mar, lave bien esta unidad con
agua dulce, con las hebillas abrochadas para eliminar la sal y la arena, y después
frótela con un paño suave y seco. Se le recomienda que sumerja esta unidad en agua
dulce durante unos 30 minutos. Si la dejase con sal, las partes metálicas podrían
dañar u oxidarse y provocar la inltración de agua. Tenga cuidado de no golpear
esta unidad con otro equipo al sumergirla en agua dulce. Si la presión del agua es
baja y el alabeo de la junta tórica es pequeño, un impacto fuerte podría provocar la
inltración de agua. Para eliminar la arena que pueda haberse acumulado alrededor
de los botones, mantenga esta unidad bajo agua corriente con los botones encarados
hacia abajo, y presione y suelte lentamente cada botón 2 o 3 veces.
Si en esta unidad entra aceite bronceador, lávela bien utilizando agua cálida.
Frote el interior de esta unidad con un paño suave y seco. No lo lave con agua.
Cerciórese de realizar el mantenimiento indicado arriba cada vez que utilice esta
unidad.
No utilice ningún tipo de disolvente, como alcohol, bencina, ni diluyente de pintura
para la limpieza, ya que podría dañar el acabado de la supercie de esta unidad.
Para almacenar esta unidad
Fije el espaciador suministrado con esta unidad para evitar el desgaste de la junta
tórica. (Consulte la ilustración
.)
Cierre esta unidad sin abrochar las hebillas para evitar el desgaste de la junta tórica.
Evite que se acumule polvo en la junta tórica.
Evite almacenar esta unidad en un lugar frío, muy cálido o húmedo, o junto con
naalina o alcanfor, ya que en estas condiciones podría dañarse la unidad.
Solución de problemas
Síntoma Causa Soluciones
El sonido no se
grabó.
La clavija de control remoto
y audio no está conectada.
Conecte la clavija de control remoto
y audio a la toma A/V, a la toma A/V
OUT, o a la toma de control remoto
A/V de la cámara.
El agua se inltra
en esta unidad.
Las hebillas no están
cerradas.
La junta tórica no está
correctamente colocada.
La junta tórica está rayada
o rajada.
El cable está pillado
entre las partes frontal y
posterior del cuerpo.
Apriete las hebillas hasta que
chasqueen.
Coloque uniformemente la junta
tórica en la ranura.
Reemplace la junta tórica por otra
nueva.
Suelte el cable para que la parte
posterior del cuerpo se cierre
rmemente.
La función de
grabación no
trabaja.
La batería está agotada.
La clavija de control
remoto no está conectada.
El “Memory Stick Duo”
está lleno.
La memoria interna está
llena.
Cargue completamente la batería.
Conecte la clavija de control remoto
y audio a la toma A/V, a la toma
A/V OUT, o a la toma de control
remoto A/V de la cámara.
Inserte otro “Memory Stick Duo”
o borre datos innecesarios del
“Memory Stick Duo.”
Borre datos innecesarios de la
memoria interna.
–
–
–
–
–
–
–
La unidad no se
enciende.
Algunos modelos de
cámaras tardan algunos
segundos en estar listos
para grabar después de
haberse encendido. No
se trata de un fallo de
funcionamiento.
La alimentación no
p´puede conectarse
inmediatamente después
de haberse desconectado.
Compruebe que la cámara esté lista
antes de comenzar una grabación.
Deje esta unidad durante al
menos 10 segundos después de
que la pantalla de cristal liquido
de la cámara se apague, y vuelva a
encender esta unidad.
Un botón de
esta unidad no
se puede pulsar
fácilmente,
parece encallado,
o no vuelve
rápidamente a su
posición.
La junta tórica está dentro
del botón de esta unidad.
Esto puede ocurrir cuando utilice esta
unidad después de un largo período
de no haberla usado. No se trata de un
fallo de funcionamiento.
El zoom no se
ajusta.
El cable está pillado en la
palanca del zoom.
Redisponga el cable de forma que no
quede pillado en la palanca del zoom.
La hebilla no se
bloquea.
El cable está pillado entre las
partes frontal y posterior del
cuerpo.
Suelte el cable para que la parte
posterior del cuerpo se cierre
rmemente.
Puede verse
empañamiento o
condensación.
Cuando abra la parte
posterior del cuerpo, es´
posible que a veces pueda
verse empañamiento o
condensación en el interior
de la parte posterior y la
parte frontal del cuerpo. Las
partes posterior y frontal
del cuerpo de esta unidad
tienen una construcción de
doble pared, y en el espacio
entre las paredes puede
producirse empañamiento o
condensación. No se trata de
un fallo de funcionamiento.
En el interior de esta
unidad no puede ocurrir
empañamiento ni
condensación.
No se trata de un fallo de
funcionamiento. No es necesario
realizar nada.
La zapata de
montaje de cámara
está agarrotada y
no se bloquea.
El desecante está pillado
en la zapata de montaje de
cámara.
Suelte el desecante de forma que no
quede pillado en la zapata de montaje
de cámara.
Especicaciones
Material
Plástico (PC, ABS), vidrio
Impermeabilidad
Junta tórica, hebillas
Micrófono incorporado
Estéreo
Dimensiones
Aprox. 120 × 103 × 207 mm (an/al/prf)
(excluyendo la correa y la almohadilla de la empuñadura)
Peso
Aprox. 670 g (portacámara deportivo solamente)
Elementos incluidos
Funda resistente al agua (1)
Asa de hombro (1)
Zapata de montaje de cámara (A (1)/B (1))
Placa roscada para trípode (1)
Anillo antirreejos (M30 × Ø 47 (1)/M30 × Ø 39 (1))
Grasa (1)
Espaciador (1)
Desecante (1)
Juego de documentación impresa
El diseño y las especicaciones están sujetos a cambios sin previo aviso.
Utilización del portacámara deportivo
Preparativos
1 Instale la cámara en esta unidad.
Para instalar la cámara, consulte la “Guía de preparación del portacámara deportivo”.
2 Encienda esta unidad.
Pulse el botón POWER de esta unidad para encender la cámara y esta unidad. La
cámara se ajustará al modo de grabación de películas.
Notas
Si deja la cámara en el modo de espera durante cinco minutos o más, la alimentación
se desconectará automáticamente para evitar que se agote la batería.
Usted podrá cambiar el ajuste “A.SHUT OFF” de esta función a [Never] en la cámara.
Con respecto a los detalles, consulte el manual de instrucciones de su cámara.
Para volver al modo de espera, ponga de nuevo el botón POWER en “ON”.
3 Ajuste el modo de la cámara.
Pulse el botón MODE de esta unidad para cambiar el modo de la cámara en el orden
siguiente.
Modo de grabación
de películas
Modo de grabación
de imágenes jas
Pulse el botón MODE de esta unidad mientras compruebe la pantalla LCD de la
cámara en el espejo retráctil hasta que se muestre el modo deseado.
Con respecto a los detalles sobre cada modo de cámara, consulte el manual de
instrucciones de la cámara.
Apertura del espejo retráctil
Usted podrá grabar y ver al mismo tiempo el reejo de dicha grabación en el espejo
retráctil.
1 Abra el espejo retráctil sujetando la parte “
”.
2 Abra las aletas e inserte las partes salientes en sus oricios.
Cierre del espejo retráctil
Suelte las partes salientes de ambas aletas, y cierre en primer lugar la aleta inferior.
Grabación
Grabación de películas
Las películas se grabarán en un “Memory Stick Duo” o en la memoria interna.
1 Pulse el botón MODE de esta unidad para ajustar el modo de la cámara para
grabación de películas.
2
Pulse el botón START/STOP.
Se iniciará la grabación.
Para detener la grabación
Pulse el botón START/STOP.
Si vuelve a pulsar el botón START/STOP, la grabación se reanudará.
Para desconectar la alimentación
Detenga la grabación antes de poner el botón POWER en “OFF”.
Utilización del zoom (Consulte la ilustración
.)
La velocidad del zoom cambia en dos pasos.
Pulse ligeramente el botón del zoom para obtener un zoom más lento, y púlselo durante
más tiempo para obtener un zoom más rápido.
Pulse el botón de gran angular para alejarse del motivo.
Pulse el botón de telefoto para acercarse al motivo.
Grabación de imágenes jas
Las imágenes jas se grabarán en un “Memory Stick Duo” o en la memoria interna.
1 Pulse el botón MODE de esta unidad para ajustar el modo de la cámara para
grabación de imágenes jas.
2
Pulse ligeramente el botón PHOTO.
La marca verde de la parte superior de la pantalla de cristal líquido dejará de
parpadear y permanecerá encendida. Ahora podrá grabar una imagen ja.
* No se grabará todavía ninguna imagen.
3 Pulse a fondo el botón PHOTO.
La imagen mostrada en la pantalla se grabará.
Algunos modelos poseen una función de grabación doble. Con respecto a los
detalles, consulte el manual de instrucciones de la cámara.
Notas
Con esta unidad no será posible utilizar Nightshot ni ninguna otra función para
fotograar en la oscuridad.
C
on esta unidad no será posible utilizar la iluminación, el ash, ni las funciones de
tele-macro que incorpora la cámara.
C
on esta unidad no será posible utilizar la función SteadyShot, la función de
detección de caras, la función de detección automática de contraluz, la función de
punto jo (telemetría, enfoque), ni el micrófono interno.
C
on esta unidad no será posible utilizar el GPS que identica la posición de esta
unidad.
A
lgunos modelos de cámaras le permitirán seleccionar más de un medio de
grabación para películas e imágenes jas (p. ej., “Memory Stick” más memoria
interna). Con respecto a los detalles, consulte el manual de instrucciones de la
cámara.
E
xisten varios tipos de “Memory Stick Duo”. Diferentes tipos son compatibles con
diferentes cámaras. Con respecto a los detalles, consulte el manual de instrucciones
de la cámara.
P
ara mantener la cámara estable cuando grabe imágenes jas, se recomienda que
apoye su brazo derecho contra su cuerpo, que sujete la cámara también con la mano
izquierda, y que presione el botón PHOTO con el pulgar de la mano izquierda.
C
uando grabe películas, tenga cuidado de no colocar los dedos sobre el micrófono
estéreo.
Extracción de la videocámara
1 Pulse el botón POWER para apagar la cámara. (Consulte la ilustración
-1.)
2 Suelte las hebillas y abra la parte posterior del cuerpo. (Consulte la
ilustración
-2.)
Con respecto a los detalles, consulte el paso 1 “Instalación de la videocámara” de la
Guía de preparación de esta unidad.
Notas
Antes de abrir esta unidad, elimine la humedad de ésta y de usted mismo. No
permita que entre agua en la cámara.
Coloque esta unidad sobre una supercie plana como sobre una mesa cuando abra
las hebillas No abra las hebillas mientras sujete esta unidad.
3 Extraiga la zapata de montaje de cámara. (Consulte la ilustración
-3.)
Sujete la perilla de un lado de la zapata de montaje de cámara para soltar el seguro y
deslice lentamente la cámara hacia afuera.
4 Extraiga la cámara hasta que las clavijas conectadas a la misma salgan justo
de la unidad, y después desconecte las clavijas de la cámara.
Notas
Cerciórese de desconectar la clavija de control remoto y audio correctamente
sujetando la parte de la clavija.
Si el cable está retenido por el soporte del cable, suéltelo.
No desconecte la clavija sujetándola por la parte del cable, ni extraiga la zapata
de montaje de cámara mientras la clavija esté conectada. De lo contrario, podría
dañar la clavija o la toma de la cámara.
5 Extraiga la zapata de montaje de cámara.
Français
(Suite de la page avant)