Loading ...
Loading ...
Loading ...
10
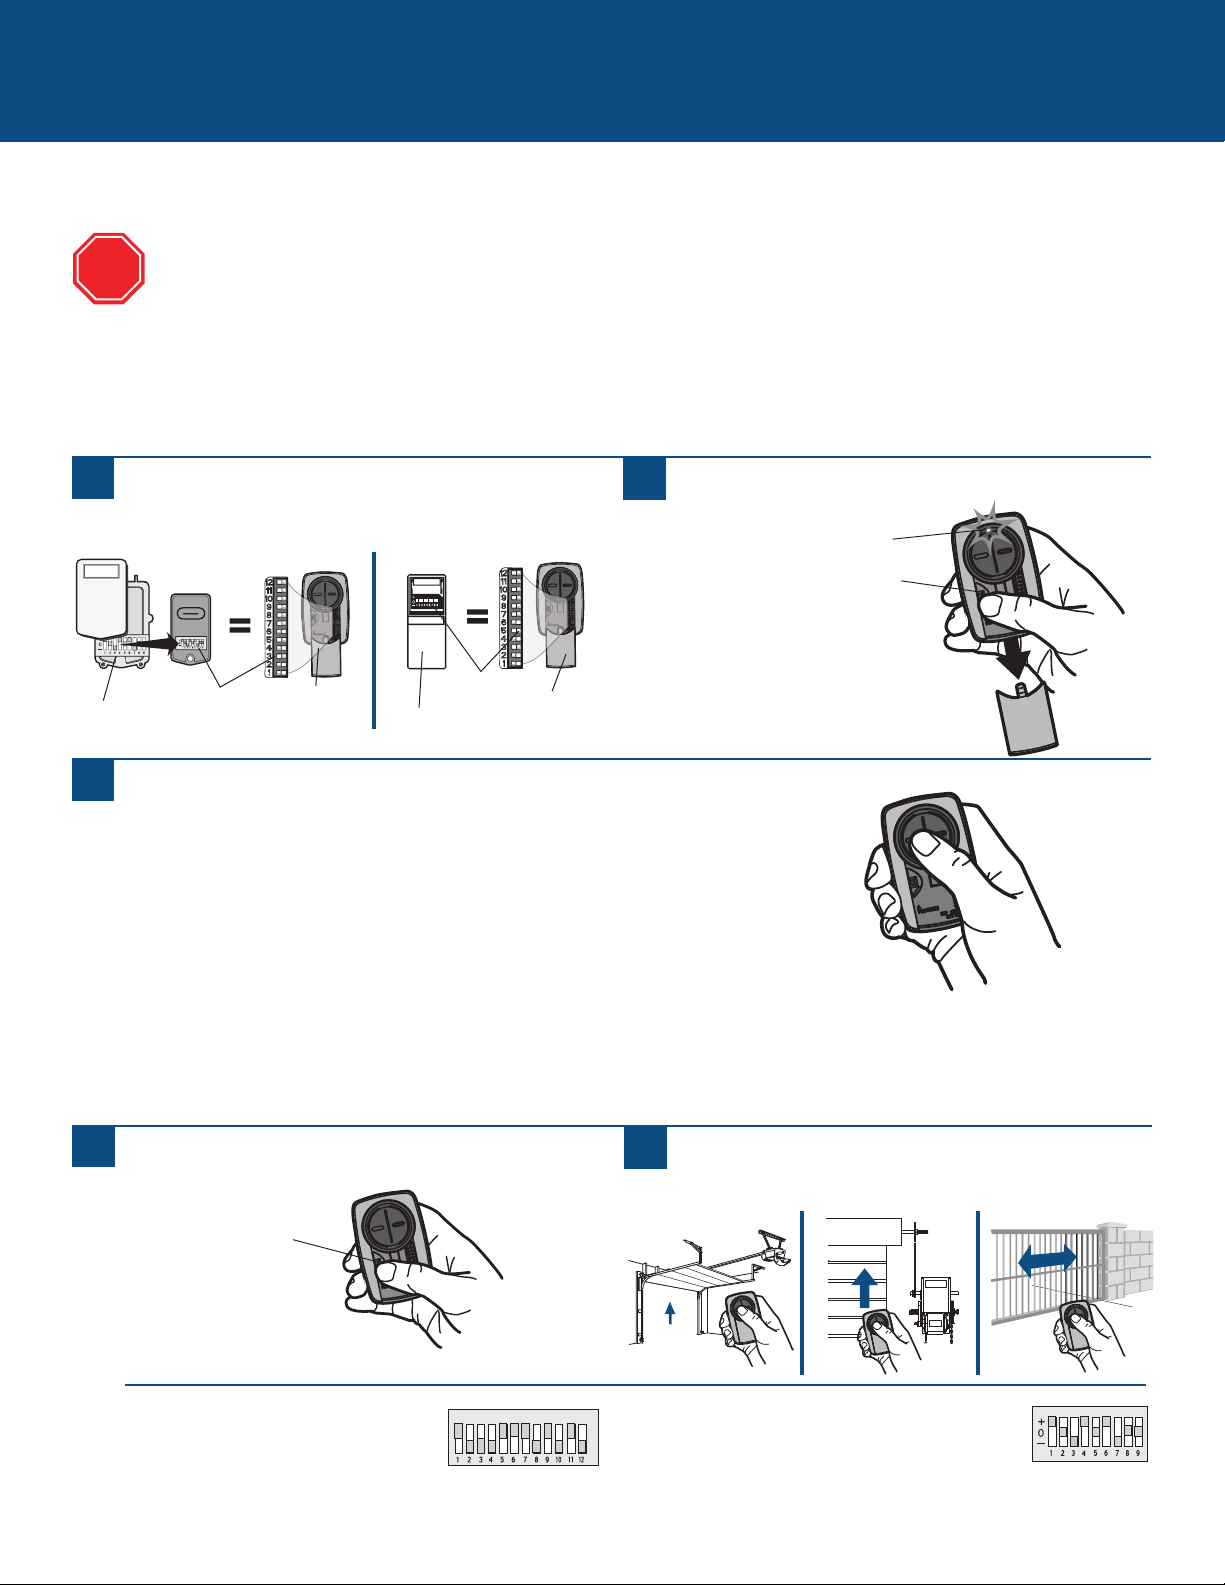
Alternative programming option for products with DIP Switches
ALTERNATIVE PROGRAMMING OPTIONS (continued)
Press and release the Universal Remote Control button...
...11 times (Chamberlain
®
** product with 9 DIP switches).
...12 times (Chamberlain
®
** Canada product with 9 DIP switches).
...13 times (Genie
®
product with 12 DIP switches).
...14 times (Linear Multicode
®
with 10 DIP switches).
...15 times (Chamberlain
®
* product with 8 DIP switches).
...16 times (Stanley/Multicode
®
product with 10 DIP switches).
...17 times (Genie
®
product with 9 DIP switches).
...18 times (Linear
®
, Moore-O-Matic
®
product with 8 DIP switches).
...19 times (Chamberlain
®
** product with 7 DIP switches).
The LED on the Universal Remote Control must stop blinking between each press of the button. The code is accepted when the
garage door opener responds by clicking, blinking, or activating.
3 Position DIP Switch:
For Chamberlain remote controls DO NOT use the “0” position,
use “+” or “-”. If you already have a 3-button remote, DIP
switch #1 must be set to “-” if the large button is to open the
door. It may be necessary to reprogram original remote controls.
1
Press the program button on the Universal Remote
Control until the LED turns on.
2
Match the DIP switches between the existing remote
control or external receiver and the Universal Remote
Control. Turn extra switches OFF.
3
5
Press the program button on the Universal Remote
Control to save.
6
Test the Universal Remote Control by pressing the button.
If the product does not activate, repeat the programming
steps.
2 Position DIP Switch:
If programming fails reverse DIP switches (OFF to ON
and ON to OFF).
External
Receiver
DIP Switches
DIP Switches
Existing Remote
Universal
Remote
Control
If using the Universal Remote Control with residential door openers, the remote control must be used only with door
openers manufactured after 1993 that utilize photoelectric sensors. The photoelectric sensors are always located on or
near the bottom of the door track.
The DIP switches are typically located on the product or an external receiver. For help locating your DIP switches
contact your product manufacturer.
The images throughout this manual are for reference only and your product may look different.
** LiftMaster, Do-It, Master Mechanic, Raynor, True Value and Sears Craftsman are compatible with Chamberlain technology.
TIPS
STOP
Universal
Remote
Control
Program Button
Program Button
LED
Loading ...
Loading ...
Loading ...