Loading ...
Loading ...
Loading ...
en Rails
26
You will not be able to open the appliance door again
until the cooking compartment has cooled down
sufficiently and the lock symbol
n on the display has
gone out.
Delaying the end time
You can delay the end time if required. Before starting,
touch the v button until the "End" symbol is highlighted
on the display. Use the @ button to delay the end time.
The appliance will switch to standby after it is started.
Changing and cancelling
The power of the cleaning cycle cannot be changed
once it has started.
The end time can be changed while the appliance is on
standby.
If you would like to cancel the cleaning function, switch
the appliance off by turning the function selector to the
"Off" position.
The appliance door will remain locked until the cooking
compartment has cooled down sufficiently and the lock
symbol on the display has gone out.
After running the cleaning function
Allow the cooking compartment to cool down. Use a
damp cloth to wipe off the ash that has been left behind
in the cooking compartment and around the appliance
door.
Hook the rails back in.
Note: Very bad soiling may cause white deposits to
remain on the enamel surfaces. This is residue from the
food and is harmless. It does not affect performance.
You can remove these residues using lemon juice if
required.
pRails
Ra i l s
With good care and cleaning, your appliance will retain
its appearance and remain fully functional for a long
time to come. This will tell you how to remove the
shelves and clean them.
Detaching and refitting the rails
The rails can be removed for cleaning. The oven must
have cooled down.
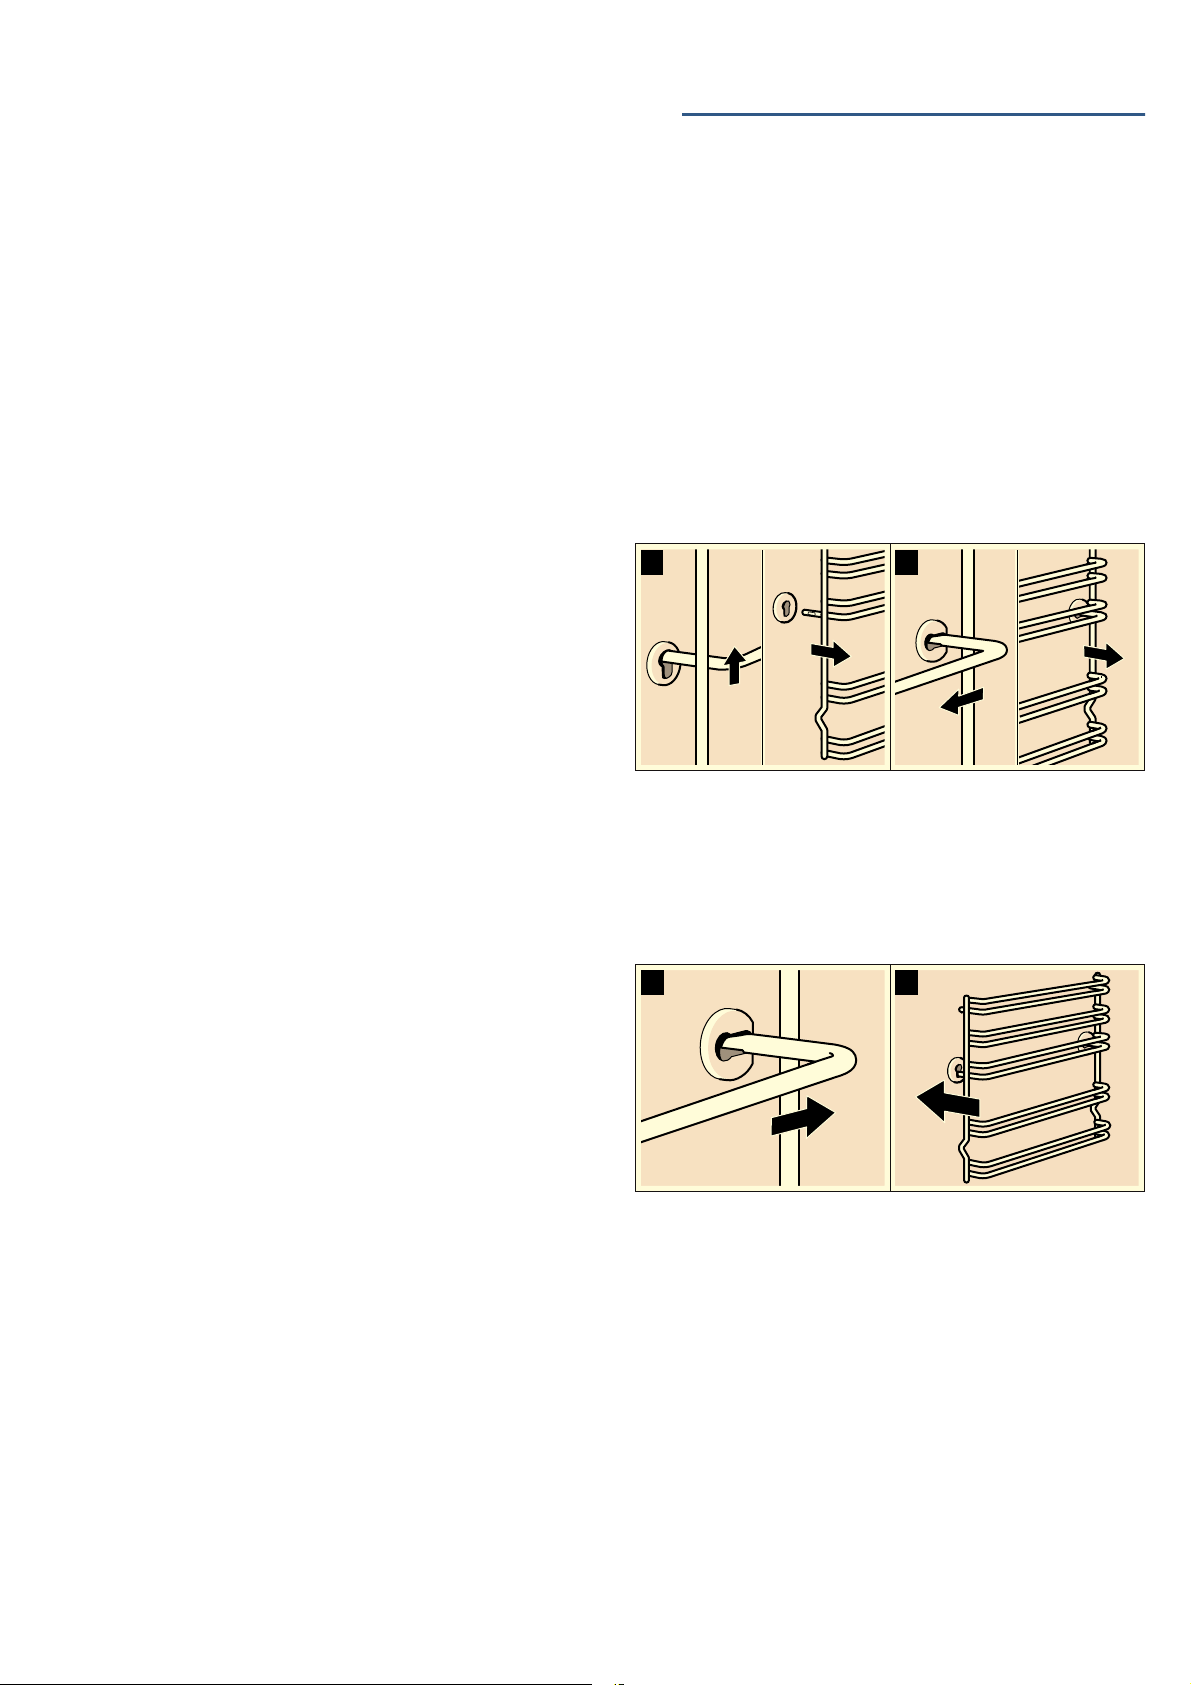
Detaching the rails
1. Lift up the front of the rail
2. and unhook it (figure A).
3. Then pull the whole rail forward
4. and remove it (Fig. B).
Clean the rails with cleaning agent and a sponge. For
stubborn deposits of dirt, use a brush.
Refitting the rails
1. First insert the rail into the rear socket, press it to the
back slightly (figure A),
2. and then hook it into the front socket (figure B).
The rails fit both the left and right sides. Ensure that, as
shown in figure B, levels 1 and 2 are below and levels
3, 4 and 5 are above.
%
$
%
$
Loading ...
Loading ...
Loading ...