Loading ...
Loading ...
Loading ...
15
2. Install a foot on the left rear spacer using a #8-18 x 3/8"
(9.5 mm) screw.
NOTE: Position the foot so the long side of the foot is facing
toward the top of the oven.
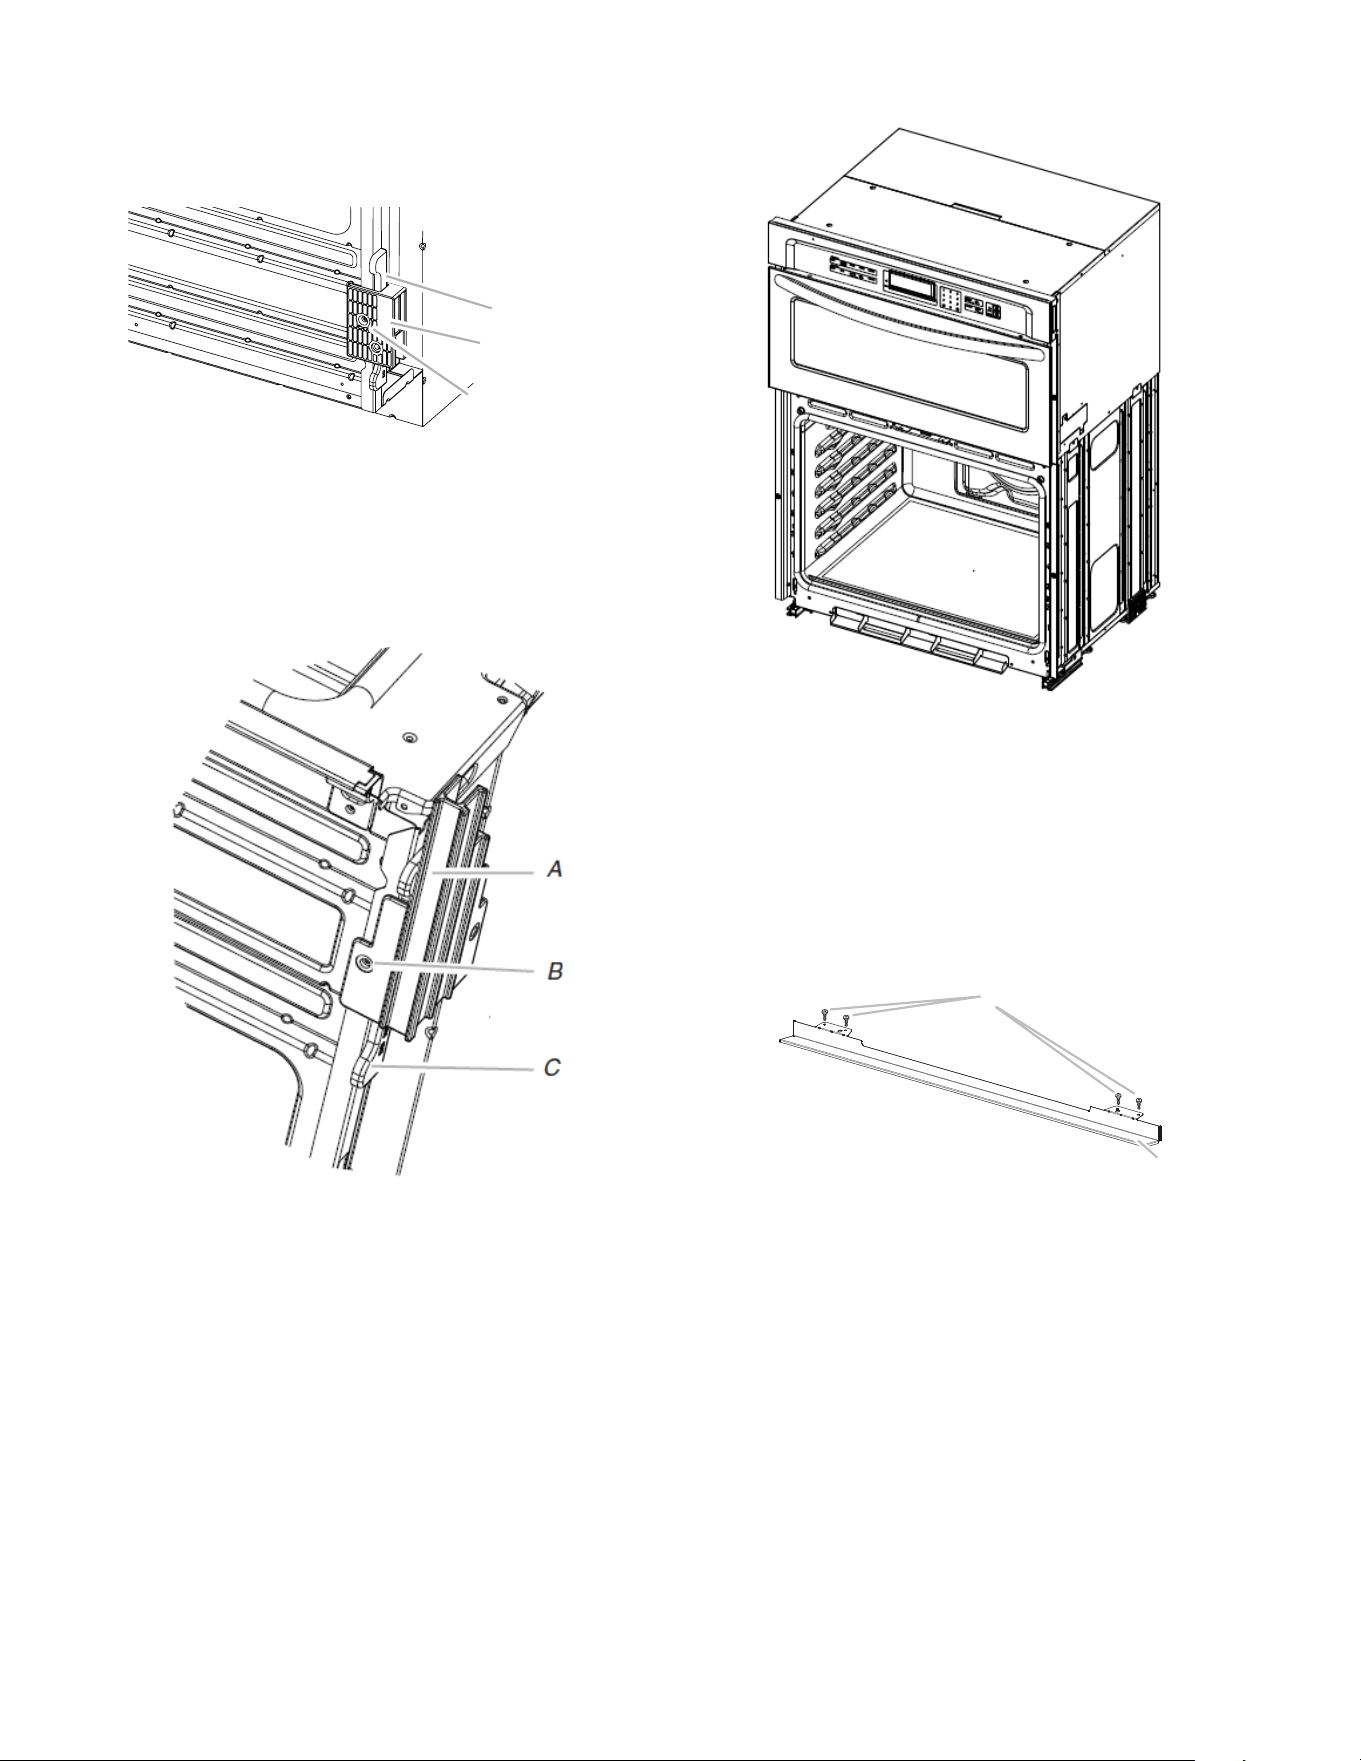
A
B
C
A. Spacers
B. Foot
C. #8-18 x 3/8" (9.5 mm) screw.
3. In the same manner, install a foot on the right rear of the oven.
4. Install a front foot on the left front spacer using a #8-18 x 3/8"
(9.5 mm).
NOTE: Position the foot so the long side of the foot is facing
toward the inside of the oven.
A. Front foot
B. #8-18 x 3/8" (9.5 mm) screw.
C. Spacer
5. In the same manner, install a front foot on the right front of the
oven.
6. Using 2 or more people, place the oven in its upright position.
7. Go to the “Make Electrical Connection” section in the
Installation Instructions provided with your built-in oven.
Install Deflector Kit
On single and double oven models installed above a warming
drawer or for ovens installed using flush installation cabinetry, a
deflector kit must be installed. See the “Tools and Parts” section
for information on ordering.
Parts Supplied in Deflector Kit
B
A
A. Phillips head screws (4), only 2 screws for 27"
(68.6 cm) size
B. Deflector (1)
Loading ...
Loading ...
Loading ...