Loading ...
Loading ...
OPERATING INSTRUCTIONS & CONTROL FUNCTIONS
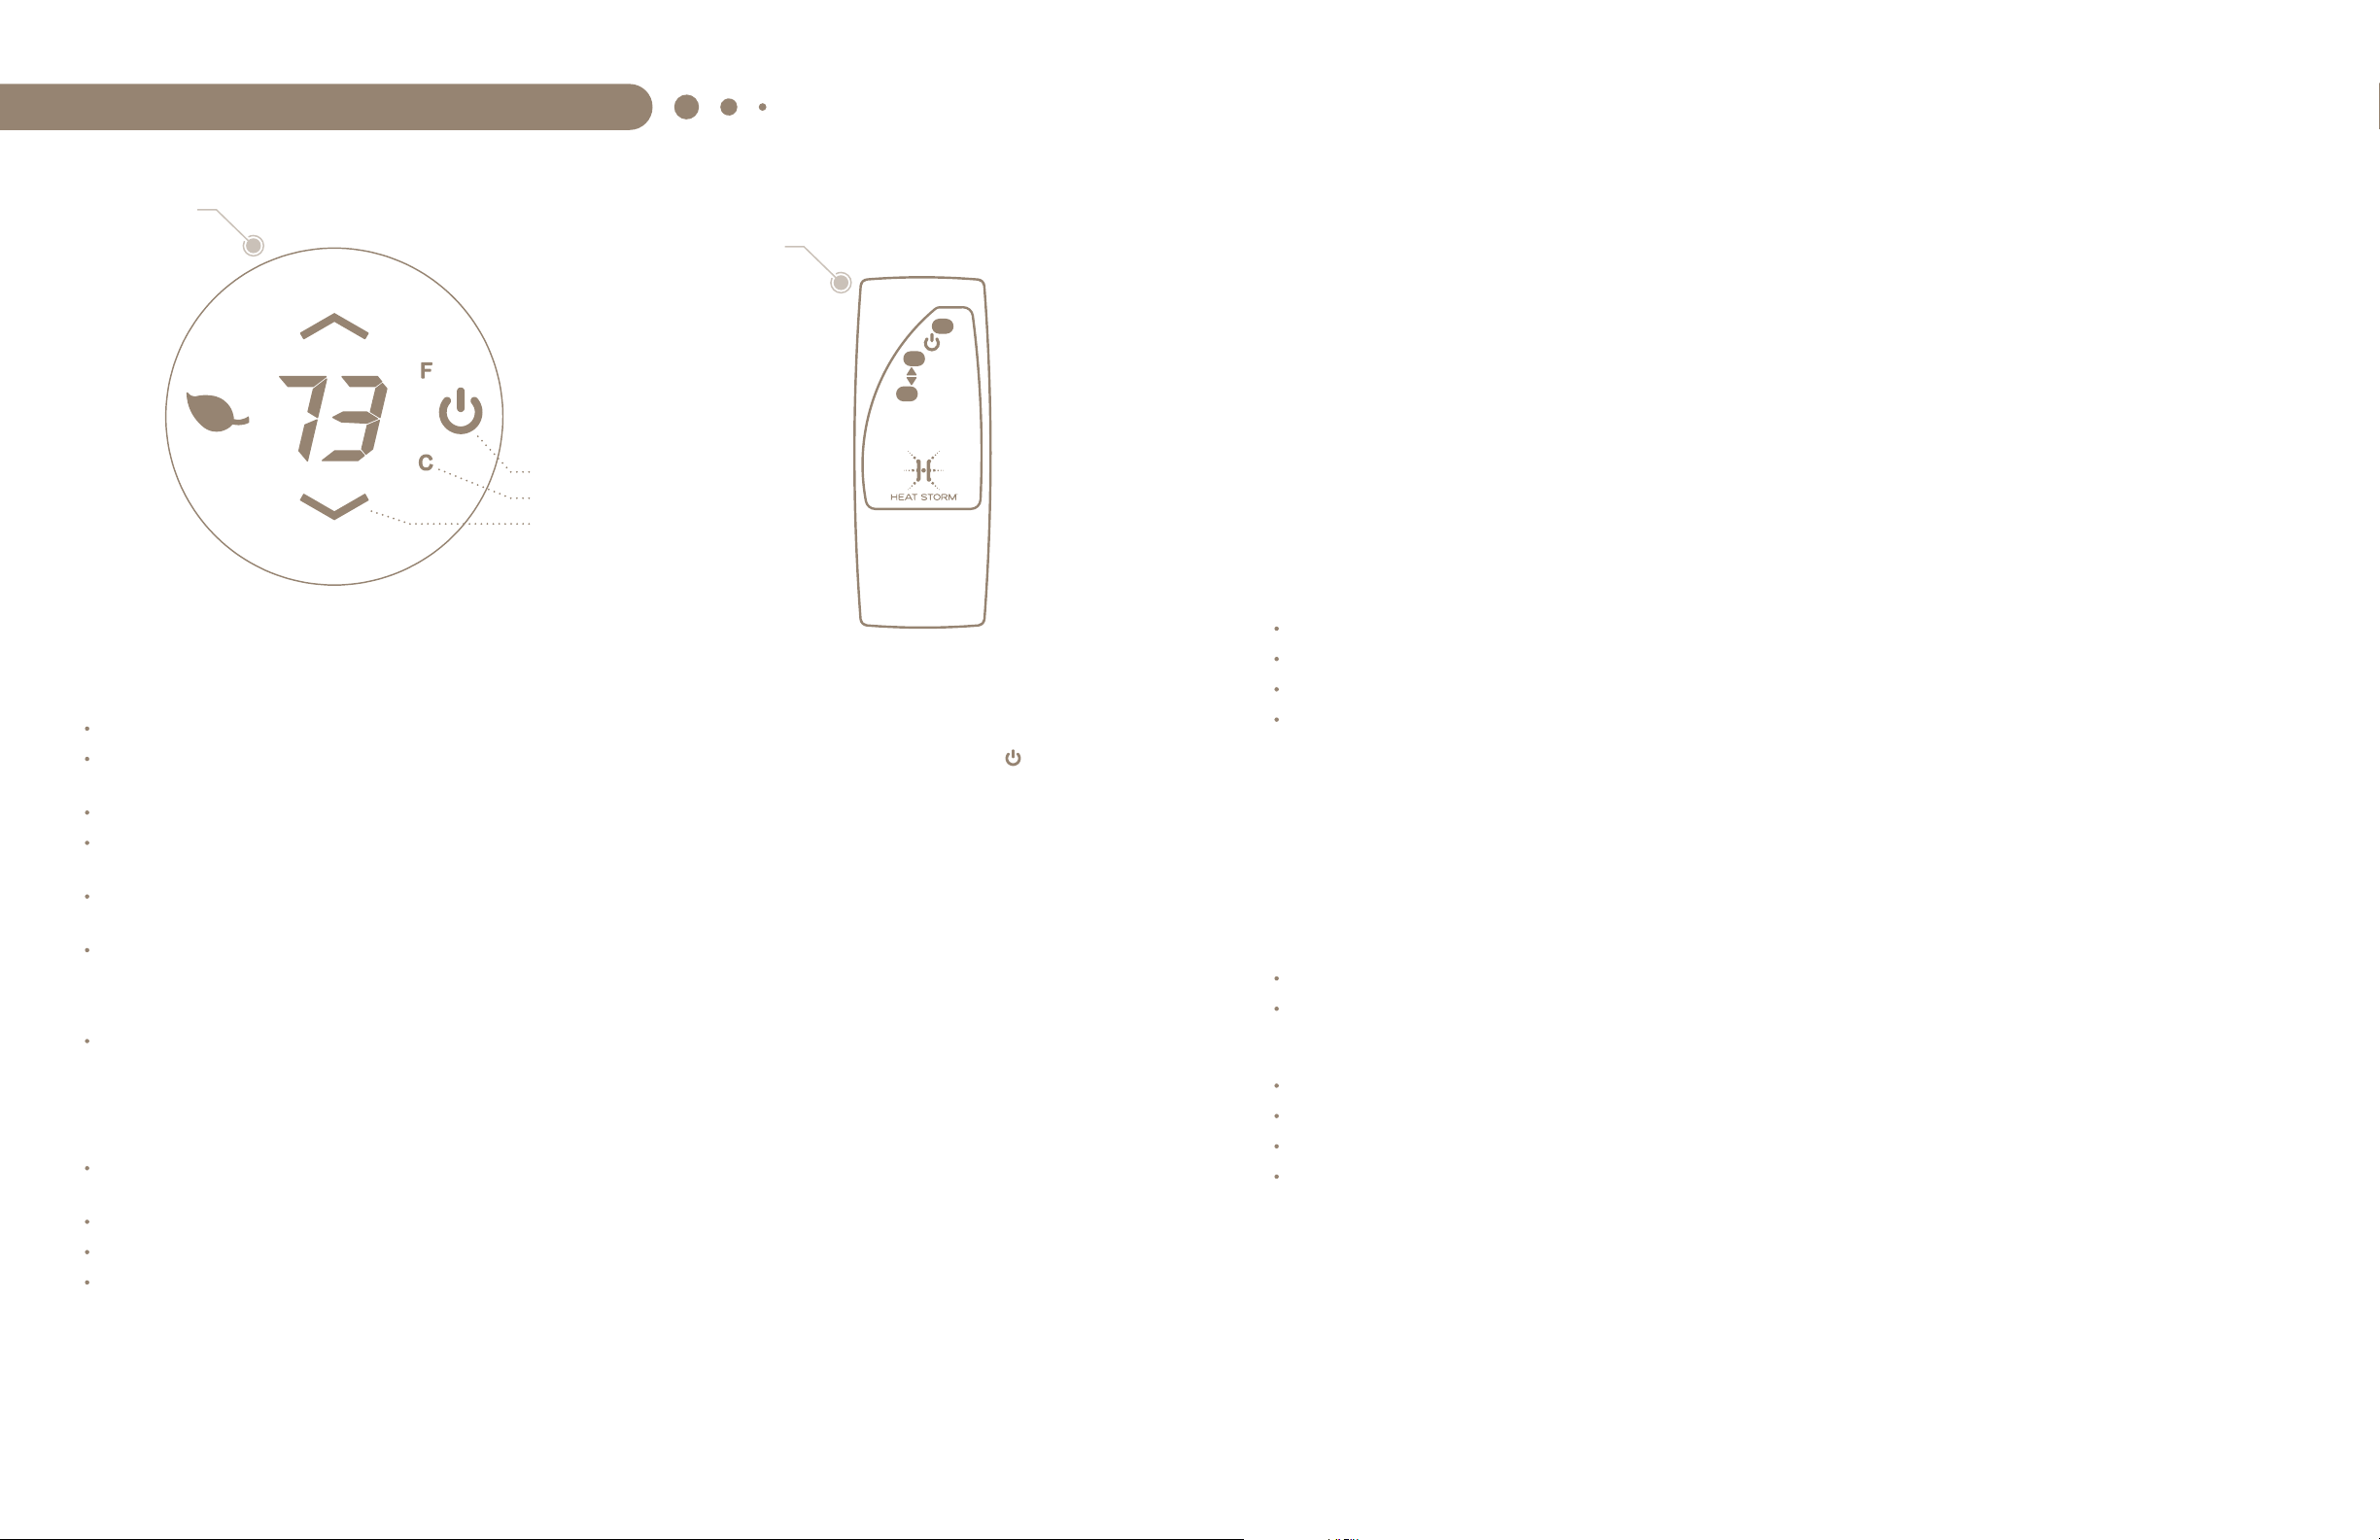
CONTROL
PANEL
REMOTE
CONTROL
POWER
The POWER button supplies power to all functions of the heater.
Once the heater is plugged into the outlet it will be in standby mode. The power button is the universal on/off symbol
and
will be blue indicating that the heater is plugged in, but is powered off.
The POWER button on the control panel needs to be pressed in order to turn on the heater and operate the remote control.
Press the POWER button and it will turn red indicating that the heater has been powered ON at full power. Full power is also
indicated by the red leaf.
Press the POWER button a second time it will remain red. However, the leaf will turn green indicating the unit is running at
half power.
Press the POWER button a third time and the unit will power off.
SWITCHING BETWEEN CELSIUS AND FAHRENHEIT
By pressing the “UP” and “DOWN” buttons at the same time for 3 seconds.
NOTE: You can only switch between Celsius and Fahrenheit on the heater itself as this is not available using the remote control.
SETTING TEMPERATURE
When pressing the up and down buttons the display will enter temperature setting mode. The displayed temperature will
begin to blink.
When in temperature setting mode pressing the up and down buttons will change the thermostat by 1 °F and by 1 °C.
The default set temperature of the heater is 72° F (22° C).
After 5 seconds without control input the display will exit temperature setting mode and show the current ambient temperature.
NOTE: After the heater function or power is shutoff the blower will continue to run for several minutes to cool the internal components.
1 Power Button
2 Fahrenheit & Celsius
3 Up & Down Arrows
THERMOSTAT CALIBRATION
Thermostat readings can vary based on the running environment. If desired the thermostat on the heater can be
manually calibrated.
NOTE: Thermostat calibration can only be done manually on the heater itself, not using the remote control.
To calibrate the thermostat:
1
Press the POWER button for 3 seconds to begin calibration.
2
Once the temperature begins to flash, use the up and down buttons to adjust the thermostat.
3
After 5 seconds without control input the heater will exit thermostat calibration.
NOTE: This equipment has been tested and found to comply with the limits for Class B digital device, pursuant to part 15 of the FCC Rules. These
limits are designed to provide reasonable protection against harmful interference in a residential installation. This equipment generates, uses, and
can radiate radio frequency energy and, if not installed and used in accordance with the instructions, may cause harmful interference to radio or
television reception, which can be determined by turning the equipment off and on, the user is encouraged to try to correct the interference by
one or more of the following measures:
Reorient or relocate the receiving antenna.
Increase the separation between the equipment and the receiver.
Connect the equipment into an outlet on a circuit different from that to which the receiver is connected.
Consult the dealer or an experienced radio/TV technician for help.
This device complies with Part 15 of the FCC Rules. Operation is subject to the following two conditions:
(1) This device may not cause harmful interference, and (2) this device must accept any interference received, including interference that
may cause undesired operation. Modifications not approved by the party responsible for compliance could void user’s authority to operate
the equipment. This Class B digital apparatus complies with Canadian ICES-003.
WASHABLE LIFETIME FILTER SYSTEM
Heat Storm
™
Infrared Heaters come equipped with a washable lifetime filter which is easy to clean. (The manufacturer recommends
the filter to be cleaned regularly as needed.) To do this, follow these steps:
Press both tabs to remove the filter cover and remove the filter, noting which side of the filter receives air flow into the heater.
Run warm tap water over the filter, the opposite direction of air flow, until water runs clear. The filter might excrete some filtered
residue, so be cautious not to drip on any stainable surfaces such as carpeting. You can also soak the filter in water mixed with a
small amount of mild dish soap (remember to rinse well with clean water after soaking filter).
Shake the filter over a sink until excess water is removed and allow it to drip dry completely before reinstalling.
DO NOT force or attempt to speed the filter drying process by using any alternative methods.
ENSURE that the filter is completely dry before inserting back into the air inlet and replacing covers.
Reinstall the filter and replace cover.
WARNING
ANY REQUIRED SERVICE OTHER THAN FILTER MAINTENANCE SHOULD ONLY BE PERFORMED BY AN AUTHORIZED
SERVICE REPRESENTATIVE
Loading ...
Loading ...
Loading ...