Loading ...
Loading ...
Loading ...
12
ENGLISH
USING YOUR POURING SHIELD*
To Attach Pouring Shield
1. Turn speed control to OFF.
2. Unplug stand mixer or disconnect power.
3. Attach flat beater, dough hook, or wire whip and bowl (see page 11).
4. From the front of the mixer, slide the pouring shield over the bowl until
the shield is centered. The
bottom rim of the shield
should fit within the bowl.
To Remove Pouring Shield
1. Turn speed control to OFF.
2. Unplug stand mixer or
disconnect power.
3. Lift the front of the pour
shield clear of the bowl
rim and pull forward.
4. Remove attachment and
bowl.
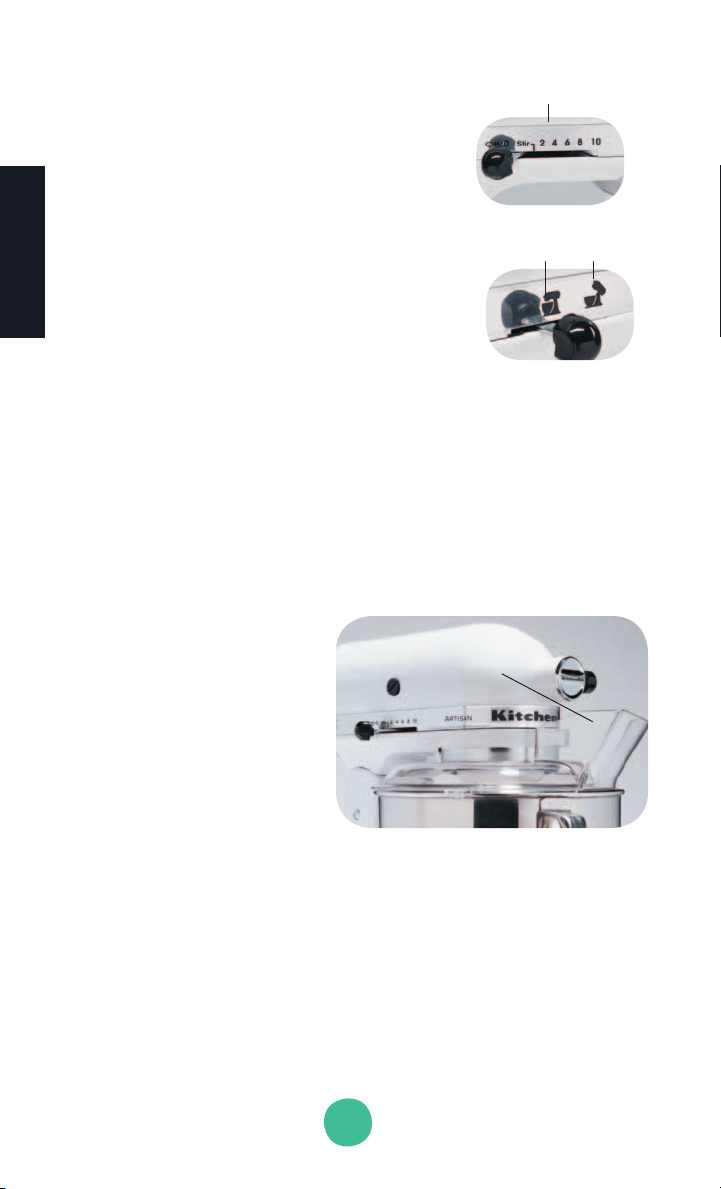
To Use Pouring Shield
1. For best results, rotate the shield so the motor head covers the “u”
shaped gap in the shield. The pouring chute will be just to the right
of the attachment hub as you face the mixer.
2. Pour the ingredients into the bowl through the pouring chute.
Pouring
Chute
* If Pouring Shield is included.
To Operate Speed Control
Speed control lever should always be set on lowest
speed for starting, then gradually moved to desired
higher speed to avoid splashing ingredients out of
bowl. See page 15 for Speed Control Guide.
To Lock Motor Head
1. Make sure motor head is completely down.
2. Place locking lever in LOCK position.
3. Before mixing, test lock by attempting to
raise head.
To Unlock Motor Head
1. Place lever in UNLOCK position.
NOTE: Motor head should always be kept in LOCK position when using
mixer.
Lock
Unlock
ASSEMBLING YOUR TILT-HEAD STAND MIXER
Speed Control
Loading ...
Loading ...
Loading ...