Loading ...
Loading ...
Loading ...
7
Preparing for Custom Panel Installation
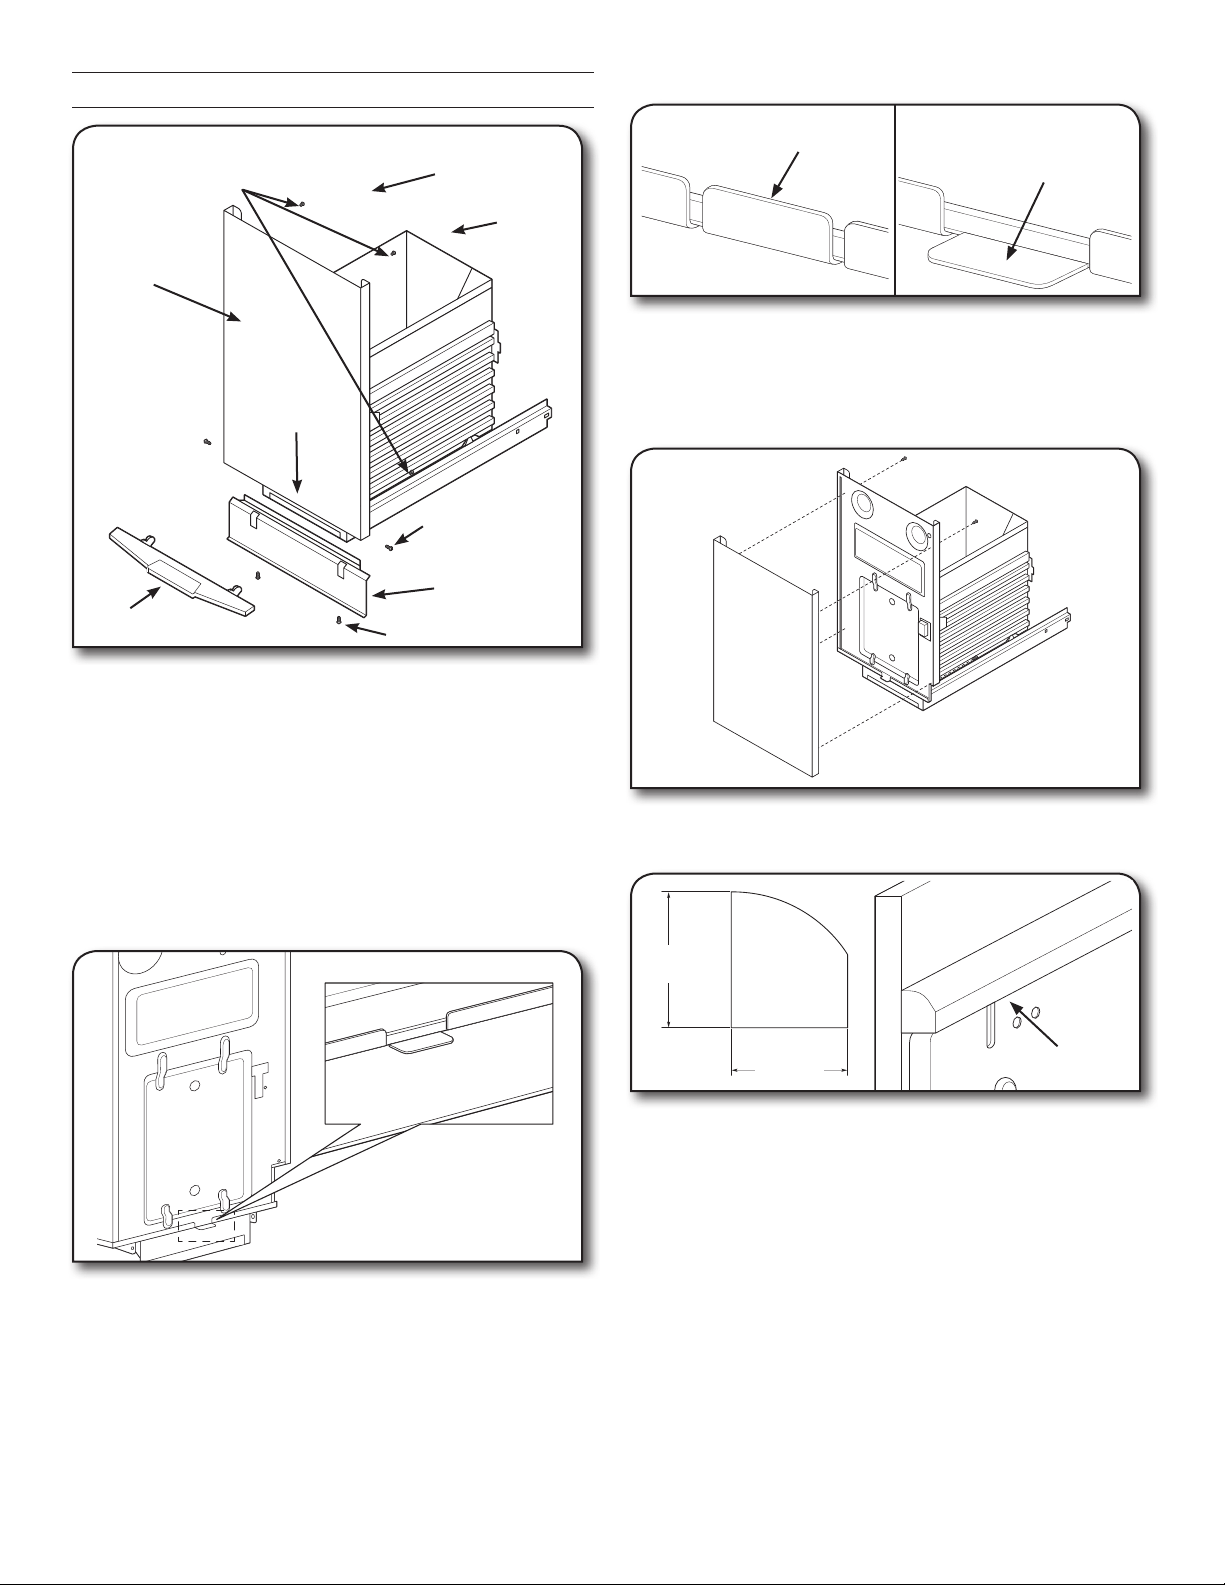
Front panel screws
Front panel
Foot pedal
Panel removal
in this
direction
Foot pedal screws
Toe guard
Toe guard scews
Handle
Handle
Screws
1. If installing the longer panel, remove the handle by removing
the three screws.
2. Turn the drawer upside down for this procedure. Do not put
too much pressure on the handle if turning the drawer over.
It is best to place the drawer on a bench or elevated item to
avoid putting pressure on the handle.
3. Remove foot pedal by removing the two screws.
4. Remove toe guard by removing the two screws.
5. Remove the four front panel screws.
6. Slide the front panel out and place aside.
7. Locate the rest tab on the bottom of the drawer front panel.
Rest tab
Bend this tab 90 degrees as shown.
Tab orientation as supplied
Tab bent 90 degrees to
stop custom panel from
going below this point.
8. Place the custom panel against the container front and rest
it on the tab.
9. Use 4 #8 x 1" wood screws to attach the custom panel as
shown below. If you are installing the long panel (handle
removed) you will have three holes available, for a total of
seven screws to attach the custom panel.
10. Long Panel Only: A 3/4" quarter round molding with the
following dimensions is suggested to ll the gap left by the
removed handle.
0.63”
(16 mm)
0.75”
(19 mm)
0.75"
(19 mm)
0.63"
(16 mm)
3/4" Quarter
round
11. Reattach the toe guard with the two screws.
12. Reattach the foot pedal with the two screws.
Loading ...
Loading ...
Loading ...