Loading ...
Loading ...
Loading ...
4
INSTALLATION INSTRUCTIONS
Tools
Installer: Leave User Instructions with the homeowner.
Homeowner: Keep User Instructions for future reference
and for local electrical inspector’s use if required.
Tools needed
Gather the required tools and parts before starting installation:
Level Phillips No. 2 screwdriver
Tape measure Flat-head screwdriver
Pliers 5/16" box-end wrench
Scissors Utility knife
Unpacking
WARNING
Excessive Weight Hazard
Use two or more people to move and install compactor.
Failure to do so can result in back or other injury.
IMPORTANT: Do not grasp control panel to move the compactor.
Begin in the room where the compactor will be located.
1. Remove compactor from shipping carton. Follow the
instructions on the shipping carton.
2. Remove all packaging materials, such as tape and
shippingpads.
3. Use a mild detergent and warm water to remove waxy
residue caused by shipping material.
4. Dry thoroughly with a soft cloth. For more information,
see “Cleaning” in the “Compactor Use” section.
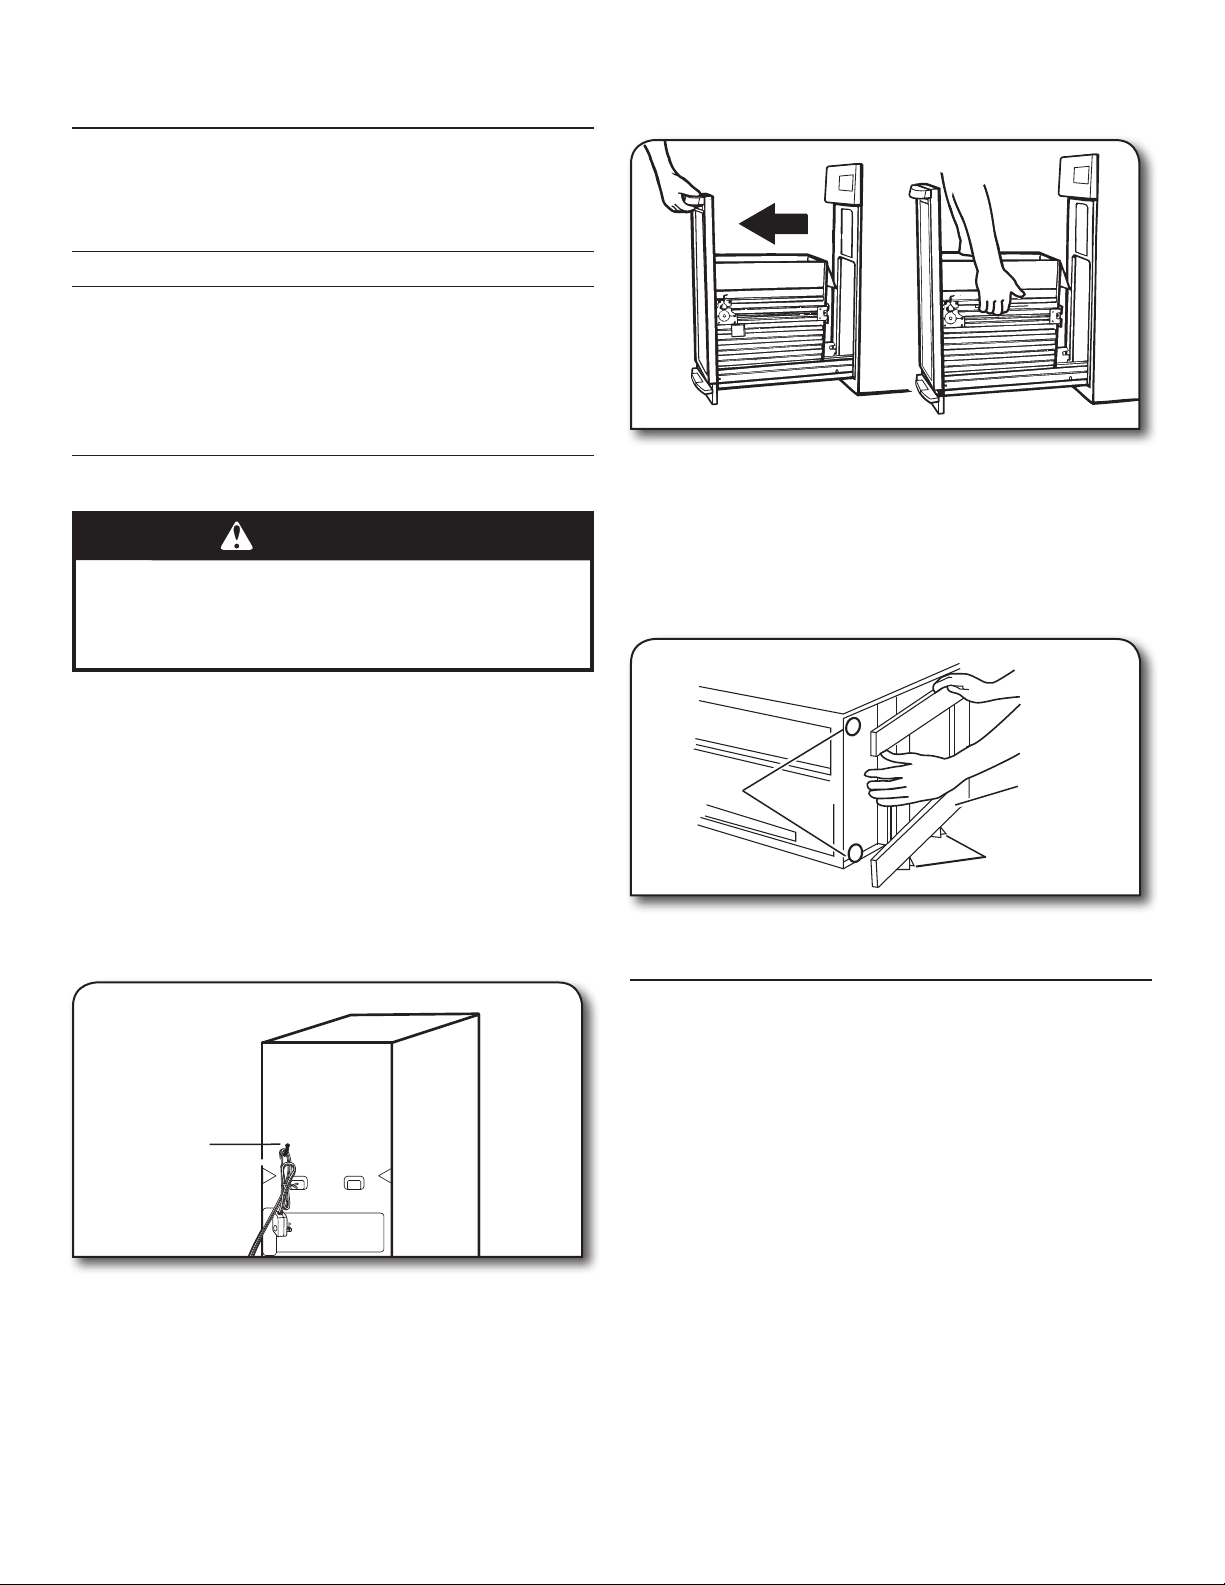
5. Be sure the power cord is attached to the cord clip on
the rear of the compactor.
Power cord clip
6. Place two of the four corner posts from the packaging on the
oor near the compactor.
7. Press the foot pedal or use the handle to open the
compactor drawer and remove any shipping materials or
other items from the drawer.
NOTE: Do not remove the compactor bag.
8. Grasp the front of the drawer and tilt it backwards slightly
while pulling forward to clear the drawer stops.
9. Grasp the drawer handle or sides of drawer and lift drawer
out of compactor.
10. Place the drawer on the two corner posts.
11. Place the other two corner posts on the oor to the side
of the compactor.
12. Grasp the sides of the compactor cabinet and place
compactor on its side on top of the second set of corner
posts.
13. Remove the shipping base from the bottom of
the compactor.
Corner posts
Shipping base
Leveling legs
NOTE: Before returning the compactor to the upright position,
adjust the height of the compactor as necessary using the
following “Height Adjustment” instructions.
Height Adjustment
Height adjustment of the rear rollers is not required for a
freestanding installation. You can install a freestanding unit
undercounter. For non-undercounter installation, you only need
to adjust the front leveling legs and level the unit.
1. Measure the height of your cabinet opening. The top of
the compactor mounting screw head should be at least
1/8" (3 mm) from the top of the cabinet opening.
The rear wheels are preset for a cabinet height of 34
1
/
4
"
(87 cm). See “Position 1” in the following picture.
To adjust for cabinet opening heights greater than 34
1
/
4
":
Loosen self-tapping screw just enough to clear stud
from hole in Position 1.
Move the rear wheel and stud to Position 2 or 3
as needed for your cabinet opening measurement:
Position 2: 34
7
/
16
" to 34
11
/
16
" (87.5 to 88.1 cm)
Position 3: 34
13
/
16
" to 35" (88.4 to 88.9 cm)
NOTE: To level the compactor in position 3, you may
need to add shims under the front leveling legs. The
shims should be approximately 1/4" (6 mm) thick.
Tighten screw.
Loading ...
Loading ...
Loading ...