Loading ...
Loading ...
Loading ...
E-53
ENGLISH
SD-PX2
Advanced Features
- Mounting the unit on the wall -
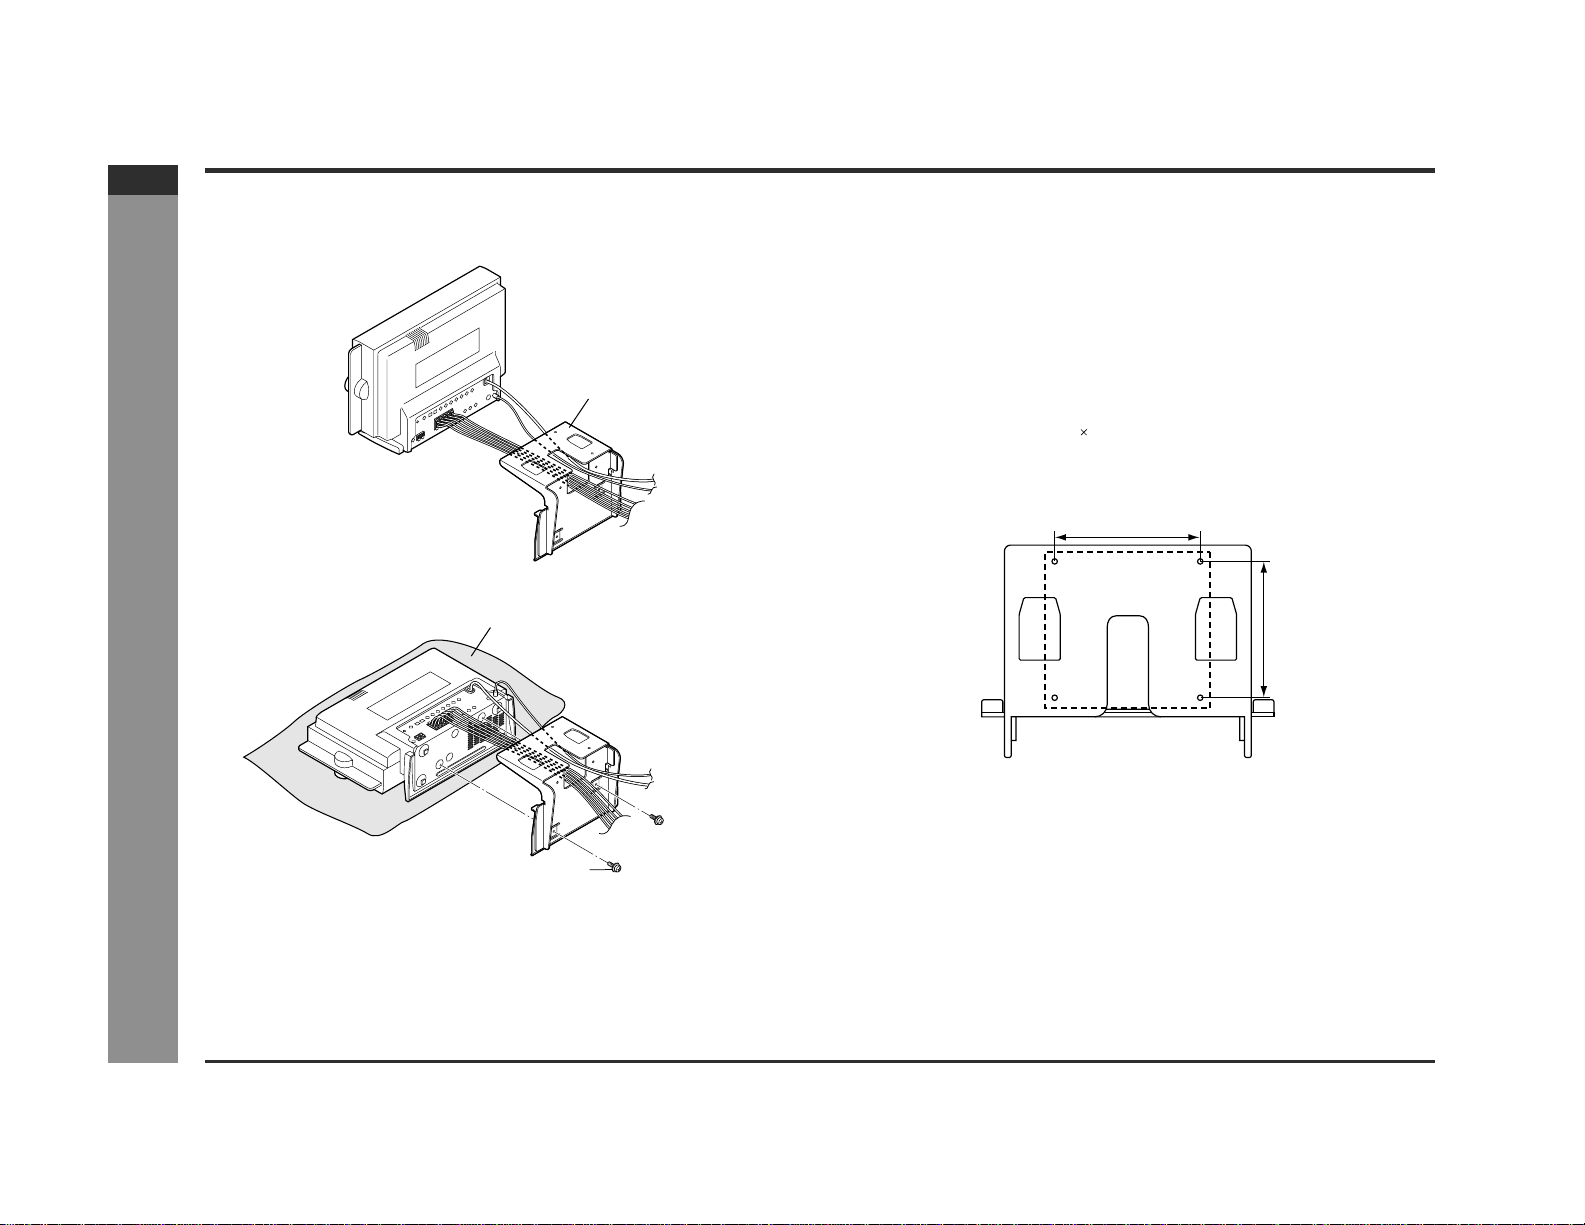
Mounting the unit on the wall
Attaching the main unit bracket to the unit
1
Route all connection cables through the main unit bracket.
2 Attach the main unit bracket to the unit.
z Fix them securely with the supplied 2 screws.
z Do not use other screws. The unit may fall or break.
Mounting the main unit bracket on the wall
VESA (*) compliant fittings (commercially available) can be attached to the
main unit bracket.
A wall bracket and adaptor not supplied, but can be purchased.
Note:
Types of fittings:
Fittings must satisfy the following.
z Compatible with the VESA standard.
z Have a gap of 3.973" (100 mm) 3.973" (100 mm) between the screw holes on the
section to be attached.
z Sturdy and stable to prevent fall or breakage.
How to attach the main unit bracket
z There are four VESA (*) screw holes on the main unit bracket. You can use com-
mercially available fittings for mounting.
z Follow the method recommended by the bracket manufacturer.
Main unit bracket
Place the main unit on a cushion or a
soft cloth to avoid damage.
Supplied screw
(*) VESA (Video Electronics Standards Association) is an organization to promote
the standardization of digital imaging device for PCs.
3.973" (100 mm)
3.973"
(100 mm)
Loading ...
Loading ...
Loading ...