Loading ...
Loading ...
Loading ...
4
3. Remove the glass to stop dispensing.
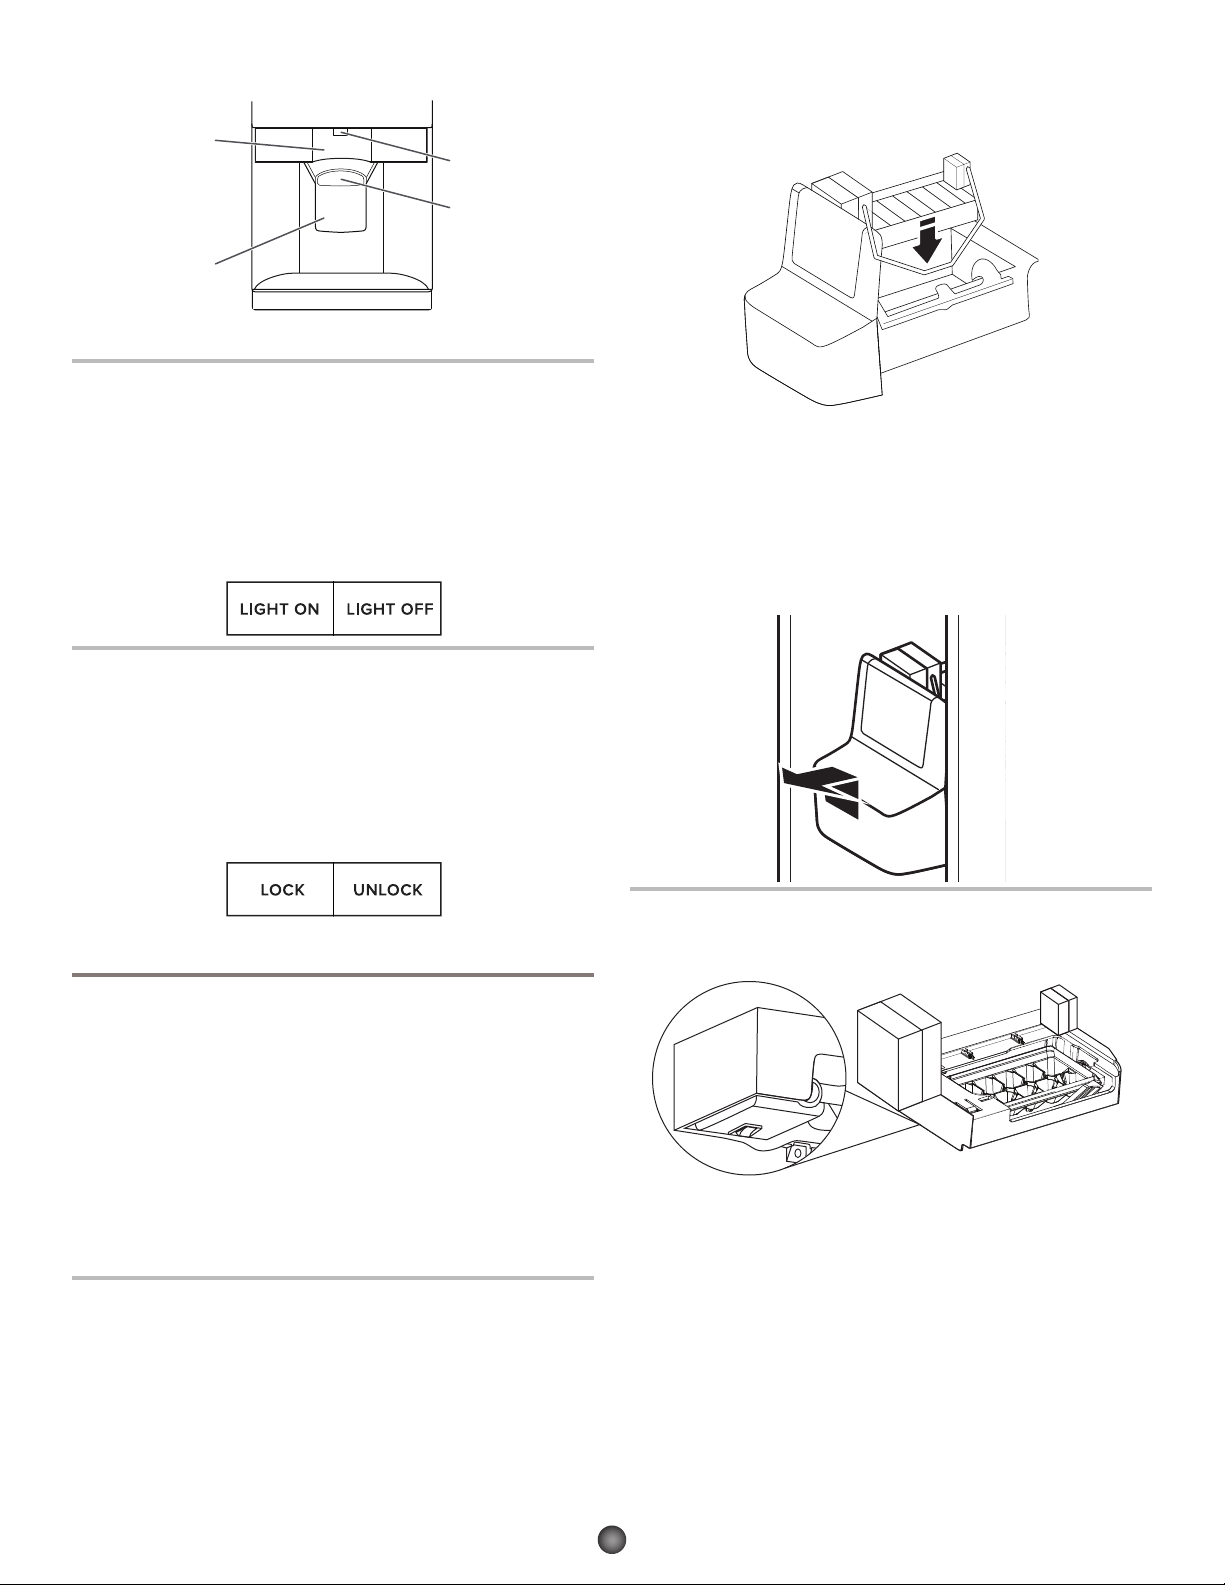
A
C
B
D
The Dispenser Light
On some models, the dispenser light will automatically turn on
when you use the dispenser.
■ If you want the light to be on continuously, press the
LIGHT ON button. To turn the light back off, press the
LIGHT OFF button.
The dispenser lights are LEDs that cannot be changed. If it
appears that your dispenser lights are not working, see the
“Troubleshooting” section for more information.
The Dispenser Lock
The dispenser can be turned off for easy cleaning or to avoid
unintentional dispensing by small children and pets.
NOTE: The lock feature does not shut off power to the
refrigerator, to the ice maker, or to the dispenser light. It simply
deactivates the dispenser lever. To turn off the ice maker, see
the “Ice Maker and Storage Bin” section.
■ To lock the dispenser, press LOCK. To unlock the dispenser,
press UNLOCK.
Ice Maker and Storage Bin
■ Allow 24 hours to produce the rst batch of ice. Discard the
rst three batches of ice produced.
■ The quality of your ice will be only as good as the quality
of the water supplied to your ice maker. Avoid connecting
the ice maker to a softened water supply. Water softener
chemicals (such as salt) can damage parts of the ice
maker and lead to poor quality ice. If a softened water
supply cannot be avoided, make sure the water softener is
operating properly and is well maintained.
■ Do not use anything sharp to break up the ice in the storage
bin. This can cause damage to the ice container and the
dispenser mechanism.
■ Do not store anything on top of or in the ice maker or
storage bin.
Turning the Ice Maker On/Off
Style 1
■ To turn on the ice maker, lift open the ice maker door and
lower the wire shutoff arm to the ON position.
■ To manually turn off the ice maker, lift the wire shutoff arm to
the OFF (arm up) position and listen for the click. Ice can still
be dispensed, but no more can be made.
NOTE: Your ice maker has an automatic shutoff. As ice is made,
the ice cubes will ll the ice storage bin, and the ice cubes will
raise the wire shutoff arm to the OFF (arm up) position. Do not
force the wire shutoff arm up or down.
Removing and Replacing the Ice Storage Bin:
1. Lift and hold open the ice maker door.
2. Lift the wire shutoff arm so it clicks into the OFF (up)
position. Release the ice maker door.
3. Lift up the front of the storage bin and pull it out.
4. Replace the bin by pushing it in all the way, or the dispenser
will not work.
5. To restart ice production, lift open the ice maker door and
push the wire shutoff arm down to the ON position.
Turning the Ice Maker On/Off
Style 2
The On/Off switch is located on the bottom of the Ice Maker, can
be accessed by lifting and opening the ice maker door.
■ To turn on the ice maker, lift open the ice maker door, ip the
switch to the ON (right) position.
■ To manually turn off the ice maker, lift open the ice maker
door, ip the switch to the Off (left) position. Ice can still be
dispensed, but no more can be made.
NOTE: Your ice maker has an automatic shutoff to keep the
storage bin from overlling during normal operation. As ice
is made, the ice cubes will ll the ice storage bin, and the ice
cubes will raise the shutoff arm to the OFF (arm up) position.
When the storage bin is at full capacity, the ice maker will
automatically stop ice production, but the ice maker On/Off
switch will remain in the On (up) position.
A. Water dispenser lever
B. Water dispenser spout
C. Ice dispenser lever
D. Ice guide
Loading ...
Loading ...
Loading ...