Loading ...
Loading ...
Loading ...
en Installation instructions
12
▶
Connect the appliance to a power supply with al-
ternating current only via a properly installed
socket with earthing.
▶
The protective conductor system of the domestic
electrical installation must be properly installed.
▶
Never equip the appliance with an external
switching device, e.g. a timer or remote control.
▶
When the appliance is installed, the mains plug
of the power cord must be freely accessible. If
free access is not possible, an all-pole isolating
switch must be installed in the permanent elec-
trical installation according to the conditions of
Overvoltage Category III and according to the in-
stallation regulations.
▶
When installing the appliance, check that the
power cable is not trapped or damaged.
Information on the installation situation
¡ Install this appliance on the kitchen wall.
Instructions for the exhaust air pipe
The appliance manufacturer does not provide any war-
ranty for faults attributable to the pipeline.
¡ Use a short, straight exhaust air pipe with as large a
pipe diameter as possible.
¡ Long, rough exhaust air pipes, many pipe bends or
small pipe diameters reduce the suction power and
increase the fan noise.
¡ An exhaust air pipe that is made of non-combustible
material.
¡ To prevent condensate from returning, fit the ex-
haust air pipe from the appliance with a 1° gradient.
Round pipes
Use round pipes with an inner diameter of 150mm (re-
commended) or at least 120mm.
Flat ducts
Use flat ducts with an inner cross-section that corres-
ponds to the diameter of the round pipes:
¡ Diameter of 150mm corresponds to ap-
prox.177cm².
¡ Diameter of 120mm corresponds to ap-
prox.113cm².
¡ Use sealing strips for different pipe diameters.
¡ Do not use any flat ducts with sharp bends.
General information
¡ To optimally detect the cooking vapours, install the
appliance in the middle of the hob.
¡ In order to freely access the appliance for servicing,
select an easy-to-reach installation site.
¡ The surfaces of the appliance are sensitive. Avoid
damaging them during installation.
Installation
Preparing the appliance
▶
Remove the grease filters.
To avoid causing damage, do not bend the grease
filters.
Checking the wall
1.
Check whether the wall is horizontal and adequately
load-bearing.
The max. weight of the appliance is 25kg.
2.
Drill the hole depth in accordance with the length of
the screws.
3.
Install the appliance with a fixing material which is
sufficiently stable and has been adjusted accord-
ingly for both the structural conditions and the
weight of the appliance.
4.
Check the cut-out area for existing cables of other
appliances.
Preparing the wall
1.
Cover the hob to prevent damage.
2.
Remove the drilling template.
The cardboard drilling template is part of the pack-
aging.
3.
Mark a vertical centre line on the wall from the ceil-
ing to the lower edge of the appliance.
4.
Using the drilling template, measure and mark the
positions of the fastening screws.
The bottom edge of the appliance is identical to the
lower edge of the drilling template.
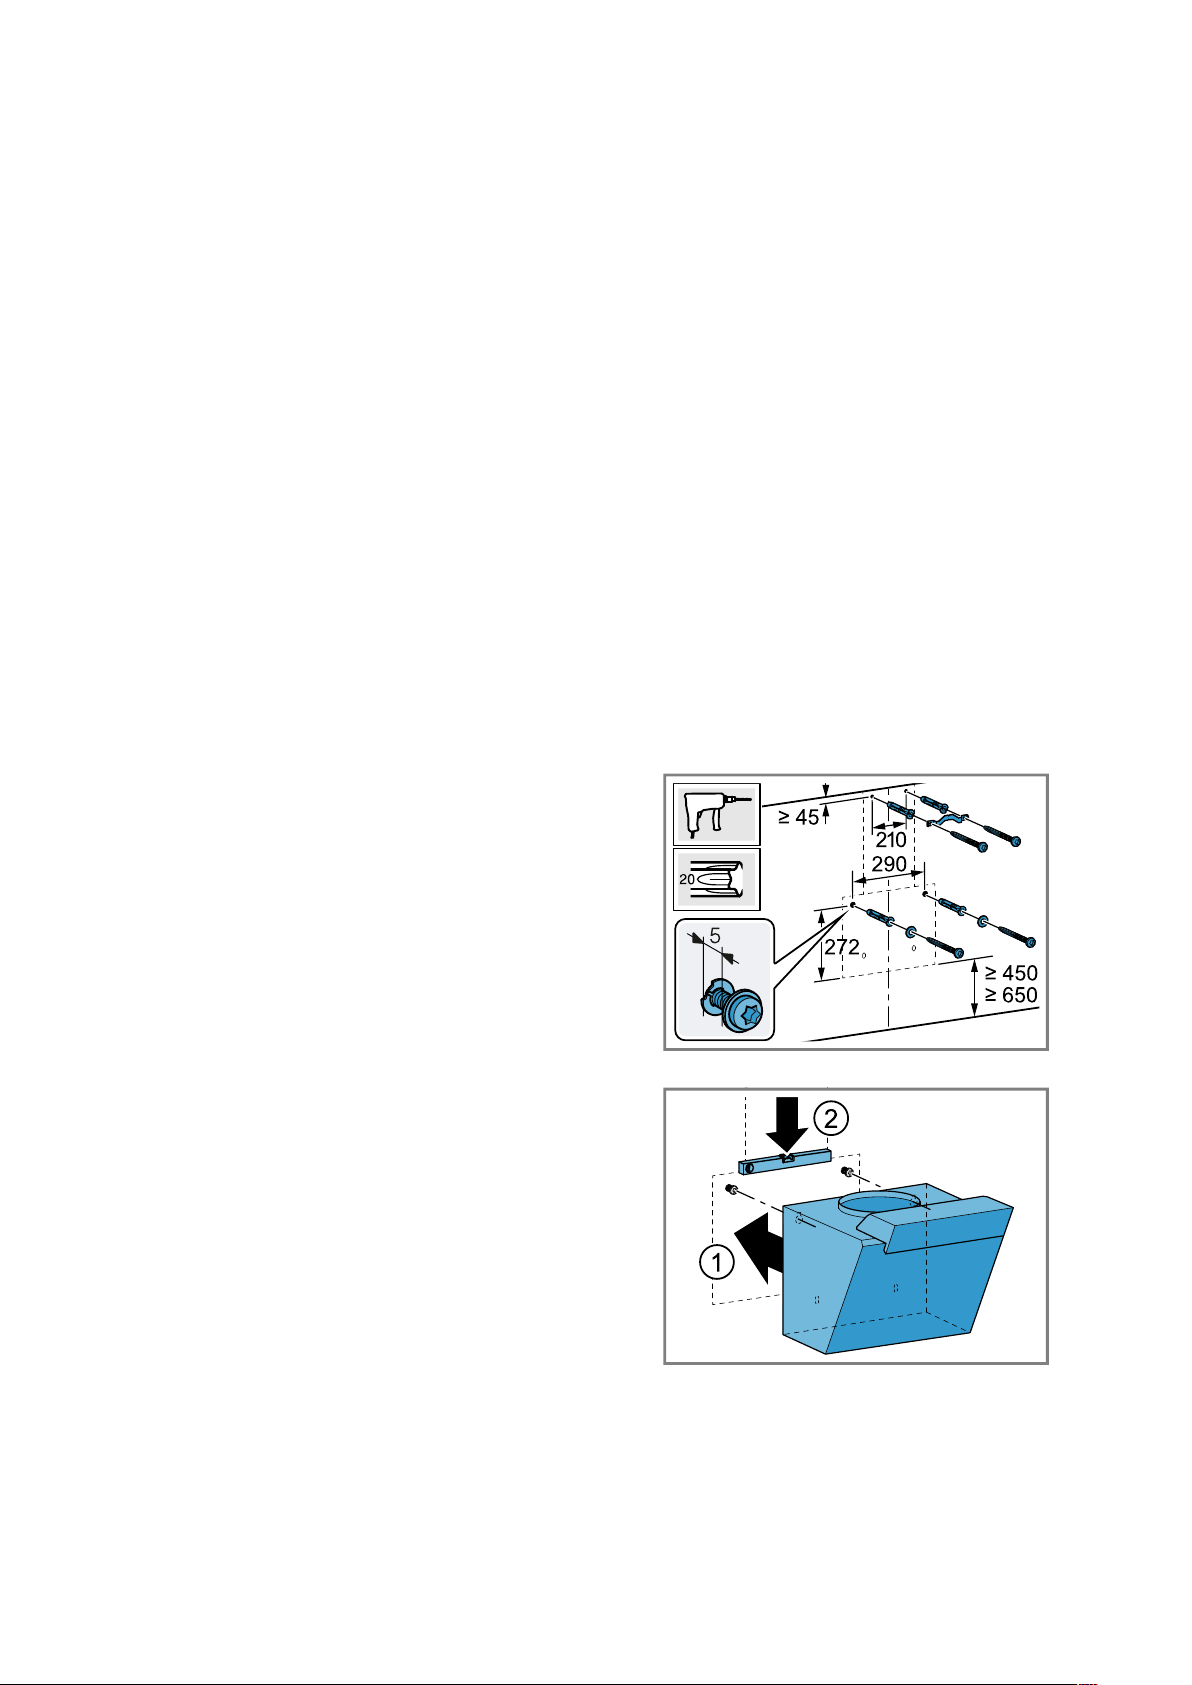
5.
Ensure that there are no electrical wires, gas pipes
or water pipes in the area where holes are to be
drilled.
6.
Drill holes with a diameter of 8mm.
7.
Drill the hole depth in accordance with the length of
the screws.
8.
Insert the wall plugs flush with the wall.
9.
Remove the angle bracket for the flue duct.
10.
Screw in two fastening screws with washers to ap-
prox. 5mm.
11.
Attach and align the appliance.
12.
Mark the hole for the safety screw.
13.
Remove the appliance once more.
Attaching the appliance
1.
Drill an 8 mm hole for the safety screw.
2.
Insert the wall plugs flush with the wall.
3.
Attach the appliance.
Loading ...
Loading ...
Loading ...