These instructions apply to metal interior lined side-by- side refrigerators only. For Plastic interior lined side- by-side refrigerators refer to page 4. For top-freezer refrigerators refer to page 6.
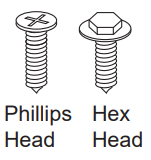
The icemaker will be attached to the icemaker bracket with a Phillips head or Hex head screws.
Using the appropriate screwdriver, loosen the 2 mounting screws until the screw heads extend about 1/2" (13mm) from the icemaker bracket. NOTE: Do not completely remove the screws.
Slide the icemaker upwards so that the screws are in the wide part of the mounting tab. Pull the icemaker away from the icemaker bracket.
To unplug the icemaker, locate the restraints on each side of the plug. Unclip the restraints by pulling outward.
Unplug the icemaker from the socket located on the rear wall the freezer.
STEP 3 REMOVE FILL CUP AND ICEMAKER INSERT
Remove the fill cup and icemaker insert from the old icemaker.
Discard the old icemaker.
STEP 4 INSTALL FILL CUP AND ICEMAKER INSERT INTO NEW ICEMAKER
If you received a NEW fill cup with your icemaker install the fill cup now.
If you did not receive a new fill cup, reinstall the fill cup from the old icemaker.
Install the icemaker insert into the new icemaker.
STEP 5 PLUG IN THE ICEMAKER
Holding the icemaker in place, insert the icemaker power cord plug into the socket, making sure that the prongs and holes are matched. Press the plug firmly into the socket. Lock the plug in place by clipping the restraints onto each side of the plug. Make sure the restraints click into place.
NOTE: The power cord SHOULD NOT be placed in the hook on the back of the icemaker.
STEP 6 MOUNT THE ICEMAKER
Lift the icemaker up and hang it on the icemaker bracket. Make sure the fill tube goes into the fill cup opening. Secure the icemaker to the bracket with the two screws and install as shown.
NOTE: It is critical that the fill tube is positioned into the fill cup opening.
Make Sure:
The power cord is still firmly in the socket.
The fill tube extends into the fill cup opening at the back of the icemaker.
The icemaker is secured to the bracket.
The icemaker is level side to side and front to back.
STEP 7 COMPLETE THE INSTALLATION
Reconnect power to the refrigerator.
Set the icemaker power switch to the ON position.
Make sure that the icemaker power cord is currently plugged in.
Replace the ice bucket and chiller shelf (if applicable). Return any items that were removed to the freezer.
It may take several hours for the freezer to reach the selected temperature and for ice production to begin.
These instructions apply to plastic interior lined sideby-side refrigerators only. For Metal interior lined sideby-side units refer to page 2. For top-freezer units refer to page 6.
STEP 1 REMOVE THE ICE BUCKET
STEP 2 REMOVE THE EXISTING ICEMAKER
The icemaker will be attached to the icemaker bracket with Phillips head or Hex head screws.
Using the appropriate screwdriver, loosen and remove the 2 mounting screws. NOTE: Remove screws completely. If screws fall into the icemaker they can be retrieved when icemaker has been removed.
Slide the icemaker up and out from the bracket.
To unplug icemaker, locate restraints on each side of plug. Unclip the restraints by pulling outward.
Unplug icemaker from socket located on the top of auger motor housing.
STEP 3 REMOVE FILL CUP, ICEMAKER INSERT AND PLASTIC STRIPPER PLATE
Remove fill cup and icemaker insert from old icemaker.
YOU MUST REMOVE THE OLD STRIPPER AND USE ON THE NEW ICEMAKER. YOU CANNOT USE THE NEW STRIPPER. To remove, gently pull out on the center of the plastic to disengage the right end from the slot on the housing. Push the piece off the mold body post at the opposite end. You may need to wiggle the stripper. Remove the stripper from the new icemaker the same way, and replace with the original one.
Discard the old icemaker.
STEP 4 INSTALL FILL CUP AND ICEMAKER INSERT INTO NEW ICEMAKER
If you received a NEW fill cup with your icemaker install the fill cup now.
If you did not receive a new fill cup, reinstall the fill cup from the old icemaker.
Install the icemaker insert into the new icemaker.
STEP 5 ATTACH THE ORIGINAL PLASTIC STRIPPER PLATE TO NEW ICEMAKER
Align the hole on the original plastic stripper, with the post on the end of the icemaker. Rotate the piece towards mold body as you pull it onto the post.
Flex the plastic outward from the middle as you align the end with the slot in the housing.
Make certain the grooves on the inside of the stripper align with the mold body so that it fits straight.
STEP 6 MOUNT THE ICEMAKER
Lift the icemaker up and hang it on the icemaker bracket. Make sure the fill tube goes into the fill cup opening. Secure the icemaker to the bracket with the two screws and install as shown.
NOTE: It is critical that the fill tube is positioned into the fill cup opening.
Make Sure:
The power cord is still firmly in the socket.
The fill tube extends into the fill cup opening at the back of the icemaker.
The icemaker is secured to the bracket.
The icemaker is level side to side and front to back.
STEP 7 PLUG IN THE ICEMAKER
Insert the icemaker power cord plug into the socket, making sure that the prongs and holes are matched. Press the plug firmly into the socket. Lock the plug in place by clipping the restraints onto each side of the plug. Make sure the restraints click into place and the power cord is firmly in the socket.
NOTE: The power cord SHOULD be placed in the hook on the back of the icemaker.
STEP 8 COMPLETE THE INSTALLATION
Reconnect power to the refrigerator.
Set the icemaker power switch to the ON position.
Make sure that the icemaker power cord is currently plugged in.
Replace the ice bucket and chiller shelf (if applicable). Return any items that were removed to the freezer
. It may take several hours for the freezer to reach the selected temperature and for ice production to begin.
These instructions apply to top-freezer refrigerators only. For metal interior lined side-by-side refrigerators refer to page 2. For plastic interior lined side-by-side refrigerators refer to page 4.
STEP 1 REMOVE THE EXISTING ICEMAKER
The icemaker will be attached to the side wall of the freezer with a Phillips head or Hex head screws.
Using the appropriate screwdriver, loosen the mounting screws until the screw heads extend about 1/2"(13mm) from the freezer wall.
NOTE: Do not completely remove the screws.
Slide the icemaker upwards so that the screws are in the wide part of the mounting tab. Pull the icemaker away from the side wall of the freezer.
To unplug the icemaker, locate the restraints on each side of the plug. Unclip the restraints by pulling outward.
Unplug the icemaker from the socket located on the back or side wall of the freezer.
STEP 2 INSTALL THE NEW ICEMAKER
Assemble the fill cup to the icemaker.
Plug the icemaker power cord into the socket. Press firmly into place. Lock the plug in place by clipping the restraints onto each side of the plug.
NOTE: If the plug is located on the back wall of the freezer, the power cord SHOULD NOT be placed in the hook on the back of the icemaker.
Position the icemaker mounting tabs over the mounting screws. NOTE: It is critical that the fill tube is positioned in the fill cup opening.
Retighten the mounting screws. Make certain that the icemaker is level.
STEP 3 COMPLETE THE INSTALLATION
Reconnect power to the refrigerator.
Set the icemaker power switch to the ON position.
Make sure that the icemaker power cord is currently plugged in.
Replace the ice bucket in the proper location. Return any items that were previously removed from the freezer.
It may take several hours for the freezer to reach the selected temperature and for ice production to begin.
-881105.png)
-80422.png)
-768326.png)
-138850.png)
-873706.png)
-28879.png)
-457809.png)
-529244.png)
-649188.png)
-407020.png)
-489069.png)
-173198.png)
-51767.png)
-396866.png)
-207246.png)
-775256.png)
-398591.png)
-81528.png)
-423543.png)
-741916.png)
-928083.png)
-74375.png)