Loading ...
Loading ...
Loading ...
6
ENGLISH
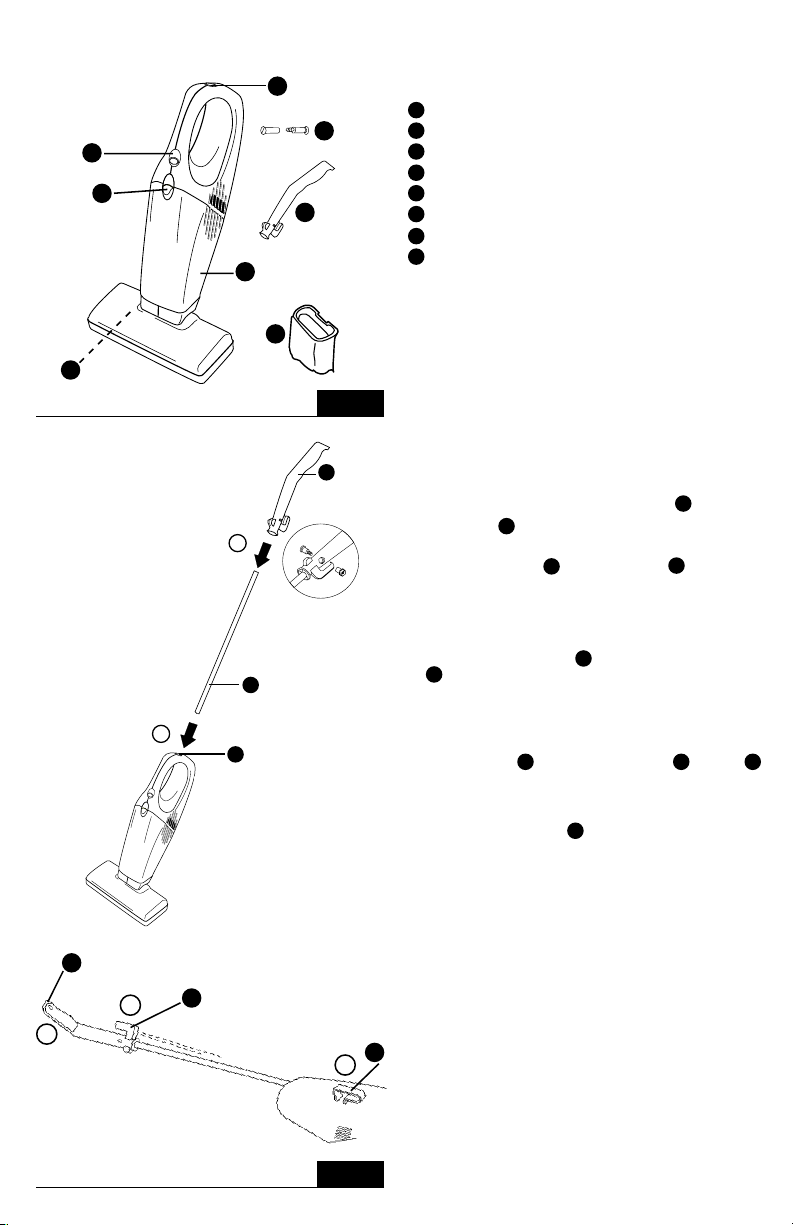
PARTS LIST (Fig 1)
A Lock button
B On/Off Switch
C Dust cup latch
D Dust cup
E Dust cup filter
F Handle grip
G Handle bolt
H Brush roll (optional)- Inside nozzle
HOW TO ASSEMBLE (Fig 2)
Assemble completely before using.
➀ Attach Handle
Use your thumb to pull back on the lock button A .
Push handle B into top of cleaner. Insert end with black knob
into the cleaner.
Release lock button A and rotate handle B until it locks
into place.
➁ Attach Handle Grip
Locate the handle bolt in the accessory package.
Align the hole in the handle B with the hole in the handle grip
C and secure with the 2-part handle bolt, see Detail A. Tighten
the handle bolt.
➂ Store Cord
Pull up on the electrical cord. Push cord into cord retainer inside
upper cord hook D . Wrap cord around upper D and lower E
cord hooks. Fasten plug to electrical cord to prevent unwinding.
➃ Store Unit
Use the hole in the handle F to hang the cleaner for storage.
FIG. 1
A
C
D
F
G
H
E
B
1
2
A
B
C
Detail A
FIG. 2
4
3
3
D
F
E
Loading ...
Loading ...
Loading ...