Loading ...
Loading ...
Loading ...
21
12
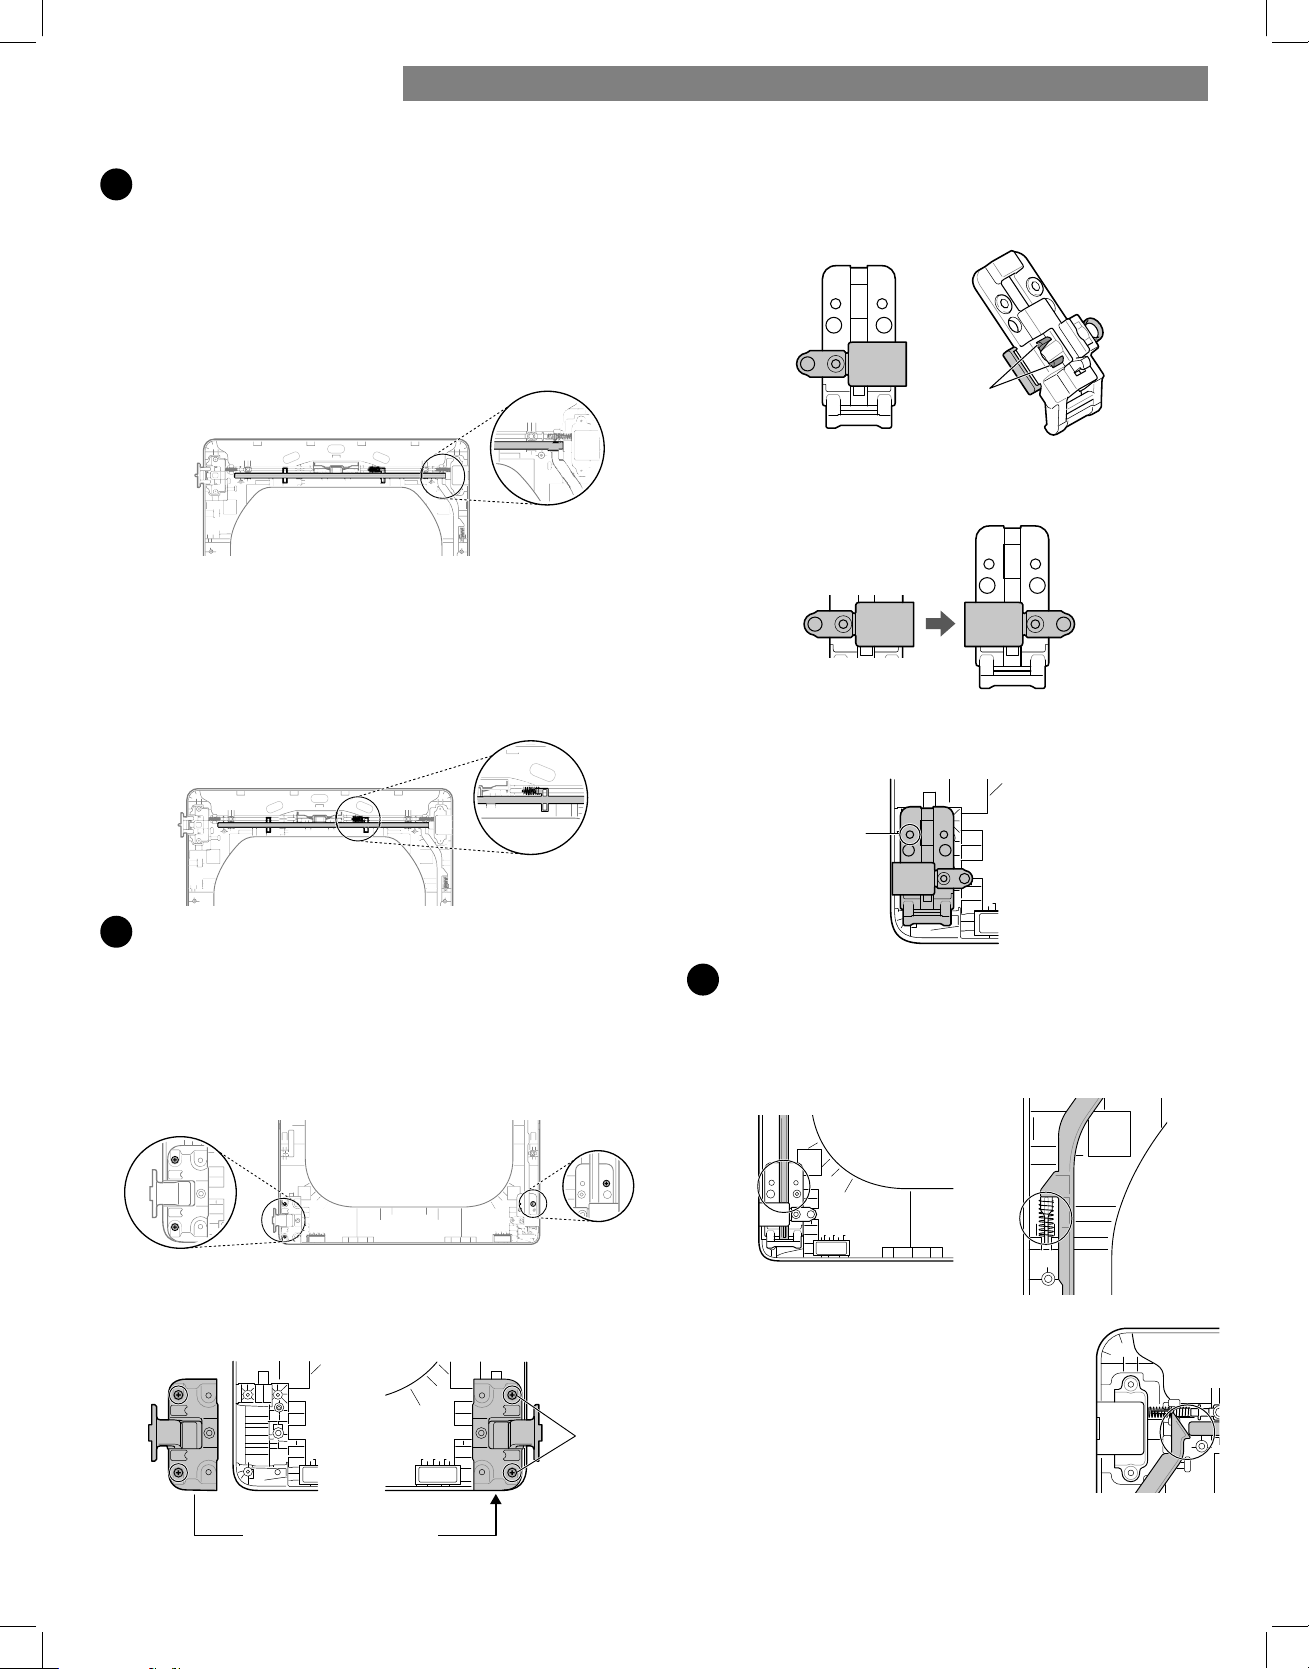
Reinstall the top lock rod.
Rotate the top lock rod (removed in step 9) 180 degrees
end for end from its original position and reinstall it.
The spring should now be to the right of center, with
the spring on the side of the rod facing the top of
the door.
a. Insert the right end of the lock rod into the right hinge
assembly. Make sure the rod is aligned with the
guides in the door panel.
b. Lower the rod into position, sliding it to bypass
the center handle, making sure to align the lock
rod with the guides all the way across the door
panel. When released, the lock rod should slide
completely into the hinge asembly on the right.
Slide the lock rod back and forth to make sure it is
correctly positioned in the guides and slides easily.
13
Reverse the lower hinge bracket and hinge
assembly.
a. Remove the screw from the lower hinge bracket
(on the right) and lift the hinge bracket out. Set it
aside.
Remove the two screws from the lower hinge
assembly on the bottom left and lift the hinge
assembly out.
b. Rotate the lower hinge assembly 180 degrees and
install it on the right side using the two screws
removed in step a.
c. Flip over the lower hinge bracket and release the
tabs on the back locking the hinge filler to the hinge
bracket.
d. Rotate the hinge filler 180 degrees and snap it
back onto the front of the hinge bracket facing in
the opposite direction.
e. Mount the lower hinge bracket and the filler on the
left side of the door with the screw removed in step a.
14
Install the side lock rod.
Flip the side lock rod over and install it on the
opposite side. Insert the lower end into the left hinge
and lower the rod into the guides on the door while
compressing the spring inside the recess.
M
ake sure the top of the side lock
rod is beside the top lock rod and
the two do not overlap each other, so
the two rods can interact correctly.
If they are not aligned properly, the
door will not operate properly.
Lower hinge assembly
Screws
tab s
screw
INSTALLATION INSTRUCTIONS
Loading ...
Loading ...
Loading ...