Loading ...
Loading ...
Loading ...
– 28 –
To Select Pitch of Tone
There are 3 options for the pitch of tone at the end of the heating cycle.
: Low, : Normal (Factory Setting), : High
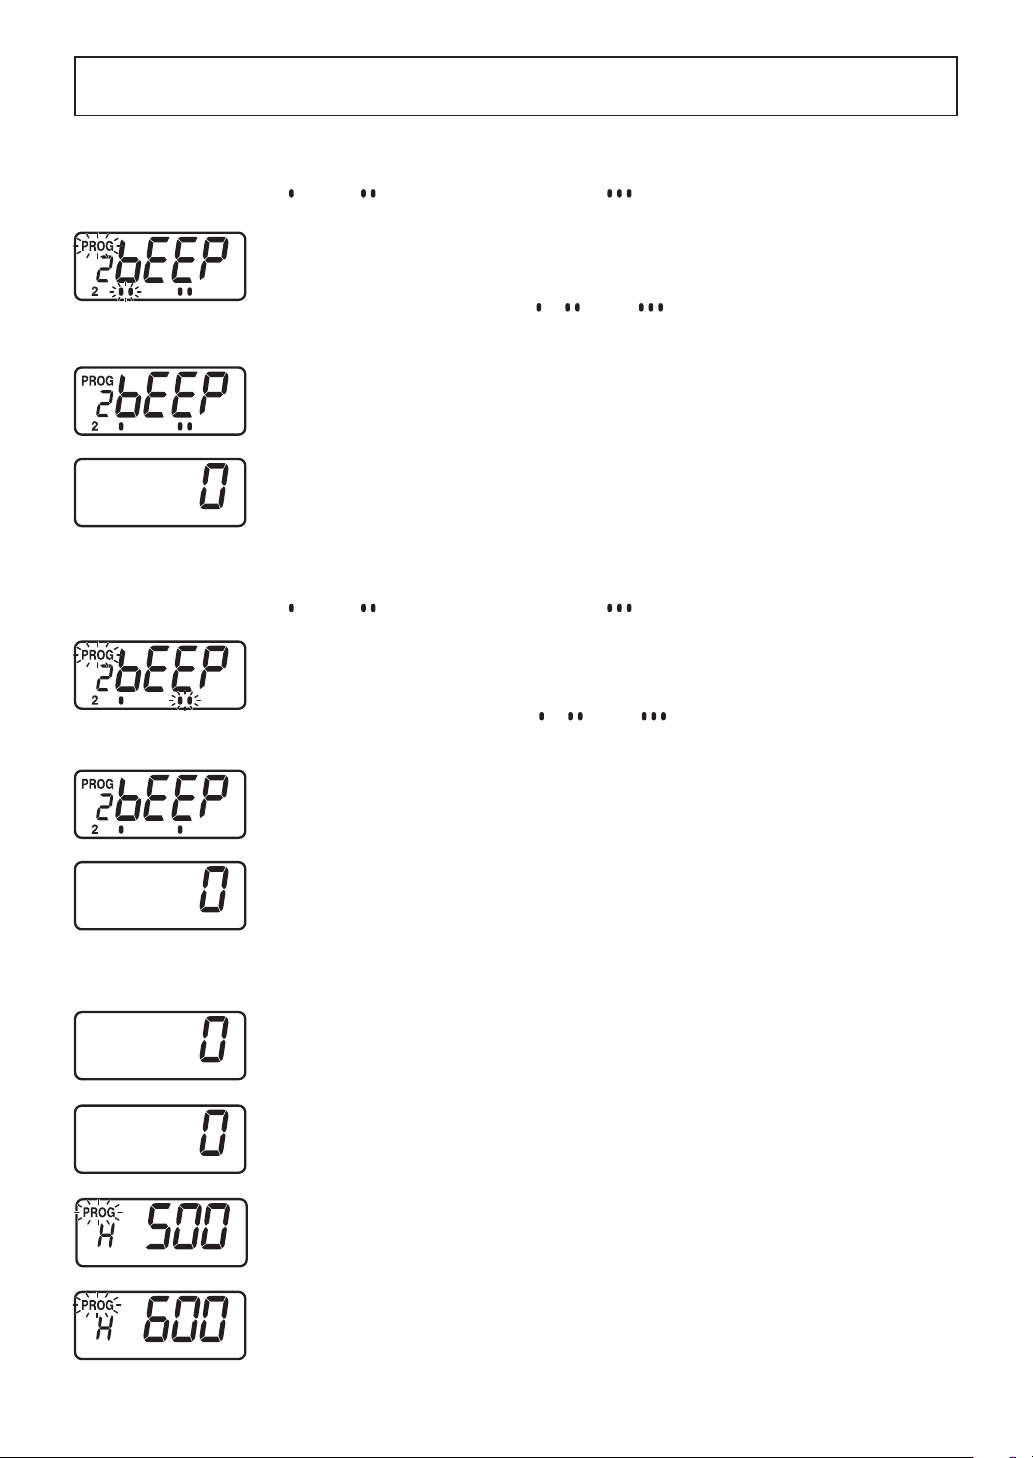
8. Within 3 seconds after touching Prog Pad at Step 7, touch Start Pad.
A. “PROG” will start to blink.
B. Current pitch of tone will be displayed.
C. The display changes to “
”, “ ”, and “ ” each time Start Pad is touched and
the settings change (Under the “bE” in “bEEP”).
9. When the desired pitch of tone has been selected, touch Prog Pad again.
“PROG” will stop blinking, and the set pitch of tone at the end of heating cycle
will appear for 3 seconds. Then “0” will appear.
To proceed to set pitch of filter cleaning alarm, touch Start Pad before “0” is
displayed after Step 9.
To Select Pitch of Filter Cleaning Alarm
There are 3 options for the pitch of the filter cleaning alarm.
: Low, : Normal (Factory Setting), : High
10. Within 3 seconds after touching Prog Pad at Step 9, touch Start Pad.
A. “PROG” will start to blink.
B. Current pitch of filter cleaning alarm will be displayed.
C. The display changes to “
”, “ ”, and “ ” each time Start Pad is touched and
the settings change (Under the “EP” in “bEEP”).
11. When the desired pitch of filter cleaning alarm has been selected, touch Prog
Pad again.
“PROG” will stop blinking, and the set pitch of filter cleaning alarm will appear for
3 seconds. Then “0” will appear.
Note: When the programmed hour of cleaning Air Filter is “0”, the pitch of filter
cleaning alarm can not be selected.
N. Procedure to Program the Air Filter
1. Open the door and leave it open.
The oven lamp will turn on. “0” will appear in the Digital Display Window.
2. While touching Start Pad, touch Number Pad “7”.
3. The display will show the length of time (in hours) between cleaning the Air Filter
you have programmed in or the original time preset by the manufacturer.
4. Set the desired time between cleaning by touching the appropriate Number
Pads. (Up to 9999 hours)
[Example]: Touch Number Pads “6”, “0” and “0” for 600 hours.
(Continued on next page.)
How to Operate NE-1853
Loading ...
Loading ...
Loading ...