Loading ...
Loading ...
Loading ...
– 19 –
(Continued on next page.)
How to Operate NE-1853
POWER LEVEL SELECTOR PAD
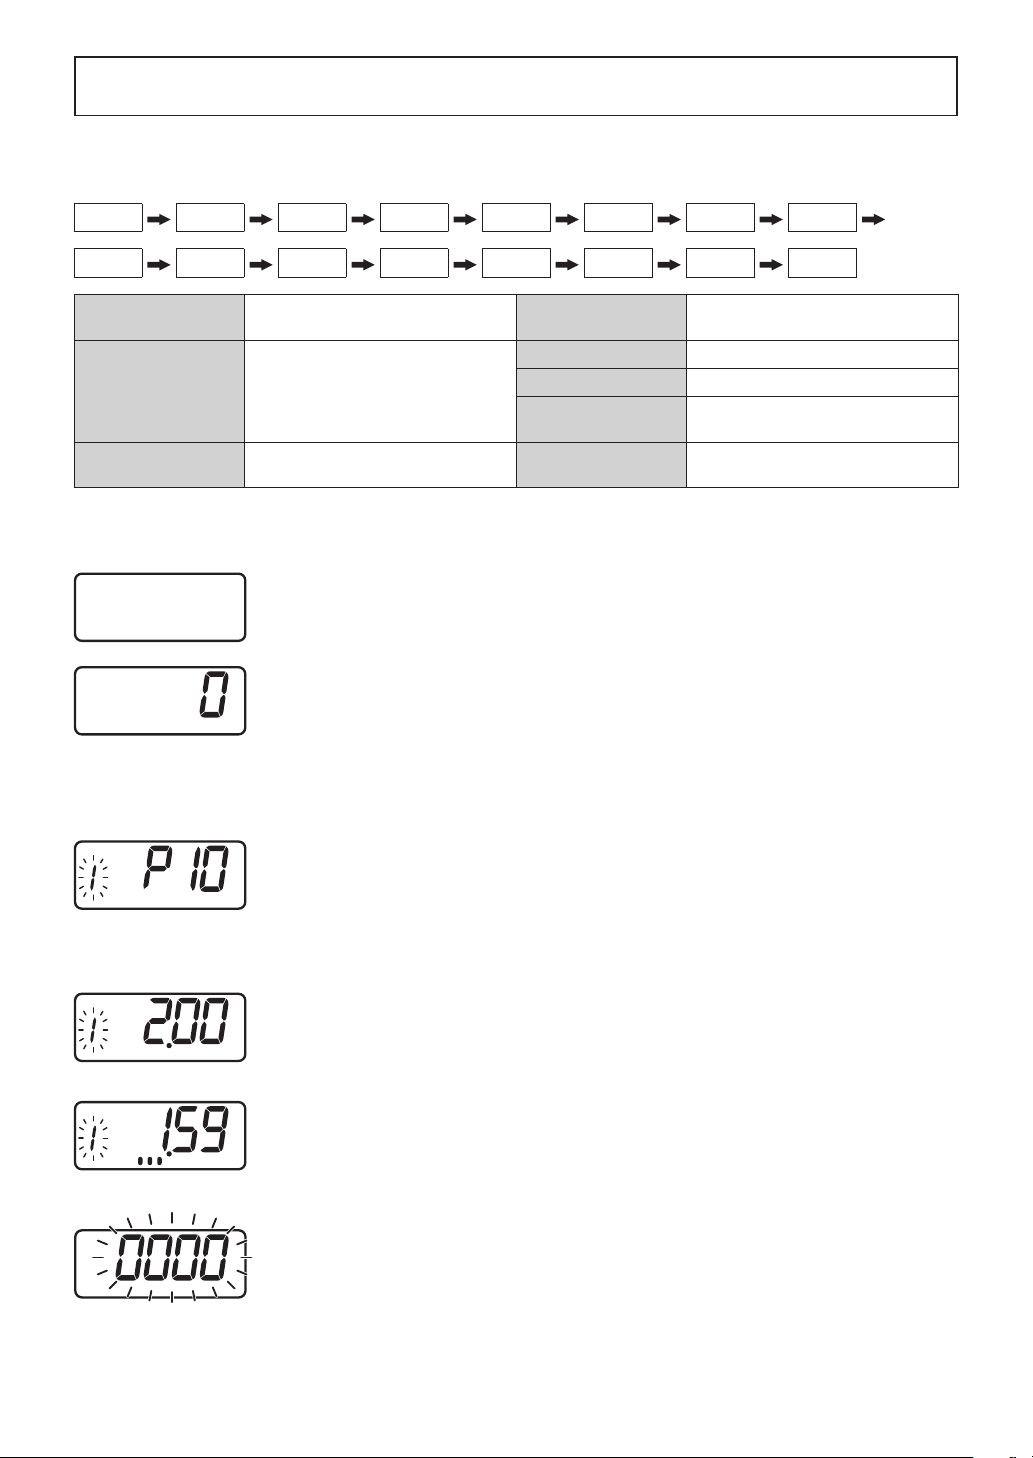
Each time the pad is touched, the Power Level switches as the illustration below.
P10 P9 P8 P7 P6 P5 P4 P3
P2 P1 P0 PU1 PU2 PL1 PL2 P10 again.
HIGH
P10: 1800 W*
LOW
P3: 30%
P2: 25%
MEDIUM
HIGH
P9: 90%
P8: 80%
P7: 70%
P6: 60%
DEFROST
P1: 340 W
OFF
P0: 0%
HEAT FROM
TOP DOWN
PU1: 50%
PU2: 25%
MEDIUM
P5: 50%
P4: 40%
HEAT FROM
BOTTOM UP
PL1: 50%
PL2: 25%
*IEC Test Procedure
A. Manual Single Stage Heating
1. Make sure the oven is plugged into a properly earthed electrical outlet.
2. Open the door.
The oven lamp will turn on. “0” will appear in the Digital Display Window.
3. Put the food into a suitable container, place it in the centre of the oven and then
close the door securely.
The oven lamp will turn off.
Note: While “0” appears, operation is available. 1 minute after the door is closed,
“0” will disappear.
4. Select the desired Power Level by touching Power Level Selector Pad.
The selected Power Level will be displayed in the Digital Display Window and the
single stage heating indicator “1” will start to blink.
[Example]: Touch Power Level Selector Pad once for HIGH power.
Note: Each time Power Level Selector Pad is touched, the Power Level switches
as the above Power Level Selector illustrates.
5. Set the desired heating time by touching the appropriate Number Pads.
Note: The maximum set time for “DEFROST” and “P0” is 30 minutes, and
15 minutes for all others.
[Example]: Touch Number Pads “2”, “0” and “0” for 2 minutes.
6. Touch Start Pad.
A. The oven lamp will turn on.
B. Heating will start.
C. During operation, the indicator appears from the left.
D. The heating time on digital display will count down.
7. When all time expires, the end of cycle beep tone will sound and all heating will
stop. The oven lamp will turn off. The display will blink “0000” until the door is
opened. 1 minute later cooling fan will stop.
Loading ...
Loading ...
Loading ...