Loading ...
Loading ...
Loading ...
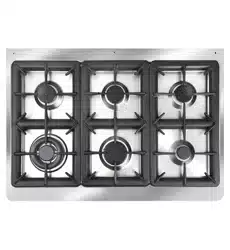
PCI "Campanil"TR 259 Analogic
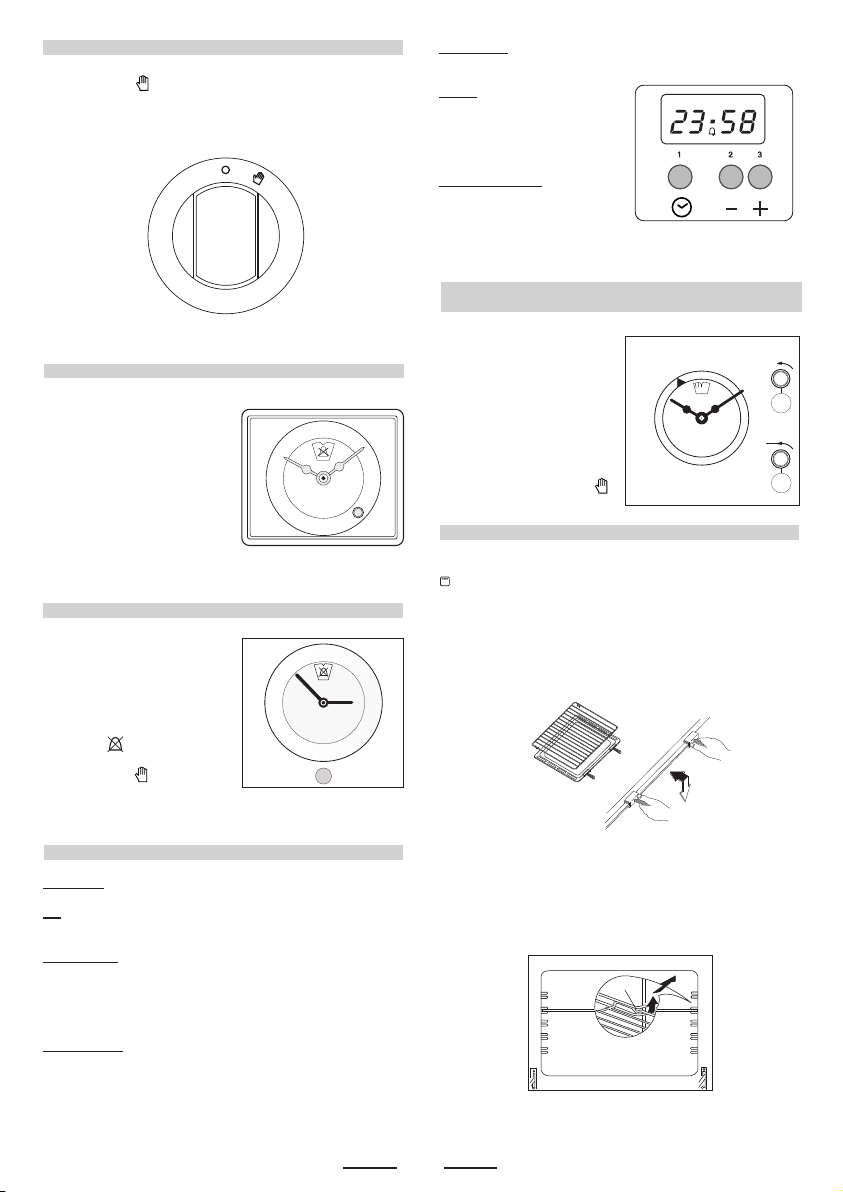
Setting the clock
Press the control knob and turn
clockwise.
Alarm programme adjustement
Turn the knob clockwise without
pressing it in. At the end of the
programmed time an alarm will
sound.
To ca nce l it , tu rn t h e kno b to th e
bell.
Instructions and operation PCI TR 331.
To s et t he cl o ck pr e ss th e kn o b
and turn anti-clockwise.
To a dju st co o kin g ti m e, tur n t he
knob clockwise without pressingit
in. The end of cooking time is
announced by an alarm bell, which
is cancelled by turning the knob
to position .
For manual connection, turn the
knob to position .
ELECTRONIC TIMER FOR COOKER
Functions
On
The display flashes.
Time setting
Press the left button.
Set the time with buttons “+” and “-”.
This function remains activated 7 seconds after the last +/-
operation.
Timer setting
This function is permanently activated and it will be immediately
set with +/- buttons. During setting the units are 10 seconds.
During count down the timer takes priority on the display.
The units are seconds. The maximum time is 99 minutes.
The relay contact (when available) is closed during the count down
only.
MECHANICAL PROGRAMMER WITH COOKING
START/END TIME
Setting the clock: press knob B and turn it anti-clockwise.
Adjustment of starting time: press
knob A and turn it anti-clockwise.
Adjustment of connection time:
turn knob B anti-clockwise
without pressing it in.
The end of the connection is
announced by an alarm bell,
which can be stopped by turning
knob B to position 0 without
pressing it in. Manual connection:
turn knob B to position I a
without pressing it in.
Reset timer
Press “+” and “-” buttons together and release “+” button first.
Signal
The signal after time out will stay
7 minutes if it has not been reset
with the “+” button (one touch
only).
Signal frequency
When the display shows the time
of day, the signal frequency can
be selected by pressing the “-”
button.
Three different frequencies are
selectable.
1 Time of the day
2 Timing and insertion
3 Signal timng and insertion
XII
XI
X
IX
VIII
VII
VI
V
I
II
III
IV
12
2
1
3
4
5
6
7
8
9
10
11
USE OF THE ELECTRIC GRILL
O
B
A
III
II
XI
XII
X
IX
VIII
VI
V
VI
I
VII
10
Bump
USlNG THE GRILL
Tu r n t h e ov en kn ob t o the r ig ht an d pl ac e it o n the g r il l pos it io n
.
The grill pan should be located on the top oven shelf position and
is provided with two detachable grill pan handles which are
engaged over the front edge of the pan between the indentations
provided. A wire grid is supplied. The grill pan handle should be
removed from the grill pan during the grilling operation and only
fitted for removal or insertion of the grill pan particularly when hot.
Always preheat the grill on full for 3-5 minutes before inserting
the food.
The user can change the shelves, depending on his personal
whishes and on the different food.
Geat the oven 5 minutes before introducing the food.
PROGRAMMER WITH COOKING END TIME
For a manual operation of the programmer, turn the knob
anticlockwise to
.
Adjust the cooking time by turning the knob clockwise.
Select the cooking time with the relevant knob (max.120 min.).
The oven will switch off automatically when the cooking is up.
0
10
20
30
40
50
60
70
80
90
100
110
120
stop
To remove the shelves from the oven, pull them forward you, tilt
front end upward and pull them out.
To replace, ct in the opposite manner as before.
Install shelves by locating them in the horizontal guide rails on
the oven walls. The raised portion of the shelf is to be facing the
rear wall of the oven.
Loading ...
Loading ...
Loading ...