Loading ...
Loading ...
Loading ...
11
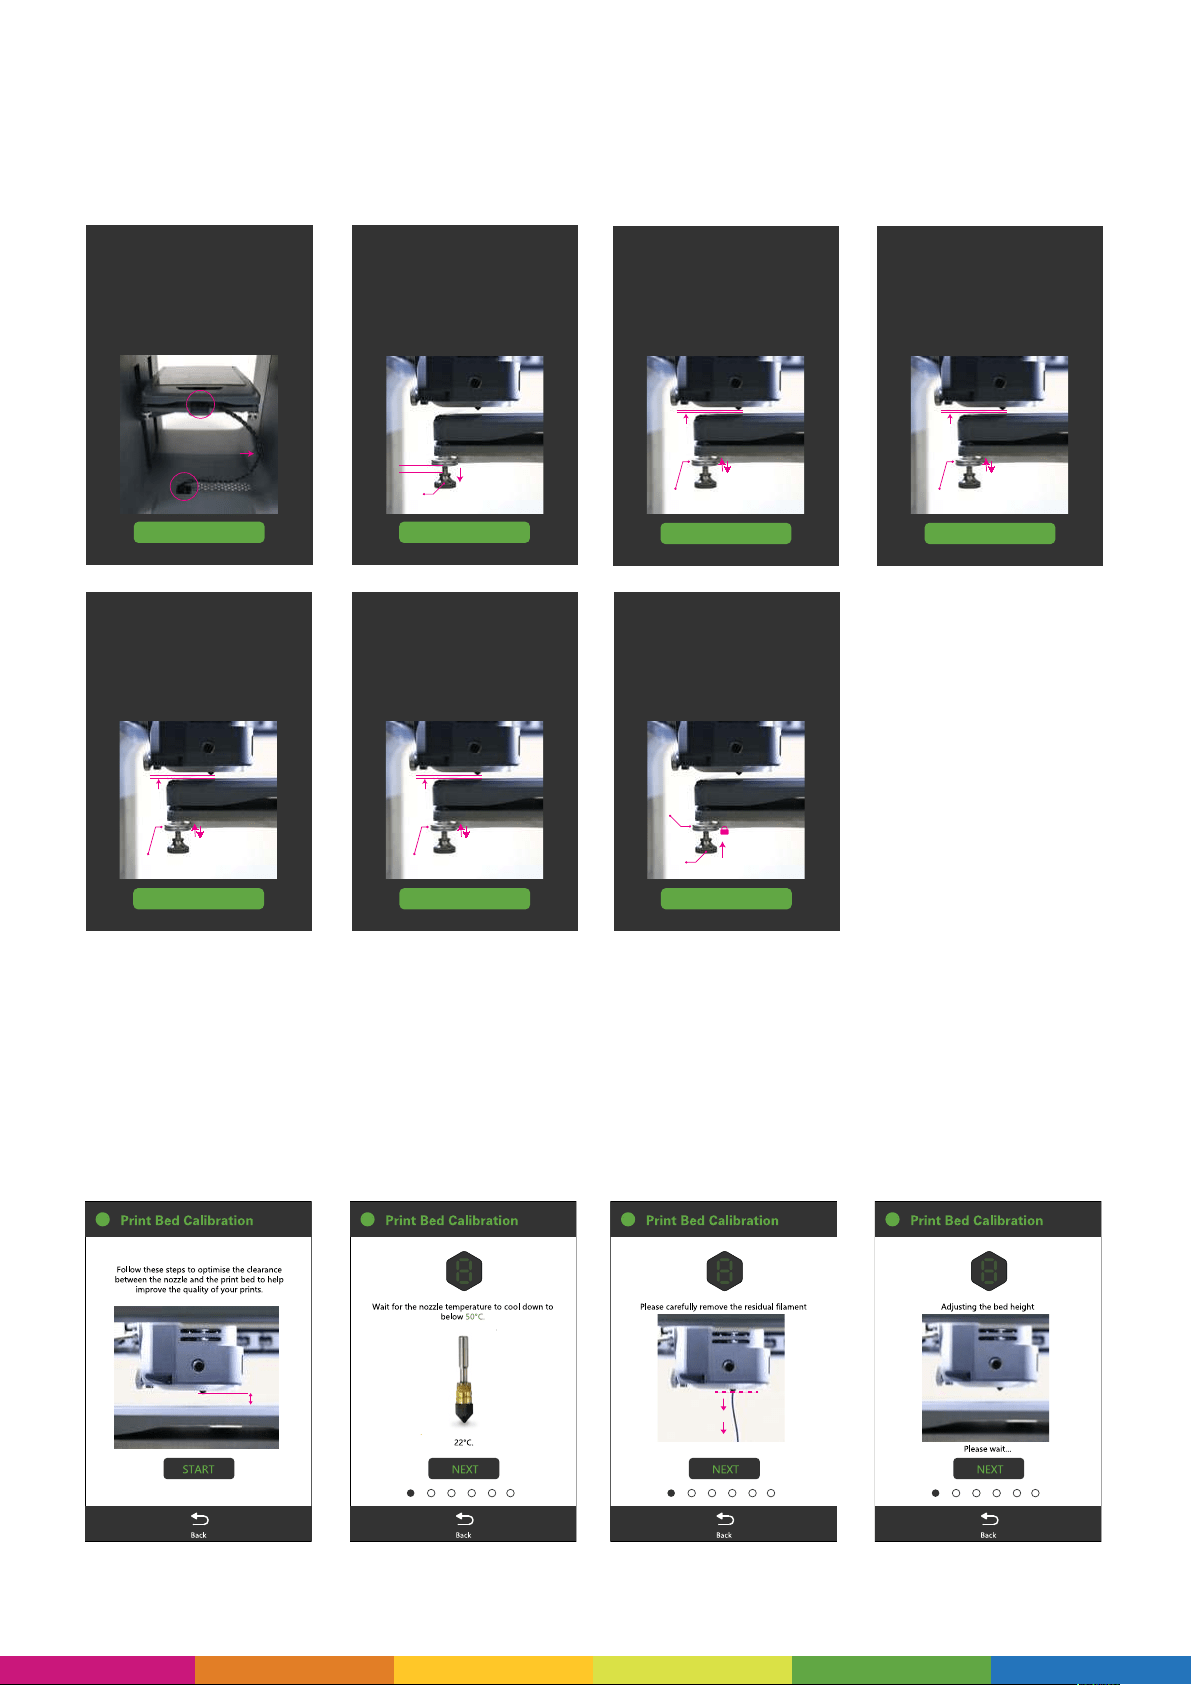
• Bed Levelling: The on-screen instructions here provide you with guidance on how to
ensure that your print bed is level prior to printing (this is very important in order to achieve
a successful print). Simply follow the step-by-step instructions to adjust each corner of the
bed, see below:
Next
Check Connection
Previous Skip
Please ensure the Heated Print Bed and the
Polaroid PlaySmart 3D printer are properly
connected. Please refer to the image below to
connect the cable correctly. If any error occurs
please disconnect and reconnect.
Port 1
Port 2
Cable
Next
Loosen nuts
Previous Skip
Loosen the 4 Screw Nuts under each corner
of the Print Bed. Leave a 2 - 3mm gap
between the Screw Nuts and the Levelling
Nuts to be able to make the levelling
adjustments to the Print Bed.
2-3 mm
gap
Screw
Nut
Screw downwards
(clockwise) to
loosen the nut
Next
Bottom left
Previous
Adjusting the Levelling Nuts:
To widen the gap between the nozzle and the bed, tighten
the Levelling Nuts by turning anti-clockwise. To reduce the
gap between the nozzle and the bed, loosen the Levelling
Nuts by turning clockwise. The gap should ideally be the
thickness of a sheet of 80gsm paper.
Skip
Leveling Nut
twist to adjust
80gsm
paper
thickness
Next
Upper left
Previous
Adjusting the Levelling Nuts:
To widen the gap between the nozzle and the bed, tighten
the Levelling Nuts by turning anti-clockwise. To reduce the
gap between the nozzle and the bed, loosen the Levelling
Nuts by turning clockwise. The gap should ideally be the
thickness of a sheet of 80gsm paper.
Skip
Leveling Nut
twist to adjust
80gsm
paper
thickness
Next
Upper right
Previous
Adjusting the Levelling Nuts:
To widen the gap between the nozzle and the bed, tighten
the Levelling Nuts by turning anti-clockwise. To reduce the
gap between the nozzle and the bed, loosen the Levelling
Nuts by turning clockwise. The gap should ideally be the
thickness of a sheet of 80gsm paper.
Skip
Leveling Nut
twist to adjust
80gsm
paper
thickness
Next
Bottom right
Previous
Adjusting the Levelling Nuts:
To widen the gap between the nozzle and the bed, tighten
the Levelling Nuts by turning anti-clockwise. To reduce the
gap between the nozzle and the bed, loosen the Levelling
Nuts by turning clockwise. The gap should ideally be the
thickness of a sheet of 80gsm paper.
Skip
Leveling Nut
twist to adjust
80gsm
paper
thickness
Next
Tighten Nuts
Previous
Hold the Levelling Nut in place while
you hand-tighten the Screw Nuts on
each of the 4 corners.
Skip
Screw
Nut
Leveling
Nut
Twist upwards
(anti-clockwise)
to tighten.
Locking it
in place
• Print Bed Calibration: The on-screen instructions here provide you with guidance on
how to adjust the distance between the nozzle and the Heated Print Bed to ensure that your
model prints correctly. The smaller the distance, the more ‘squashed’ the lament will be
to the bed, whereas a larger gap may cause the lament not to adhere to the bed correctly.
Follow these step-by-step instructions to see how to make this adjustment for a successful
print:
Loading ...
Loading ...
Loading ...