
Loading ...
Loading ...
6
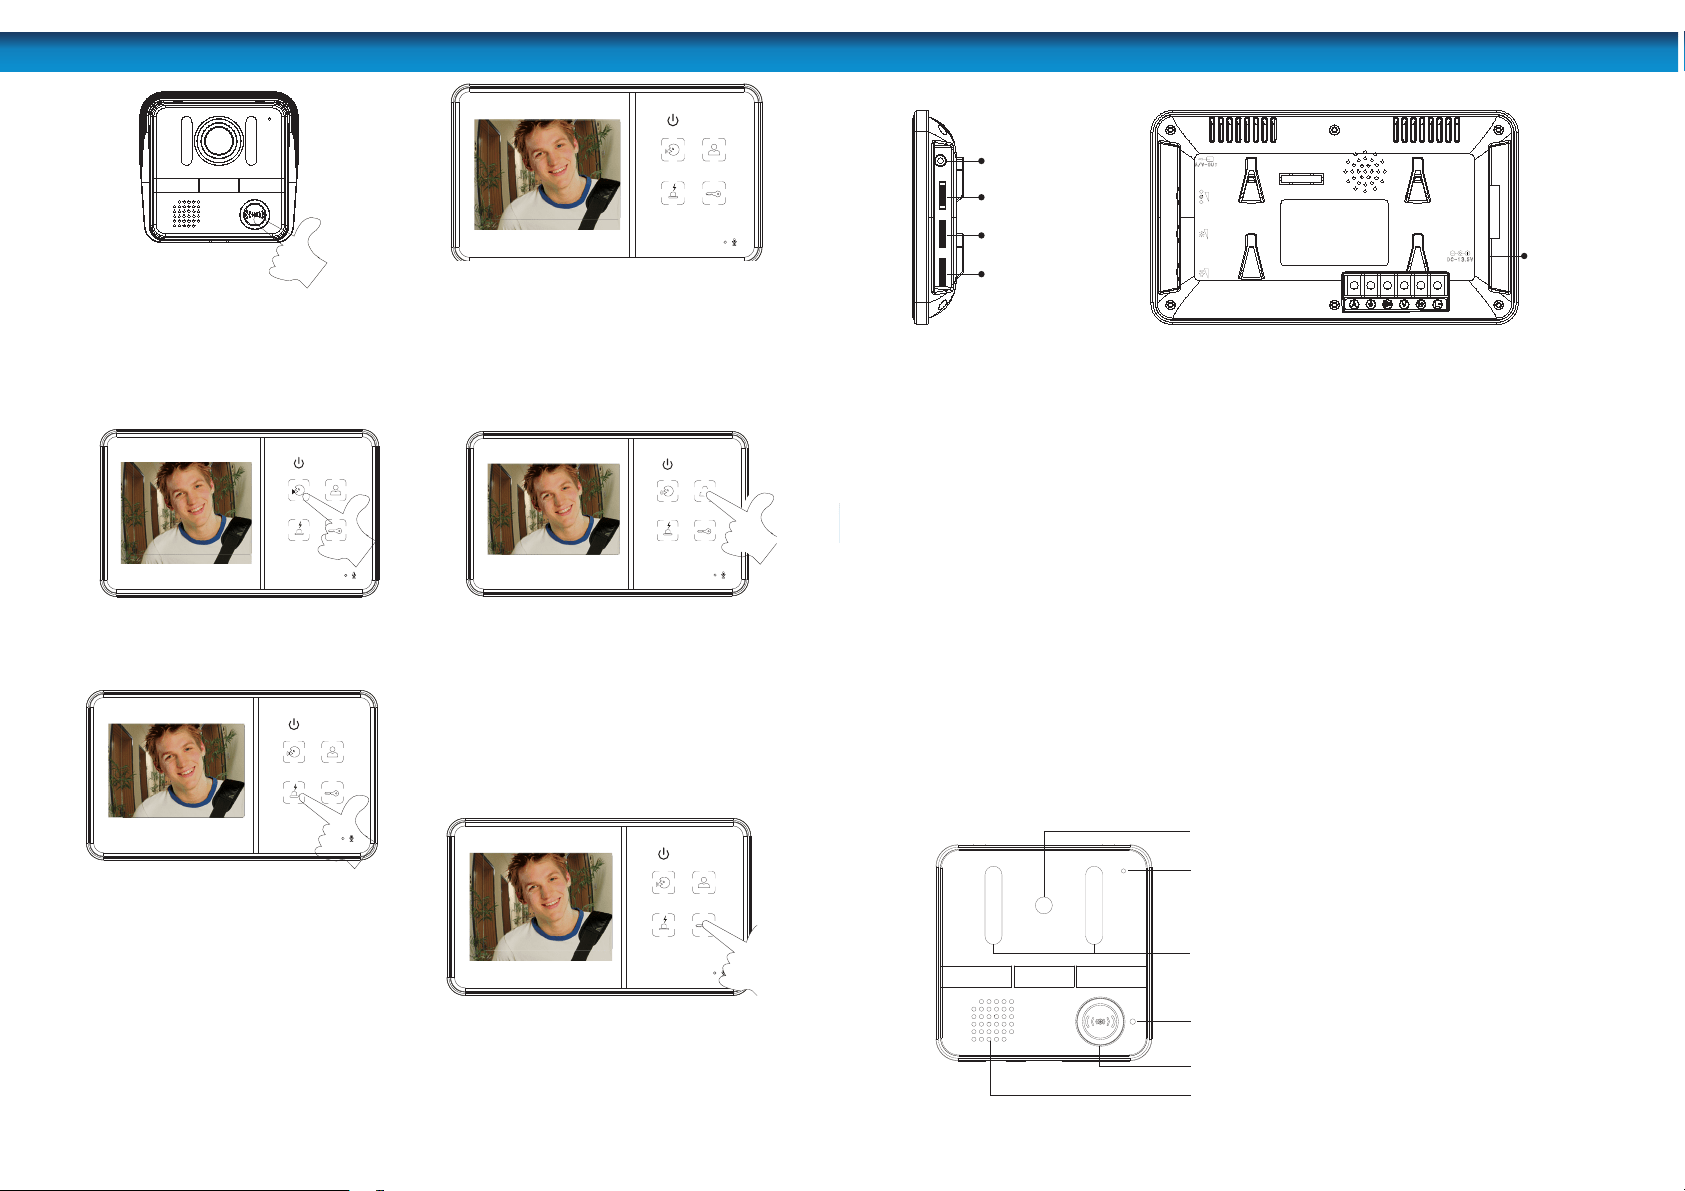
DOORBELL: The visitor presses the
call button to ring the doorbell
MONITOR: The video of the visitor will be
displayed on the monitor screen. The video
will switch o automatically after one minute.
If it is too dark outside at the doorbell
like at night, the image on the monitor
will appear black and white.
TALK: Touch and release the ‘TALK’
button to talk to the visitor.
UNLOCK: If the “keylock” option is
tted, press the ‘UNLOCK’ button to
unlock the door for the visitor.
NOTE: You will need an external
powered 12V DC doorlock.
MONITOR: When in STANDBY mode, touch
and release the “MONITOR” button to
view a live feed from the camera. The live
feed will switch o automatically after one
minute or you can touch the “MONITOR”
button again to switch o the live feed.
If it is too dark outside at the doorbell
like at night, the image on the monitor
will appear black and white.
WARNING: When viewing a live feed from
the camera, touch the “WARNING’ button
to trigger an alarm at the DOORBELL.
Note: The “WARNING” button will not work
in standby mode. You need to be viewing
a live feed by pressing the “MONITOR”
button or by the visitor pressing the
“CALL” button on the DOORBELL.
The “WARNING” alarm will only sound
while you are touching the button and
will only be heard at the DOORBELL.
Operation
3
Layout
2
1
3
4
5
6
1. CAMERA LENS: This is where the image of the
visitor is captured.
2. MICROPHONE: This is where the visitors speaks
to you.
3. INFRARED LED LIGHTS: The infra-red LED lights
are what allows the camera to see your visitors at
night. The image will appear black and white.
4. INDICATOR: This light enables visitors to identify
the outdoor camera at night.
5. CALL BUTTON (DOORBELL): When the visitor
presses this button, the doorbell rings and the
MONITOR displays the image from the camera.
6. SPEAKER: This is where the visitor hears you
speak to them from the MONITOR. It also emits
the WARNING alarm.
The side of the MONITOR has extra controls to help you adjust the MONITOR to suit
your needs.
1. A/V OUT: This allows you to view or record what the camera captures on an
external device. You can plug a composite AV cable into this port to connect it
to an external VCR, TV or monitor.
2. CHROMA ADJUST: This adjusts the amount of color in the image seen on the
monitor.
3. BRIGHTNESS ADJUST: This adjusts the brightness of the image seen on the
monitor.
4. VOLUME ADJUST: This adjusts the volume that can be heard on the monitor
unit. Turn this up if you are having trouble hearing your visitor or ask them to
speak closer to the camera.
5. DC 13.5V: This is where you plug the power supply.
Chroma Adjust
Communication
Volume Adjust
Brightness Adjust
A/V out
DC 13.5V
Loading ...