Loading ...
Loading ...
Loading ...
122 Servicing Your Honda
Battery
Installation
1. Reinstall the battery (1) in the reverse order of
removal. Be sure to connect the positive (+)
terminal (2) first, then the negative (–) terminal
(3).
2. Tighten the positive (+) and negative (–)
terminal bolts (4) to the specified torque:
1.5 lbf·ft (2.0 N·m, 0.2 kgf·m)
3. Install the battery band (5).
Be sure to read the information that came with
your battery charger and follow the instructions on
the battery. Improper charging may damage the
battery.
We recommend using a charger recommended by
your lithium-ion (li-ion) battery manufacturer
which can be purchased from your dealer. These
units can be left connected for long periods without
risking damage to the battery. However, the
lithium-ion (li-ion) battery may degrade if stored
with a charger connected. Do not intentionally
leave the charger connected longer than the time
period recommended in the charger’s instructions.
Using a battery charger that is not recommended
can cause permanent damage to your battery.
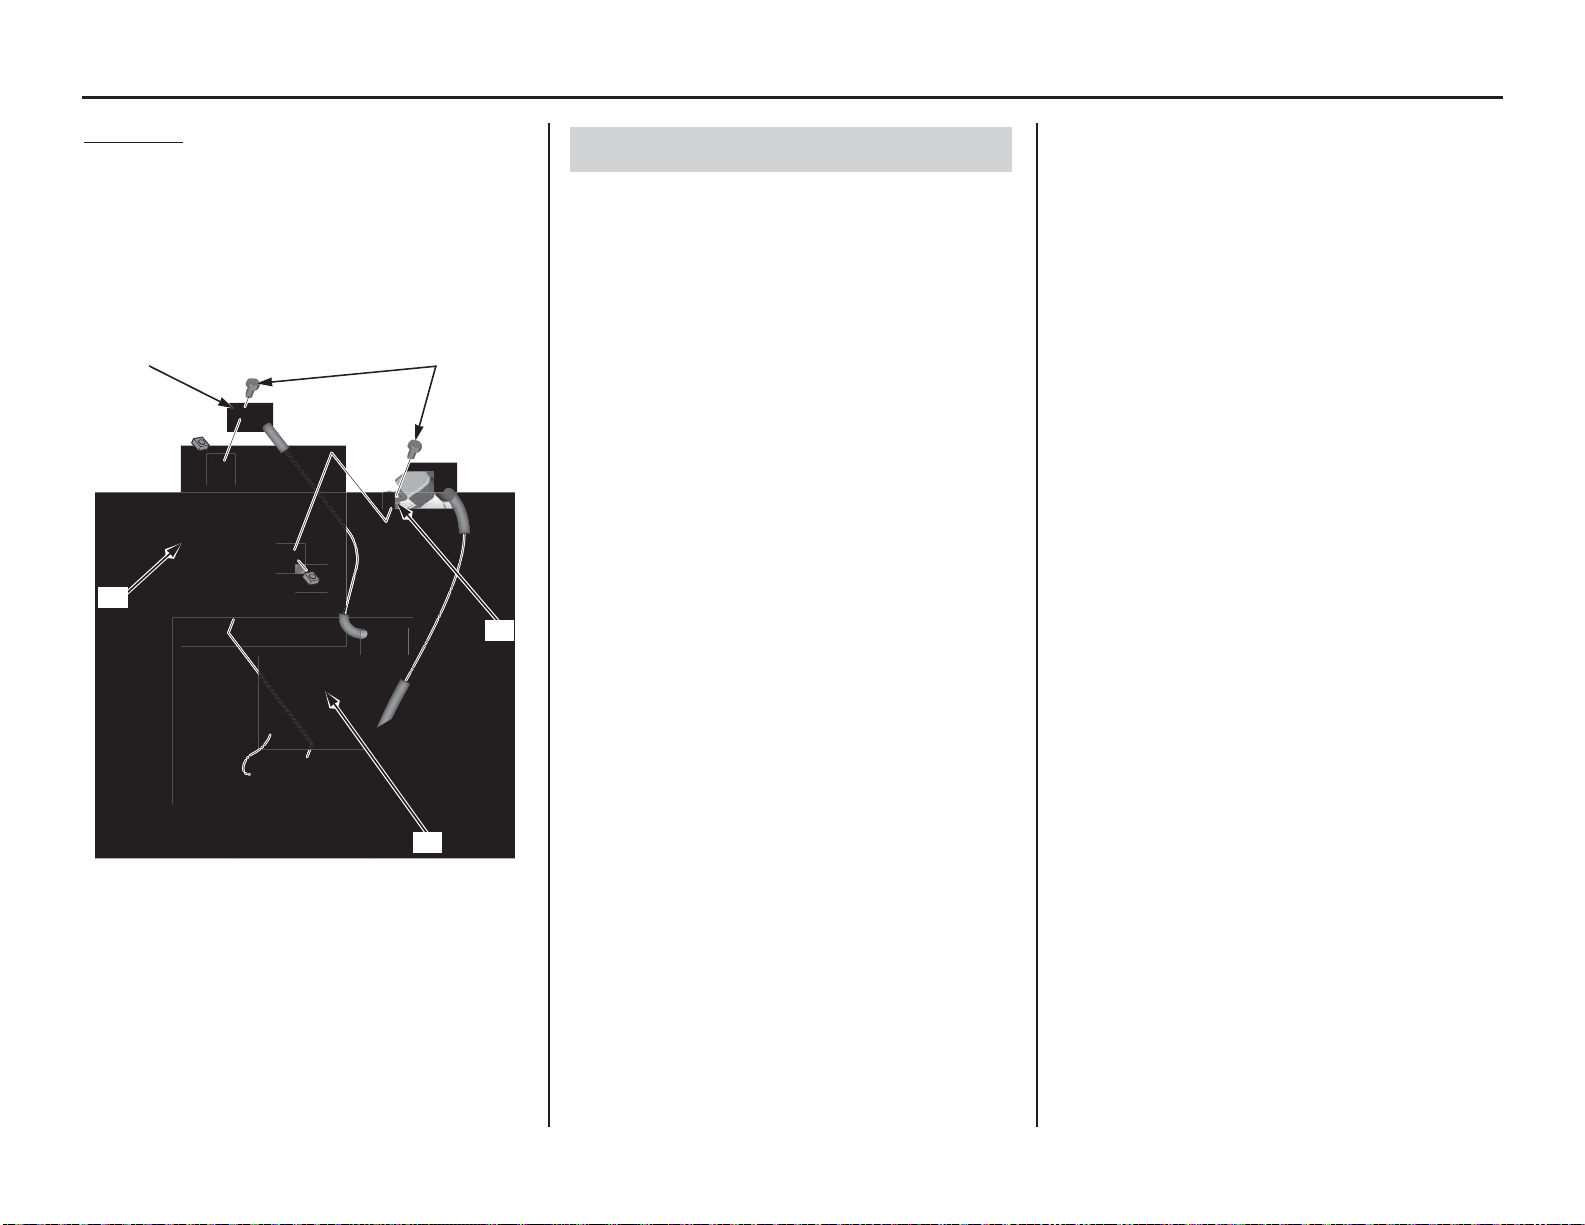
(1) battery
(4) terminal bolts
(2) positive (+) terminal
(5) battery band
(3) negative (–) terminal
(1)
(3) (4)
(2)
(5)
Battery Charging
Loading ...
Loading ...
Loading ...