Loading ...
Loading ...
Loading ...
VIZIO VA320M User’s Manual
36
www.VIZIO.com
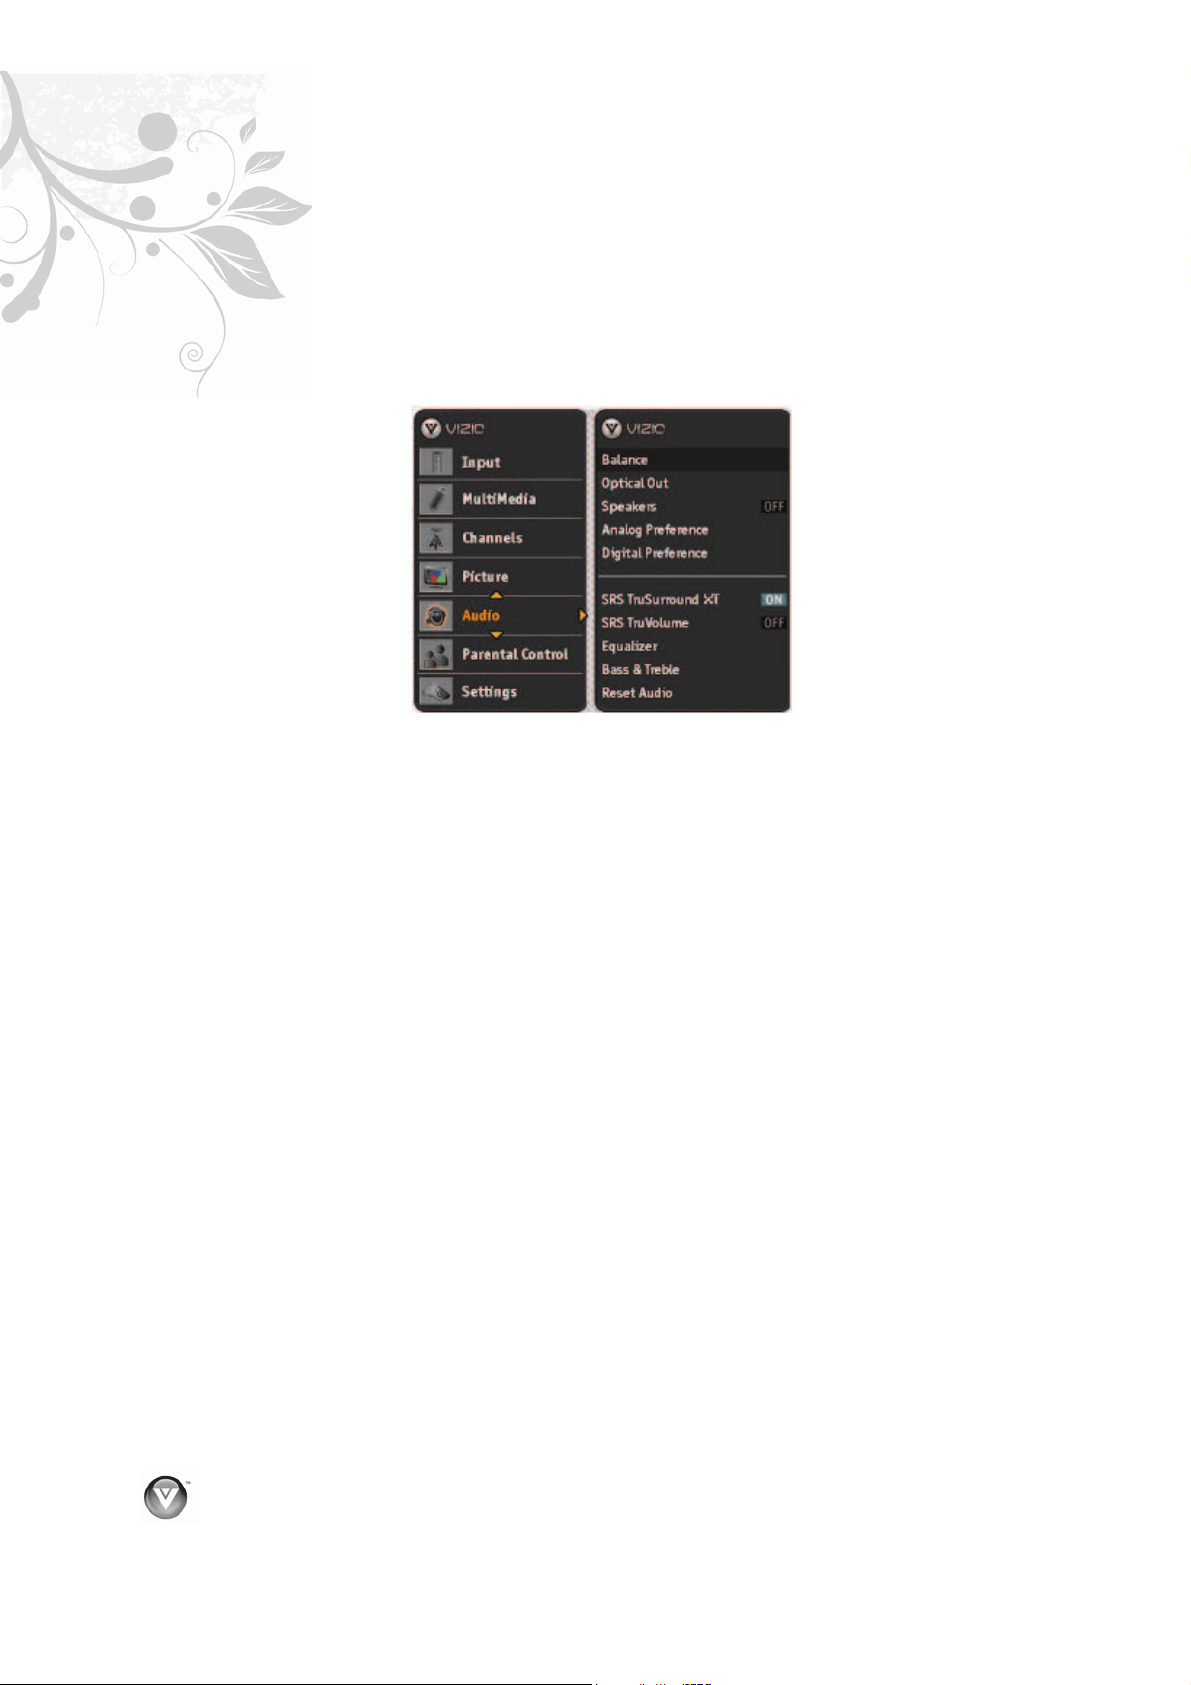
Adjusting the Audio Settings
When viewing a DTV / TV or an HDMI, Component, AV, or PC source, the following audio adjustment
OSD screens are available when you press MENU on the remote control. The source you are viewing is
displayed in orange text in the bottom left-hand corner of the OSD.
Press Ÿ / ź / Ż / Ź to highlight and select the choice, then press MENU/SELECT key to select the
desired adjustment, and the press the EXIT key when finished making adjustments. Press Ż to return to
the previous screen or repeatedly to exit the OSD.
The following options are available in the Audio menu:
1.
Balance – This option allows for compensation of one channel (Left or Right Audio) being higher
or lower than the other in order to bring stereo effect back into balance.
2. Optical Out – This option allows selection of the type of processing for the SPDIF (Optical
connector) when used with a Receiver/Amplifier/Home Theatre system.
x
Auto – Select to produces 5.1 channel Dolby Digital ® surround sound audio.
x
Force PCM - Select to output audio in 2-channel stereo.
3.
Speakers – Turn off the internal TV speakers when listening to the audio through your home
theater system.
4. Analog Preference – This option allows turning the analog audio preference Mono or Stereo
or selecting the SAP (alternate language) of the broadcast signal.
5.
Digital Preference – This option allows selecting the language (English, French or Spanish)
preference of the digital audio.
6. SRS TruSurround HD –- Turn the simulated surround feature On or Off.
7.
SRS TruVolume
TM
–- When the programming switches to a commercial or when changing from
channel to channel, volume fluctuations occur. The SRS TruVolume
TM
provides the listener with
a comfortable and consistent volume level.
8.
Equalizer – To adjust the level for different frequencies of the Stereo audio signal, use
this option.
9.
Bass & Treble– Adjust low and high frequency sounds. You can also adjust for bass and treble
boost or attenuation.
10. Reset Audio – This option allows the reset of any changes done to the adjustable parameters
within the Audio menu.
Loading ...
Loading ...
Loading ...