Loading ...
Loading ...
Loading ...

6
Introduction
Congratulations on your purchase and welcome to Philips! To fully benet from the support that
Philips oers, register your product at www.philips.com/welcome.
Read this user manual, the important information leaet, and the quick start guide carefully before
you use the appliance. Save them for future reference.
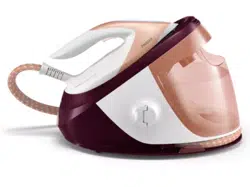
Product overview
1 Steam supply hose
2 Steam trigger/Steam boost
3 ‘Iron ready’ light
4 Soleplate
5 Iron platform
6 Carry lock release button
7 Detachable water tank
8 Filling hole
9 Supply hose storage compartment
10 EASY DECALC knob
11 Mains cord with plug
12 EASY DECALC light
13 ECO button with light
14 ‘Water tank empty’ light
15 On/o button with power-on light and auto-o light
Preparing for use
Type of water to use
This appliance has been designed to be used with tap water. However, if you live in an area with hard
water, fast scale build-up may occur. Therefore, it is recommended to use distilled or demineralized
water (50% demineralized/distilled water mixed with water could be used as well) to prolong the
lifetime of the appliance.
Warning: Do not use perfumed water, water from the tumble dryer, vinegar, starch,
descaling agents, ironing aids, chemically descaled water or other chemicals, as they
may cause water spitting, brown staining or damage to your appliance.
Filling the water tank
Fill the water tank before every use or when the ‘water tank empty’ light ashes. You can rell the
water tank at any time during use.
1 Remove the water tank from the appliance (Fig. 2) and ll it with water up to the MAX indication
(Fig. 3).
2 Put the water tank back into the appliance by tting the bottom part into the appliance rst.
3 Push in the top part of the water tank until it locks into place (‘click’) (Fig. 4).
Water tank empty light
When the water tank is almost empty, the ‘water tank empty’ light ashes (Fig. 5). Fill the water tank
and press the steam trigger to let the appliance heat up again. When the ‘iron ready’ light lights up
continuously, you can continue steam ironing.
English
Loading ...
Loading ...
Loading ...
