Make sure everything is installed properly before use.
Illustrations in this document are for reference only and may differ from the actual product. Always refer to the actual product.
Initial setup
Is your drink missing a little somethin’ somethin’? Get this little guy going and start showing off your foam flair.
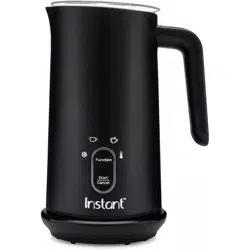
Pull your new milk frother out of the box!
Remove all the packaging material and accessories from in and around the appliance. Make sure to check inside the pitcher!
Place the milk frother base on a stable, level surface.
Follow the instructions in Initial cleaning before frothing for the first time.
Initial cleaning
Before using your milk frother, it’s important to clean the components
1. Disassemble the milk frother into 3 parts:
• The lid
• The frothing paddle (pull up gently to remove)
• The pitcher
2. Hand wash the lid, the frothing paddle, and the inside of the pitcher with hot water and dish soap. Do not immerse the pitcher in water or other liquid.
3. Rinse the lid, the frothing paddle, and the inside of the pitcher with clear, warm water, then dry them thoroughly with a soft cloth.
That’s it! Start whipping up that fresh, fluffy foam.
Making drinks
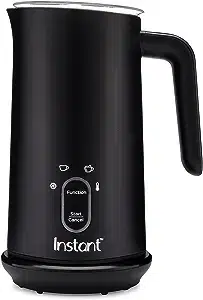
The Instant Milk Frother was designed with 2 easy-to-use button controls.
Function
Toggles through the preset programs to create various types of foam to suit your tastes.
Start/Cancel
Starts and stops the selected program.
The cold foam setting creates a luscious, silky microfoam filled with millions of tiny bubbles. Use milk and coconut milk for the perfect cold brew topper.
The Milk Frother does not chill when frothing. Use chilled liquid.
The warm foam setting heats and froths, and with a gentle swirl of the pitcher at the end, creates a loose style of warm microfoam — like a cloud floating on your café au lait and lattes.
The warm, thick foam setting heats and froths your liquid to create a rich, dense style of warm microfoam. The crowning touch for your cappuccino.
The warm, no foam setting heats your drink without generating any foam. This setting automatically slow-stirs your drink to keep it from scorching, for amazing steamed milk, hot chocolate and more!
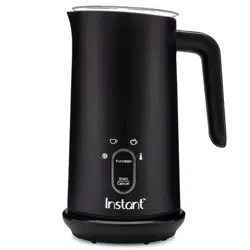
Set up the Milk Frother for use
1. Remove the lid from the pitcher.
2. Position the square end of the frothing paddle over the shaft at the bottom of the pitcher.
Rotate the frothing paddle until it aligns with the shaft, then push the frothing paddle down until it is secure.
3. For cold foam, warm foam, or warm, thick foam, fill the pitcher to between the and lines.
To warm without creating foam, fill the pitcher to between the and lines.
Overfilling may cause the milk frother to overflow when using a foaming setting. Do not overfill the pitcher.
4. Place the lid on the pitcher and press down until it is secure.
5. Place the pitcher on the base.
6. Connect the power cord to a 120 V outlet.
Settings
1. Press Function to toggle between all settings.
Cold foam
Warm foam
Warm, thick foam
Warm, no foam
The light that corresponds to the selected program blinks.
2. Press Start/Cancel.
The light stays illuminated and the program starts after a few seconds.
3. To stop the program at any time, press Start/Cancel.
When the program ends, the milk frother stops.
Frothing tips
Follow these tips and tricks to make sure you’re treating yourself to the best drink possible.
Tip
How to do it and why
The colder the liquid the better.
Always use the coldest, freshest milk or milk alternative possible before frothing.
When frothing, millions of tiny air bubbles are introduced into the liquid. The longer it takes to heat up, the more air can be infused into the liquid. This immediately enhances the quality of your foam, and reduces your chances of scalding. No more bad froth days!
Note: Warm milk will not foam up properly
Not all milk alternatives produce foam.
Oat and soy milk will create foam using either the warm or cold foaming settings.
Coconut milk will only froth using the cold foam setting
Infuse your foam with flavor.
Before frothing, add aromatic spices to the pitcher, like cinnamon, cardamom or nutmeg, or other fragrant items like lavender. The longer you allow your ingredients to steep, the stronger the flavors will be.
It’s a tasty mix and match! Join the official Instant Pot® Facebook Community to let us know your favorite bevvy’s unique flavor profile.
Give your milk frother a break!
When frothing big batches, allow the milk frother to rest for about 3 minutes after every 2 frothing cycles.
Making latte worthy foam.
As soon as the frother finishes whipping up your warm foam, lift the pitcher off the base, put your thumb on the lid and give it a good swirl! This helps give your latte foam the glossiness it deserves.
Care, cleaning and storage
Clean your Instant Milk Frother after every use to ensure the best possible flavor and to prevent milk from baking onto the inside of the pitcher.
Always unplug the milk frother and let it cool to room temperature before cleaning. Never use metal scouring pads, abrasive powders or harsh chemical detergents on any of the milk frother’s parts or components.
Let all parts dry thoroughly before use or before storage
Parts
Cleaning methods and instruction
Lid
Remove from the pitcher before cleaning. Dishwasher safe.
Pitcher
Remove the pitcher from the base before cleaning.
With a cloth, hand wash the inside of the pitcher with hot water and dish soap and rinse it with clean, warm water.
With a barely-damp cloth, hand wash the outside of the pitcher and wipe dry to prevent streaking.
DO NOT rinse the pitcher’s exterior.
DO NOT store liquid in the pitcher
Frothing paddle
Remove from the pitcher before cleaning.
Dishwasher safe.
Base
With a barely damp cloth, wipe visible particles from the base as needed. Allow to dry thoroughly before placing the pitcher.
Power cord
With a barely damp cloth, wipe visible particles from the power cord as needed.
DO NOT fold the power cord when storing
WARNING
The pitcher and base contain electrical components. To avoid fire, electric shock or personal injury, DO NOT machine wash, rinse or immerse the milk frother base, pitcher, power cord or plug in water or other liquids.
Troubleshooting
Resolution table
Problem
Possible reason
Try this
Milk is not frothing.
The frothing paddle is not installed correctly
Remove the liquid from the pitcher.
Position the square end of the frother paddle over the shaft at the bottom of the pitcher and push down until it is secure.
Milk is too hot.
Put your milk in the fridge or freezer to bring the temperature down.
The inside of the pitcher or the frothing paddle contains milk residue.
Clean the pitcher and frothing paddle according to Care, cleaning and storage instructions.
Different types and brands of milk and nondairy milk alternatives may froth differently.
Experiment to find your favorite foam
The Warm Foam and the Warm Thick Foam lights blink repeatedly.
The milk frother has overheated.
Unplug and wait up to 10 mins for the milk frother to cool before further use.
All four LEDs blink repeatedly.
The unit is defective or damaged.
The unit needs to be serviced by an authorized service representative.
Contact Customer Care.
Any other servicing should be performed by an authorized service representative.
IMPORTANT SAFEGUARDS
For countertop use only. Always operate the appliance on a stable, non-combustible, level surface.
For household use only. Not for commercial use. DO NOT use the appliance for anything other than its intended use.
Make sure that your outlet voltage corresponds to the voltage stated on the rating label, located on the sticker under the base.
DO NOT operate the appliance while the pitcher is empty.
Avoid spillage on the connector.
To protect against fire, electric shock and injury to persons, DO NOT immerse the power cord, plug, pitcher or the appliance base in water or other liquid.
Unplug from outlet when not in use and before cleaning. After using a program that heats, there will be residual heat within the pitcher. Allow the appliance to cool before putting on or taking off parts, and before cleaning.
Regularly inspect the appliance and power cord. DO NOT operate the appliance if the power cord or plug is damaged, or after the appliance malfunctions or is dropped or damaged in any manner. For assistance, contact Customer Care at support instant appliances website, instantappliances.com/#chat, or by phone at 1-800-828-7280.
DO NOT let the power cord hang over the edge of tables or counters, and DO NOT allow it to touch hot surfaces.
DO NOT place the appliance on or near a hot gas or electric burner, or in a heated oven.
Fill the pitcher with only milk or non-dairy milk alternatives. Never fill the pitcher with oil or other liquids. DO NOT fill past the appropriate MAX fill lines for your desired setting, as hot liquid may be ejected.
Always operate the appliance with the lid in place. DO NOT remove the lid while frothing to avoid scalding injury.
Avoid contacting moving parts. Keep hands and utensils out of the pitcher while frothing to reduce the risk of personal injury and/or property damage.
Some parts of the appliance are hot when the appliance is in operation. Only use the handle to move or carry the pitcher.
Extreme caution must be used when moving the appliance when it contains hot liquids.
To disconnect, press the Start/Cancel button and ensure the unit is off, then unplug the base from the power source. To unplug safely, grasp the plug and remove from the outlet. Never pull from the power cord.
DO NOT use the appliance outdoors. Never leave the appliance exposed to sun, wind, rain and/or snow.
DO NOT leave the appliance unattended when in use.
This appliance is NOT to be used by children or by persons with reduced physical, sensory or mental capabilities. Close supervision is necessary when any appliance is used near children and these individuals. Children should not play with this appliance.
The use of accessories not recommended by the manufacturer may result in fire, electric shock or injury to persons.
The appliance is only to be used with the base provided.
Extension cords are available and may be used if care is exercised in their use:
• The marked electrical rating of the extension cord should be at least as great as the electrical rating of the appliance;
• The longer cord should be arranged so that it will not drape over the counter top or table top where it can be pulled on by children or tripped over.
Special cord set instructions
As per safety requirement, a short power supply cord (0.6 m to 0.9 m / 24” to 35”) is provided to reduce the hazards resulting from grabbing, entanglement and tripping.
This appliance has a polarized plug and one blade is wider than the other. To reduce the risk of electric shock, the plug is intended to fit into a polarized outlet only one way. If the plug does not fit fully into the outlet, reverse the plug. If it still does not fit, contact a qualified electrician. DO NOT attempt to modify the plug in any way.


 The Milk Frother does not chill when frothing. Use chilled liquid.


 and
and  lines.
 lines.
 Cold foam
  Warm foam
  Warm, thick foam
  Warm, no foam
 WARNING