If the refrigerator is not leveled during installation, the doors may not close or seal properly, causing cooling, frost, or moisture problems. It is very important for the refrigerator to be level in order to function properly.
To level your refrigerator, you may either turn the level leg clockwise to raise that side to the refrigerator or turn counter-clockwise to lower that side. Having someone push against the top of the refrigerator will take some weight off the leveling leg. This makes it easier to adjust the leveling leg.
2. Ventilation: Place refrigerator approximately 5 inches from the wall to ensure proper airflow to the compressor. Do not place refrigerator near any heat resources such as a heater or stove as it will put a strain on the compressor.
3. Power supply:
Check your local power source. This refrigerator requires a 110V-120V, 60Hz power supply.
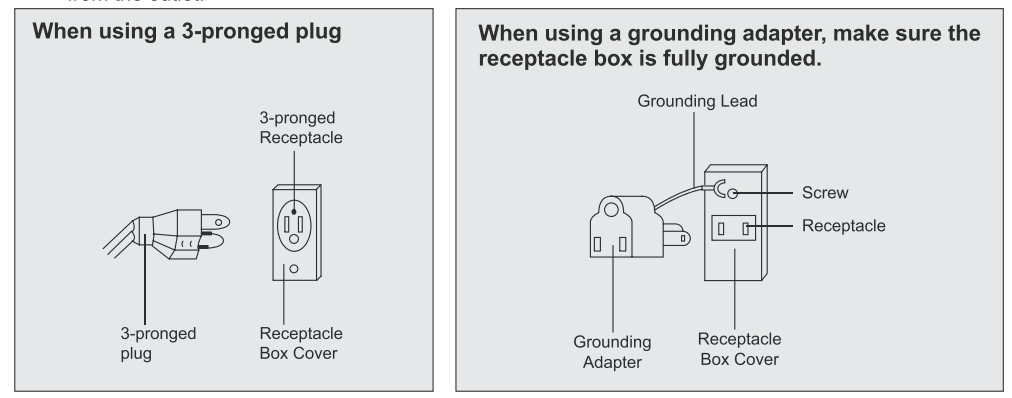
Use a receptacle that will accept the ground prong. The power cord of this appliance is equipped with a 3-prong (grounding) plug which mates with a standard 3-prong (grounding) wall outlet to minimize the possibility of electric shock hazard from this appliance. Do not use extension cords or ungrounded(two prong) adapters.
NOTES:
The refrigerator should always be plugged into its own individual electrical outlet which has a voltage rating that matches the rating plate.
If you have only a standard 2-prong wall outlet, it is your personal responsibility and obligation to have it replaced with a properly grounded 3-prong wall outlet.
Never unplug your refrigerator by pulling on the power cord. Always grip plug firmly and pull straight out from the outlet.
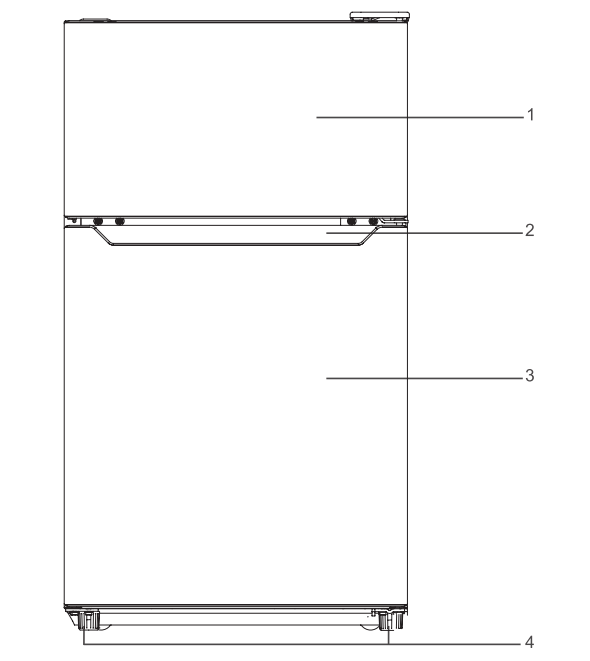
LOCATION OF CONTROLS
DOOR CLOSED
Freezer Door
The Handle
Refrigerator door
Leveling Feet
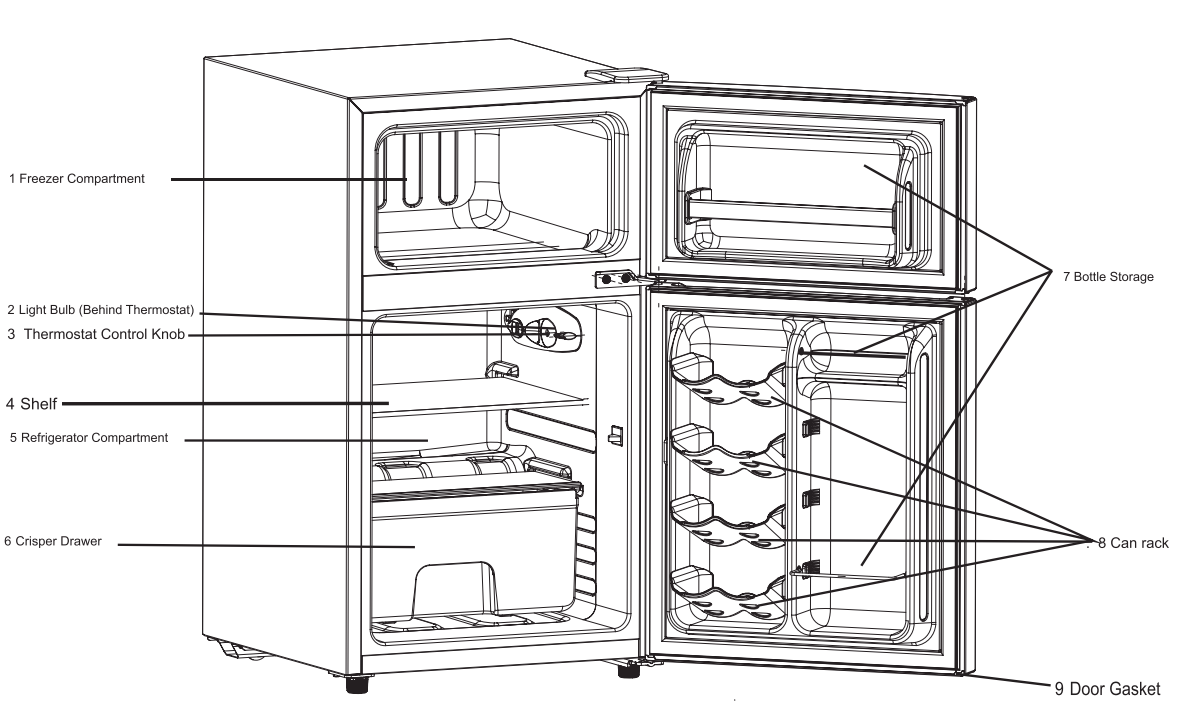
DOOR OPEN
Freezer Compartment
Light Bulb (Behind Thermostat)
Thermostat Control Knob
Shelf
Refrigerator Compartment
Crisper Drawer
Bottle Storage
Can rack
Door Gasket
OPERATION
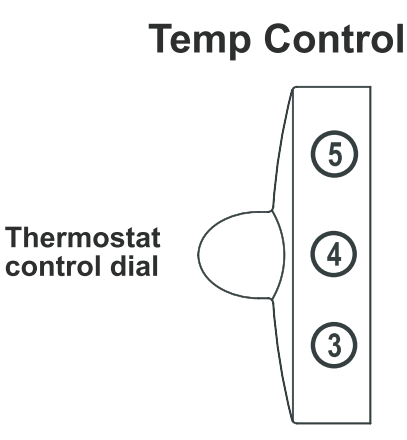
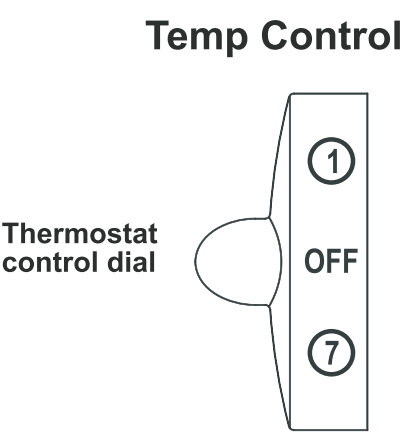
USING THE THERMOSTAT
The thermostat control knob for the refrigerator and freezer is located at the upper right hand comer of the refrigerator compartment.
The first time you turn the unit on, adjust the thermostat control knob to “4’ and give your refrigerator time to cool down completely before adding food; a full 24 hours is recommended.
After it is fully cooled, test it and adjust towards “1” to make less cool or towards “7" to cool more to best suit your needs. However, the setting of “4” should be appropriate for home or office refrigerator use.
NOTE: Turning the control knob to the‘OFF’ position will stop the cooling cycle.
DEFROSTING
Refrigerator compartment: Defrosting process is automatic; melted frost flows into drip tray and automatically evaporates.
Freezer compartment: Defrosting for the freezer must be performed manually.
1. Turn the thermostat knob to the “OFF" position and leave the freezer door open.
2. Remove all food and ice cube tray or transfer to refrigerator compartment.
3. Place towel under compact refrigerator or move refrigerator outdoors where no water damage can occur.
4. Clean and wipe out the melted frost with a cloth.
NOTE: To avoid damaging the freezer compartment wall, do not use any sharp objects to remove the frost or to separate the frozen food.
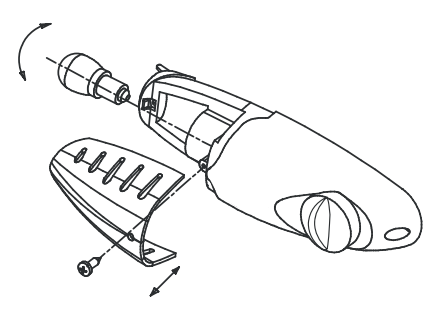
REPLACING THE LIGHT BULB
1. Unplug refrigerator or disconnect refrigerator from power supply before you remove the light bulb.
2. Unscrew the middle parts of the thermostat holder assembly, marked by the arrows in the diagram.
3. Pull the light bulb cover (thermostat holder assembly) outward to remove it.
4. Unscrew the light bulb.
5. Replace with a 15-watt 115V appliance bulb only. (Not all bulbs will fit your refrigerator. Be sure to replace the bulb with the same screw Type E-12 and shape. The T6 can be used.)
6. Plug in refrigerator or reconnect refrigerator to power supply.
Changing the door from the right side to the left.
The side at which the door opens can be changed from the right side (as supplied) to the left side, if the installation site requires. Tools you will need:
■ 8mm socket driver(1PCS)
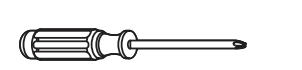
■ phillips screwdrivers(1PCS)
■ Putty Knife(1PCS) or slotted srewdrivers(1PCS)
■ 7mm wrench(1PCS)
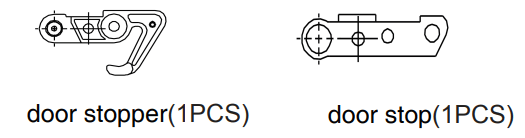
■ Parts you will need ,parts are from the package of manual
Caution To avoid to injury yourself and/or property, we recommend someone assist you during the door reversal process.
Ensure the Appliance is unplugged and empty.
Following steps are generally recommended
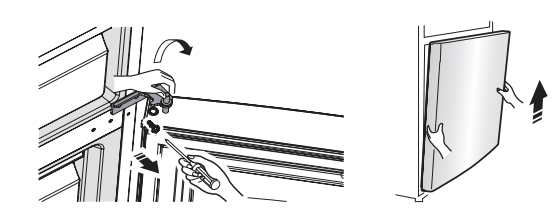
1. Stand the refrigerator, open the upper door and remove the things in the door and close it.
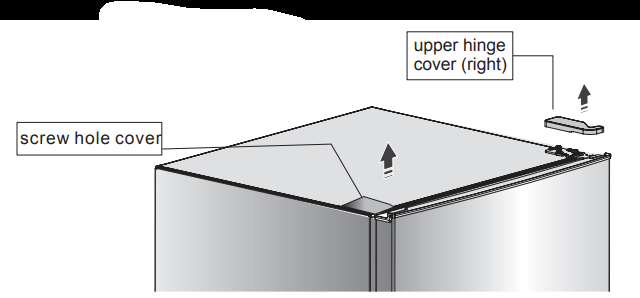
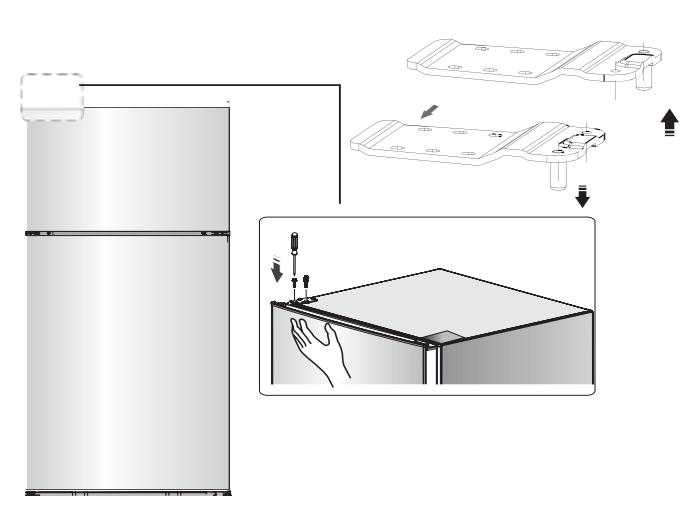
2. open the screw hole cove and the upper hinge cover which is at the top right corner of the refrigerator.
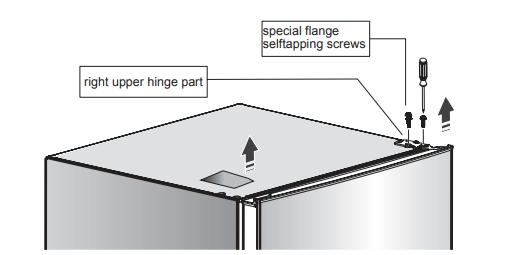
3.Unscrew the special flange self-tapping screws which are used for fixing the right upper hinge part by a 8mm socket driver or a spanner(please support the upper door with your hand when doing it ).
4.Remove the right upper hinge part and screw hole cover ,place them on the smooth surface.
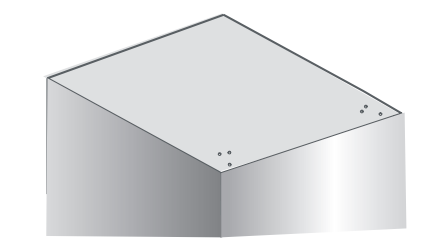
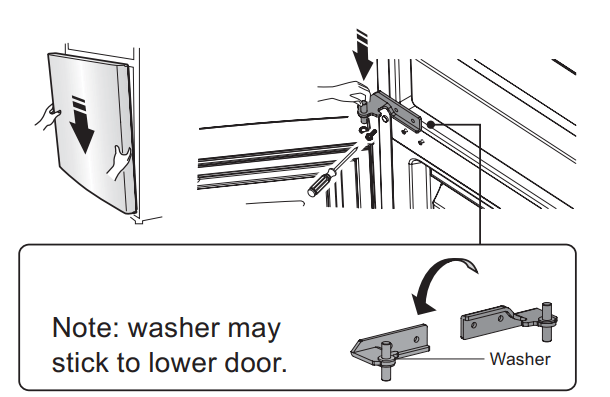
5.Remove upper door and place it on smooth surface with panel upwards.
6. Loose screws used to fix middle hinge and remove middle hinge. Then turn middle hinge by 180. Take washer on axis and put it on another end. Place it well for use.
7. Remove lower door and place panel upwards on smooth surface.
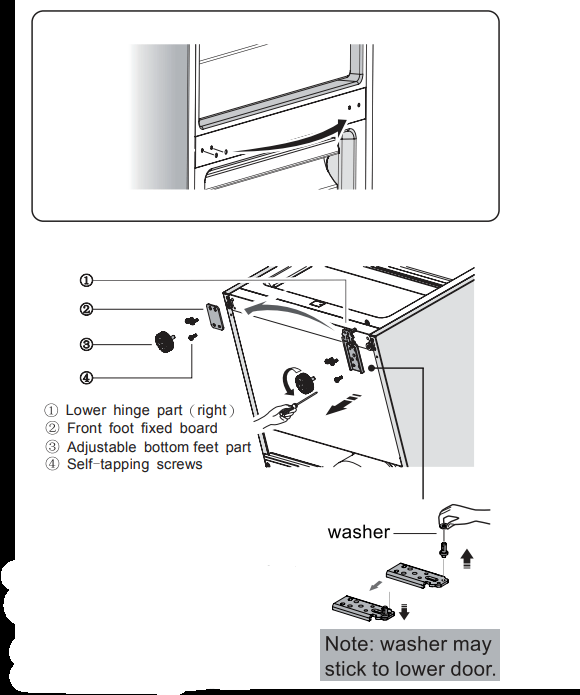
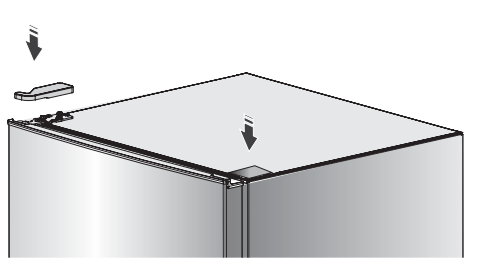
8. Change screw hole covers on middle cover plate from left to right (as shown in figure below).
9. Use the 8mm socket driver to remove lower hinge part and front foot fixed board, Then Screw out lower hinge axis and change it to the near hole site, and then screw up and mount washer,
Note: Before this step, you should lay the refrigerator on it’s back in order to gain access to the base, you should rest it on soft foam packaging or similar material to avoid damaging the cooling pipes at the rear of the refrigerator.
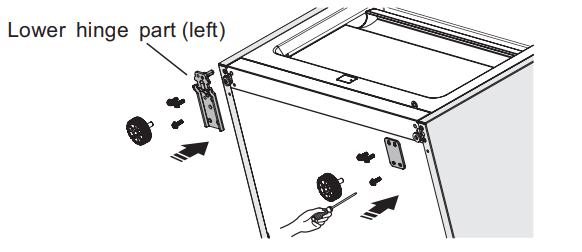
10. Change lower hinge part to left and front foot fixed board to right and fix them with screws. Then install adjustable bottom feet parts
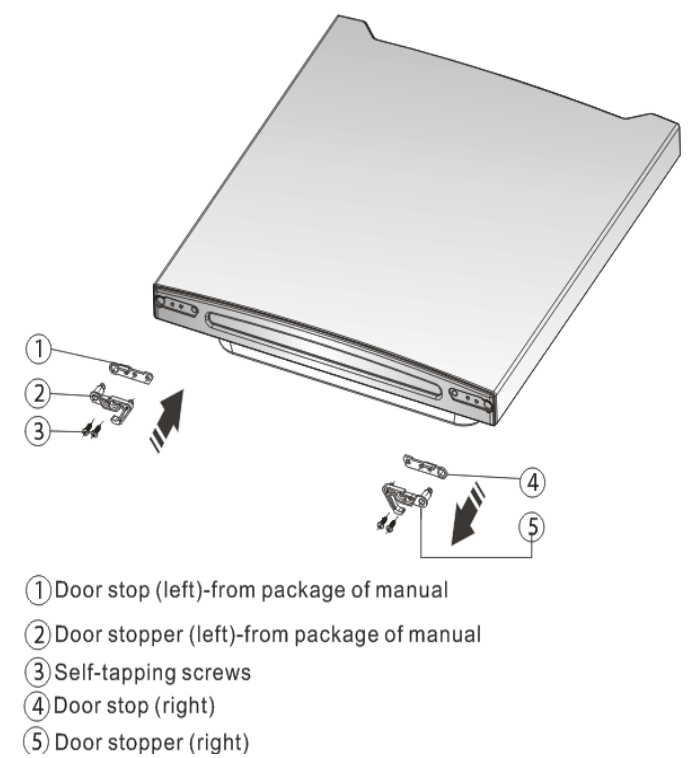
11.Remove the door stop (right) and door stopper (right) with Phillips screwdrivers ,Install the door stopper(left) and door stop (left) which are from the package of user's manual
Stand the refrigerator then move lower door and adjust its position to align lower hole(left) site and lower hinge axis. Then adjust middle hinge and align the middle hinge axis to the higher (left) hole site. Then install the middle hinge.
12. Screw out top hinge axis,and change it to the near hole site, then screw up .Move upper door to appropriate position,
13. Replace and the right upper hinge Install cover on the left corner, Replace the screw hole cover on the right corner.
14.Stand and level the appliance.
NOTE: Before the appliance is powered, We recommend that you should wait for about 2 hours.