Home
Bookmarks
Home
Sony
Sony MSAC-US2 User Manual
Page 35
Sony MSAC-US2 Memory Stick Reader/writer
User Manual - Page 35
For MSAC-US2.
PDF File Manual
,
68 pages
,
Read Online
|
Download pdf file
US
Before You Begin
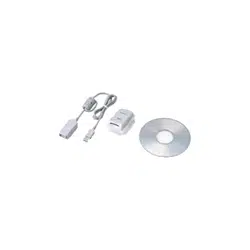
Checking the accessories
Parts identification
Installation and Operation
For Windows
Installing USB driver software
Installing Image Transfer and PIXELA ImageMixer for Sony
Connecting the unit to a personal computer
Recommended connections
Precautions to be taken when connecting this unit to a computer
Inserting a “Memory Stick”
Confirming the insert
Copying images using Image Transfer
Removing a “Memory Stick”
For Macintosh
Installing USB driver software
Inserting a “Memory Stick”
Removing a “Memory Stick”
PIXELA ImageMixer for Sony
Installing editorial and image materials on your computer
Installing images from a “Memory Stick”
Additional Information
The “Memory Stick”
Troubleshooting
Specifications
FR
Préparation
Vérification de la présence des accessoires
Identification des pièces
Installation et utilisation
Pour les appareils fonctionnant sous Windows
Installation du logiciel de pilote USB
Installation de Image Transfer et de PIXELA ImageMixer for Sony
Raccordement de l’appareil à un ordinateur personnel
Raccordements recommandés
Précautions à prendre lors du raccordement de cet appareil à un ordinateur
Insertion d’un “Memory Stick”
Confirmation de l’insertion
Copie d’images à l’aide d’Image Transfer
Retrait d’un “Memory Stick”
Pour les appareils fonctionnant sous Macintosh
Installation du logiciel de pilote USB
Insertion d’un “Memory Stick”
Retrait d’un “Memory Stick”
PIXELA ImageMixer for Sony
Installation de matériel d’édition et d’images sur votre ordinateur
Installation d’images à partir d’un “Memory Stick”
Informations complémentaires
Le “Memory Stick”
Dépannage
Spécifications
Page 35/68
Page 1
Page 2
Page 3
Page 4
Page 5
Page 6
Page 7
Page 8
Page 9
Page 10
Page 11
Page 12
Page 13
Page 14
Page 15
Page 16
Page 17
Page 18
Page 19
Page 20
Page 21
Page 22
Page 23
Page 24
Page 25
Page 26
Page 27
Page 28
Page 29
Page 30
Page 31
Page 32
Page 33
Page 34
Page 35
Page 36
Page 37
Page 38
Page 39
Page 40
Page 41
Page 42
Page 43
Page 44
Page 45
Page 46
Page 47
Page 48
Page 49
Page 50
Page 51
Page 52
Page 53
Page 54
Page 55
Page 56
Page 57
Page 58
Page 59
Page 60
Page 61
Page 62
Page 63
Page 64
Page 65
Page 66
Page 67
Page 68
Contents
Table of Contents
Search
Previous
Next
Troubleshooting
Bookmarks
Loading ...
Loading ...
Loading ...
Additional Information
35-US
Loading ...
Loading ...
Loading ...
File type: PDF
File name: 45049566_msac-us2.pdf
File size: 585.45 KB
File Language: English
Pages: 68
Author: Sony
File created: 2002-08-26
Published: 2021-05-27
Updated: 2023-08-25
Download File
Table of Contents
×
US
6
Before You Begin
7
Checking the accessories
7
Parts identification
8
Installation and Operation
9
For Windows
9
Installing USB driver software
9
Installing Image Transfer and PIXELA ImageMixer for Sony
11
Connecting the unit to a personal computer
14
Recommended connections
17
Precautions to be taken when connecting this unit to a computer
18
Inserting a “Memory Stick”
20
Confirming the insert
20
Copying images using Image Transfer
21
Removing a “Memory Stick”
22
For Macintosh
24
Installing USB driver software
24
Inserting a “Memory Stick”
25
Removing a “Memory Stick”
26
PIXELA ImageMixer for Sony
27
Installing editorial and image materials on your computer
27
Installing images from a “Memory Stick”
28
Additional Information
29
The “Memory Stick”
29
Troubleshooting
31
Specifications
32
FR
38
Préparation
39
Vérification de la présence des accessoires
39
Identification des pièces
40
Installation et utilisation
41
Pour les appareils fonctionnant sous Windows
41
Installation du logiciel de pilote USB
41
Installation de Image Transfer et de PIXELA ImageMixer for Sony
43
Raccordement de l’appareil à un ordinateur personnel
46
Raccordements recommandés
49
Précautions à prendre lors du raccordement de cet appareil à un ordinateur
50
Insertion d’un “Memory Stick”
52
Confirmation de l’insertion
52
Copie d’images à l’aide d’Image Transfer
53
Retrait d’un “Memory Stick”
54
Pour les appareils fonctionnant sous Macintosh
56
Installation du logiciel de pilote USB
56
Insertion d’un “Memory Stick”
57
Retrait d’un “Memory Stick”
58
PIXELA ImageMixer for Sony
59
Installation de matériel d’édition et d’images sur votre ordinateur
59
Installation d’images à partir d’un “Memory Stick”
60
Informations complémentaires
61
Le “Memory Stick”
61
Dépannage
63
Spécifications
64
Search:
×
Search