Loading ...
Loading ...
Loading ...
10
•
Take care at all times. Always be aware of what you are doing and work carefully at all times.
•
During use on the skin the device may become hot.
•
The device can become very hot during long, intensive use, e. g. when sanding off calluses on feet. To prevent
burns to the skin in these cases, longer breaks must be taken between individual uses. For your own safety,
continuously check the heat development of the device. This particularly applies to heat-sensitive users.
• Checktheresultsregularlywhenusingthedevice.Thisisparticularlyimportantfordiabetics,becausethey
may be less sensitive to pain and may injure themselves more easily. Take particular care when working
with the device. If in doubt, consult your doctor.
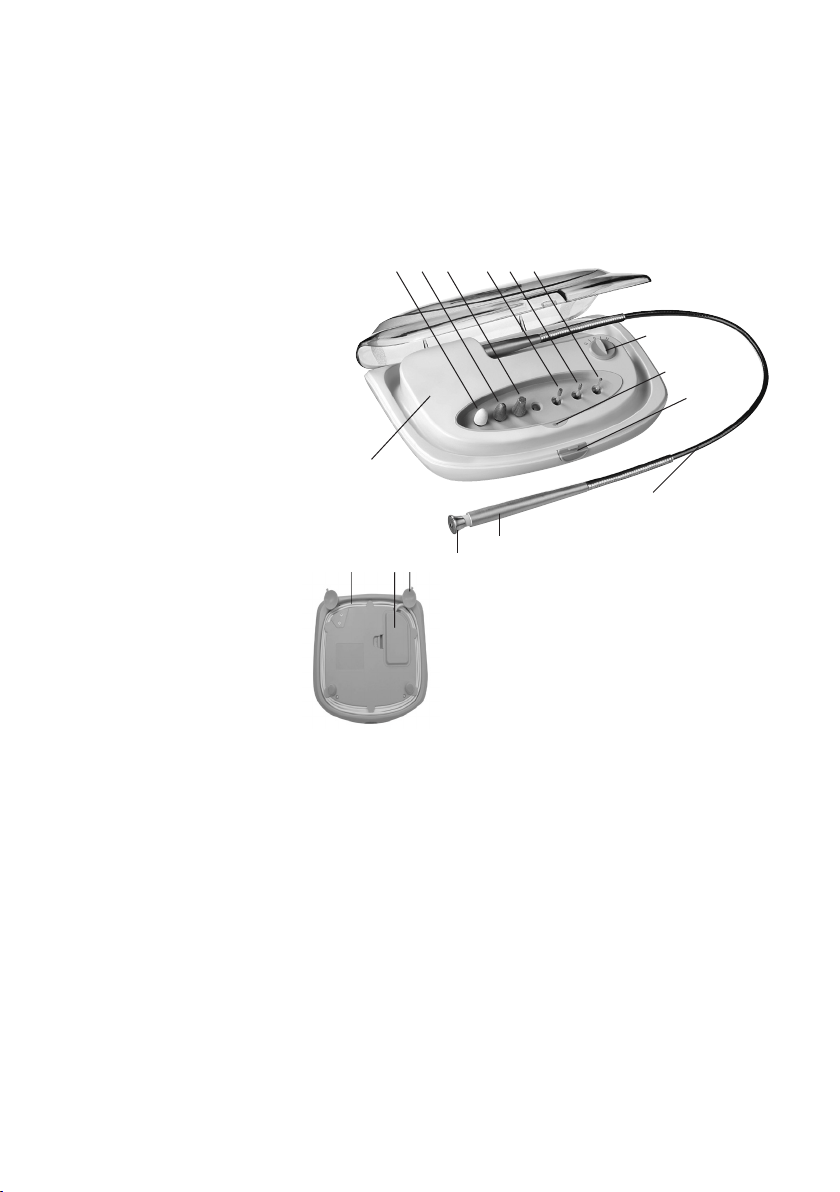
2. Unit description
1 Device housing
2 Sapphire wheel
3 Handle with axle
4 Flexible spiral shaft
5 Catch
6 Display
7 Rotary switch
8 Sapphire milling cutter
9 Flame milling cutter
10 Cylindrical milling cutter
11 Sapphire callus sander
12 Sapphire cone
13 Felt cone
on the bottom of the device:
14 Suction cup
15 Power cord (in cord winder)
16 Compartment for power plug
3. Putting into operation
Open the compartment on the bottom, remove the power plug and extend the power cord to the desired
length. No turn the device right side up and place on your work surface (such as a smooth table). Press
the device lightly to the work surface from the top to set the suction cups that hold the device in position
during operation.
Open the device by pressing the catch. Take the handle out of its holder.
Fitting attachment
•
Make sure that the device is switched off beforehand.
•
Select the desired attachment and insert it into the handle of the device. The attachments must be inserted
until you can feel then lock into position.
•
Make sure that the rotary switch is in the OFF position "0" before plugging in the power plug.
•
Plug the power cord into the mains outlet. The device is ready for use (display lights up).
Removing attachment
•
Turn the rotary switch to the OFF position "0".
•
Disconnect the mains plug from the wall socket.
•
Pull the attachment straight out of the handle.
1
2
3
4
5
6
7
8
9
10111213
1415 16
Loading ...
Loading ...
Loading ...