User Manual for Philips HD4922/00
Table of Contents
- Introduction
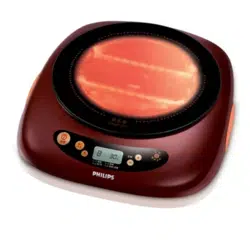
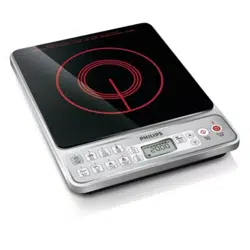
- General description (Fig. 1)
- Important
- Before first use
- Preparing for use
- Using the appliance
- Cleaning and maintenance
- Storage
- Environment
- Guarantee and service
- Troubleshooting
- Recipes
Before first use
Remove all packaging material from the induction cooker.
Preparing for use
1 Place the appliance on a dry, stable and level surface.
2 Make sure there is at least 10cm free space around the appliance to prevent overheating.
3 Always place the cookware on the cooking zone during cooking.
4 Make sure you use cookware of the correct type and size (see the tables below).
Using the appliance
Only use cookware that is suitable for induction cooking (see chapter ‘Preparing for use’).
Note: Always place and use the appliance on a dry, stable and level surface. The tables below shows the default settings in the different cooking modes and to what extent these default settings can be adjusted.
Note: In the stew and soup/congee modes, the appliance first brings the food to the boil and then switches to a lower power level. You can only adjust the power level after the boiling stage.
Note: The steam modes allow you to steam various types of food, such as steamed rolls, egg, pork ribs or chicken. The steam-lo mode is suitable for steaming a small amount of food, like eggs or buns. The steamhi mode is suitable for steaming a large amount of food, like ribs or chicken.
Note: The boil mode allows you to boil water or food in a fast way. The suggested boiling time for 1 litre is 3-5 minutes, for 2 litres 6-10 minutes and for 3 litres 9-14 minutes
Using the different modes
You can choose between the quick-start (manual) mode and 8 preset cooking modes.
1 Put the mains plug in the wall socket and press the power on/off button to switch on the appliance (Fig. 2).
- The appliance produces a 2-second beep and the power-on light goes on.
- The power bar shows the default power level (1400W) (Fig. 3).
- The time display shows “- - : - -”. The light of the quick-start (manual) mode lights up to indicate that the appliance is in manual mode (Fig. 4).
2 Place the cookware on the cooking zone.
3 Press the quick-start (manual) button or the button of the preset mode you want to use. (Fig. 5)
- The light of the corresponding mode lights up (Fig. 6).
- The appliance is set to the default settings of the quick-start (manual) mode (5 minutes cooking time and a power level of 1400W) or to the default settings of the selected preset mode.
Note: Before you press the start button to confirm the selected mode, you can still switch to another mode. If you want to switch to a different mode after you have pressed the start button, you have to switch off the appliance by pressing the power on/off button. Then press the power on/off button again to switch the appliance back on and select the desired mode.
4 If you want to start cooking at the default setting of the selected mode, continue with step 7. See the default settings and cooking time table above for the default settings of the different cooking modes.
5 If you want to adjust the power level or cooking temperature, press the + and - buttons on the right side of the control panel. (Fig. 7) Certain settings cannot be adjusted. See the table above for information about the settings that can or cannot be adjusted in the various modes.
Note: You can also adjust the power level or cooking temperature during cooking.
6 If you want to adjust the cooking time, press the + and - buttons on the left side of the control panel (Fig. 8).
Note: If you are in the quick-start (manual) mode, you have to press the cooking time/timer button before you can adjust the cooking time with the + and - buttons.
Note: When you press the + and - buttons briefly, the time increases or decreases by 1 minute. When you press the buttons longer, the time increases or decreases by 5 minutes.
Note: You can also adjust the cooking time during cooking.
7 Press the start button (Fig. 9). The start light goes on. The induction cooker automatically starts operating according to the selected mode.
Note: If you have not adjusted the cooking time, power level or cooking temperature, the induction cooker starts operating at the default settings of the selected mode.
- During cooking, the fan switches on to keep the appliance cool. When you switch off the appliance, the fan remains on for approx. 1 minute and then switches off automatically.
- The time display shows the remaining cooking time. At the same time, the selected cooking temperature or power level light goes on (Fig. 10).
- When the cooking time has elapsed, the appliance beeps a few times. The appliance automatically switches off and the power-on light goes out.
Note: If you want to stop cooking, press the power on/off button. The appliance then switches off.
8 Unplug the appliance after use.
Using the timer
You can use the cooking time/timer button to set the time at which you want the appliance to start cooking at a preset cooking mode.
For example: if it is 14:00 hours and you want the appliance to start cooking at 18:00 hours, set the timer to 4.00 (4 hours) and press the start button. After 4 hours, at 18:00 hours, the appliance automatically starts cooking. You can use the timer function for the stew, soup/congee, steam-lo and steam-hi modes. You can set a start time of 5 minutes to 24 hours.
1 Follow steps 1 to 5 of section ‘Using the different modes’.
2 Press the cooking time/timer button (Fig. 11). The timer light goes on. Note: If you are in the quick-start (manual) mode, you have to press the cooking time/timer button twice to activate the timer.
3 Press the + and - buttons on the left side of the control panel to set the number of minutes or hours after which you want the appliance to start cooking (Fig. 8).
Note: When you press the + and - buttons briefly, the time increases or decreases by 1 minute. When you press the buttons longer, the time increases or decreases by 5 minutes.
Note: If you want to adjust the cooking time, first press the cooking time/timer button and then press the + and - buttons on the left side of the control panel.
4 Press the start button to start the timer (Fig. 9).
- The start light goes on.
- The time display starts counting down the time.
- When the cooking process starts, the timer light goes out and the display shows that the cooking process has started.
Cleaning and maintenance
Cleaning
- Never immerse the appliance in water nor rinse it under the tap.
- Never use scouring pads, abrasive cleaning agents or aggressive liquids such as petrol or acetone to clean the appliance.
- Do not put vinegar on the crystallite cooking plate.
1 Unplug the appliance and let it cool down.
2 Clean the appliance with a damp cloth and, if necessary, with some mild cleaning agent.
Maintenance
Improper use can lead to scratches on the cooking plate. To avoid discolouring and scratches, use the appliance according to the instructions in this user manual and always clean the appliance and cookware properly after use.
Storage
- Do not place heavy objects on the crystallite cooking plate as it is breakable.
- Do not store the appliance in a hot place, for example near a cooker.
- If you are not going to use the appliance for a longer period of time, store the appliance in a dry and safe place.